In this article, we will learn about custom attribute directives in Angular. In this article, we will create some custom attributes directive and use in our components.
What is a directive?
Directives are classes that add additional behavior to elements in your Angular applications. With Angular's built-in directives, you can manage forms, lists, styles, and what users see.
The different types of Angular directives are as follows,
Components - directives with a template. This type of directive is the most common directive type.
Attribute directives - directives that change the appearance or behavior of an element, component, or another directive.
Structural directives - directives that change the DOM layout by adding and removing DOM elements.
Create a new Angular project
Step 1
Open your folder where you want to save your project in Visual Studio Code or Command Prompt.
Step 2
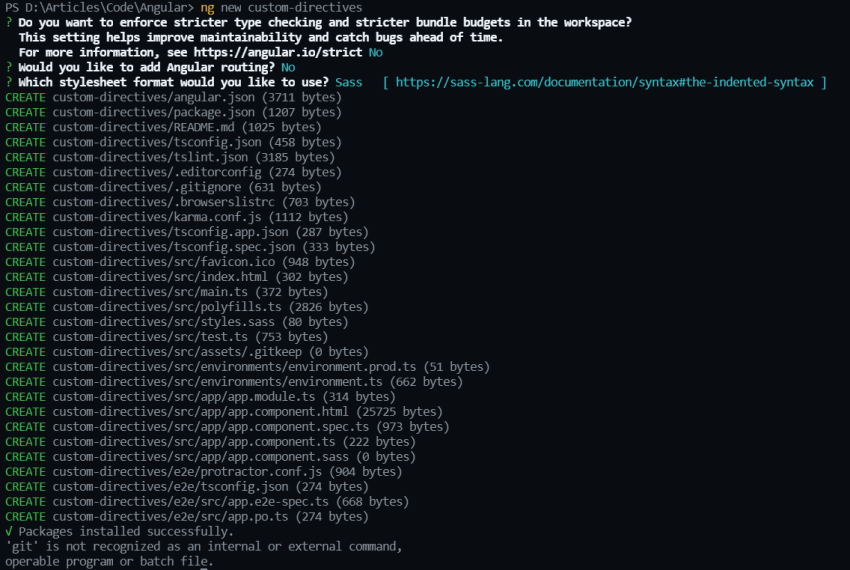
Run the below command to create a new project. In this process, you will be asked some questions like add routing in your project and style sheet format, etc. You can add as per your requirements.
ng new custom-directives
JavaScript
As you see below, our project is created.Custom Attribute Directive In Angular
In this article, we will learn about custom attribute directives in Angular. In this article, we will create some custom attributes directive and use in our components.
What is a directive?
Directives are classes that add additional behavior to elements in your Angular applications. With Angular's built-in directives, you can manage forms, lists, styles, and what users see.
The different types of Angular directives are as follows,
Components - directives with a template. This type of directive is the most common directive type.
Attribute directives - directives that change the appearance or behavior of an element, component, or another directive.
Structural directives - directives that change the DOM layout by adding and removing DOM elements.
Create a new Angular project
Step 1
Open your folder where you want to save your project in Visual Studio Code or Command Prompt.
Step 2
Run the below command to create a new project. In this process, you will be asked some questions like add routing in your project and style sheet format, etc. You can add as per your requirements.
ng new custom-directives
JavaScript
As you see below, our project is created.
Step 3
As you now open your app component you see a lot of code so we remove all the code and just add a simple h1 tag as you see below code.
<h1>This is Custom Attribute Directive Project</h1>
Markup
Step 4
Now run your project by a simple move to your project directory and then run the below command,
ng serve
JavaScript
After successfully running your project, you can see the output as below.

Built in Attributes Directives
Attribute directives listen to and modify the behavior of other HTML elements, attributes, properties, and components.
The most common attribute directives are as follows,
NgClass - adds and removes a set of CSS classes.
NgStyle - adds and removes a set of HTML styles.
NgModel - adds two-way data binding to an HTML form element.
Create custom attributes directive
Step 1
Create a new folder in your project’s app folder called directives to simplify project structure.
Step 2
Run the below command to create a new custom attribute directive. Here error is the name of our directive and directives is a folder name that we create.
ng g directive directives/error
JavaScript
After executing the above command, it will generate the following two files.
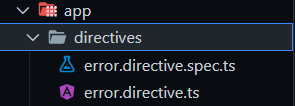
And it also adds our directive in-app module file’s declaration section.
Step 3
Now we implement logic in this directive that if the user uses this directive in any element, the element color will become red. For that add the below code in your file.
import { Directive, ElementRef } from '@angular/core';
@Directive({
selector: '[appError]'
})
export class ErrorDirective {
constructor(el:ElementRef) {
el.nativeElement.style.color="red";
}
}
Explanation
In the above code first, we add the ElementRef type parameter in the constructor. It will get that element on which we use our custom attribute directive
Then by using this el parameter we change color from style to red.
Implement custom attributes directive in our components
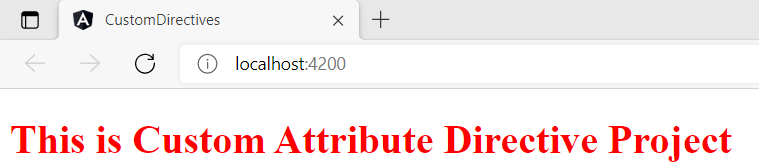
To add our custom attribute directive we need to add attributes In our element. As you see in your directive file you see a selector in our case our selector name is appError, by using appError in our element we can change the style.
Add this attribute in your element as shown below image,

Now refresh your page in the browser and you can see out like below image,
So as you see that we can create custom attribute directives easily. You can implement it as your requirement. In the future, we will create some other custom directives that will be useful in our day-to-day projects. If you like this article kindly share it with your friends and if you have any doubt let me know in the comments.