Full Trust European Hosting

BLOG about Full Trust Hosting and Its Technology - Dedicated to European Windows Hosting Customer

European Visual Studio 2022 Hosting - HostForLIFE :: How To Enable Preview Version In Visual Studio 2022?

clock March 24, 2022 09:08 by author Peter

As we know Microsoft has released Visual Studio 2022 17.2 Preview1 (VS2022 17.2 Preview 1) recently. Just a few months before I had installed Visual Studio 2022 17.1-Current version of visual studio. I was exploring how can I get started and learn .NET 7 preview in my working machine. So, in this article, we will learn how to switch from the current Visual Studio version to the Preview version with a demonstration of switching from Visual Studio 2022 17.1-Current version to the VS2022 17.2 Preview1 (VS2022 17.2 Preview 1).

To move from Visual Studio 2022 17.1 current version to the VS2022 17.2 Preview1 (VS2022 17.2 Preview 1), you need to install the following prerequisites in your machine. Download it and install those.

  • .NET 7 Preview
  • Visual Studio 2022 17.2 Preview1

Then, follow the below steps for switching from the current to the preview version. This article is written with the device which has already been installed Visual Studio 2022 in it. However, the switching process is the same for another version as well.

So, let’s begin.

Step 1 – Check for Update
Open Visual Studio and then go to Help–>Check for Updates as shown below.

Step 2 – Change Update Setting
Then, you will get the below screen. Here you can see my Visual Studio is up to date. So, to change the setting to Preview, click on change the update setting as highlighted below.

Alternatively, you can directly go to the update setting from Visual Studio Installer. Go to More and then Update Setting as illustrated below.

Step 3 – Update Channel
Select the update channel from Current to Preview and click on OK.

It will check for the update.

Step 4 – Click on Update
If there is an update required then click on Update.

As you can see on the above image, VS 2022 17.2.0 Preview contains a cumulative update with new features, updated components, and servicing fixes.

Step 5 – Updating
The update will take some time. Wait for it until the update is done.

Step 6 – Close and Restart
Once it is updated then restart the Visual studio.

Step 7 – Version checking
When you search for VS then you can see the preview is available in the search as shown below.

Alternatively, you can check the release version at any time. For this open the Visual Studio and go to Help–> Release Note.

Or go to Help–>check for the update then you will see the status of your Visual Studio.

Hence, once you set up VS2022 17.2 Preview1 (VS2022 17.2 Preview 1) then you are ready to learn and explore the .NET 7. To learn and get started with .NET 7 you can find the article here.

In this article, we have learned to switch from Visual Studio 2022 17.1 current version to Visual Studio 2022 17.2 Preview version and set up the Visual Studio development environment for .NET 7 and C# 11. Once your environment is ready then you can start your .NET 7.0 journey from here.


AngularJS Hosting Europe - HostForLIFE :: Difference Between Observable, Eventemitter, and Subject

clock March 21, 2022 09:17 by author Peter

When we start to use any new tools it is important to know why are we using it and where to use it. Likewise, it is important to understand the difference between Observable, EventEmitter, and Subject and where to use it. It always gets confusing to choose between Eventemitter and Subject for transferring data from one component to another component.

What is observable?

Angular uses observables as an interface to handle a variety of common asynchronous operations. We can also say it as a data source that will emit data over a period of time. It’ll start to emit data asynchronously when it is subscribed.

What is EventEmitter?

It is used with @Output directive to emit custom event synchronously or asynchronously using emit() method. Using EventEmitter we can transfer data from child component to parent component. It is true, we can transfer data from one component to another using EventEmitter but it is not recommended.

What is Subject?

It is a special type of observable that acts as both observable and observer. It’ll emit new value using next() method. All the subscribers who subscribe to the subject when emitted will receive the same value.

Which one to use for transferring data from one component to another, EventEmitter or Subject?

It is recommended to use Subject for transferring data from one component to another as EventEmitter extends Subject, adding a method emit().

Conclusion

  • Use Eventemitter when transferring data from child component to parent component.
  • Use Subject to transfer data from one component to another component.


AJAX Hosting - HostForLIFE :: Learn About AJAX Security

clock March 17, 2022 07:42 by author Peter

The advent of Web 2.0 brought about a new technique in building web applications, Asynchronous, JavaScript, and XML. AJAX is a faster and interactive technology that has found great favor among modern businesses today. With it comes a combination of JavaScript, HTML, CSS, and XML to build one useful technique that makes web application interactivity faster and affordable in terms of bandwidth consumption. This article is a description of AJAX and its security issues.

AJAX
Conventional web sites were known to be slower and consumed more bandwidth because of the way they connected to the server. It would take a page to reload to connect to the server using synchronous connection. This meant more bandwidth consumption and slower response from web applications. On the other hand, AJAX is a browser technology that uses asynchronous means to communicate to the server. This means that you can communicate with the server to update certain portions of a page without having to reload the whole page.
 
A good example of AJAX in use is the Google create account page which recognizes a username in use soon after a user enters their suggested username. This means that in the background the page has communicated with the Google server to check if the name exists and show results without having to reload the entire page.
 
It is considered the most feasible Rich Internet Application (RIA) to date. AJAX makes use of Open Standards that include HTML and CSS for the presentation of data, XML for data storage and transfers to and from the server, XMLHttpRequest objects in the browser to fetch data from the server, and finally JavaScript for interactivity. AJAX can also transfer data in JSON or plain-text.
 
Security Issues with AJAX
AJAX applications only use a different technique to connect to the server. However, they use the same security schemes to connect to the server. This entails that you still have to include your authentication, authorization, and data protection methods in the web.xml file or program. AJAX applications bear the same vulnerabilities as ordinary or conventional web applications. In as much as people prefer the swiftness and the advanced interactivity of AJAX applications, some are misled to believe that AJAX web applications are more secure than ordinary web applications.
 
AJAX applications are known to have session management vulnerabilities and a lot of loopholes in the hidden URLs which carry AJAX requests to the server.
 
The AJAX engine makes use of JavaScript to transfer user requests/commands and transforms them into function calls. The AJAX engine sends these function calls in plain-text to the server that may be intercepted by attackers to reveal database information, variable names, or any other confidential user data that may be used by the attacker maliciously.
 
AJAX-based applications are also vulnerable to Cross-Site Request Forgery (CRSF) and Cross-Site Scripting (XSS). Although it is not that easy to exploit CSRF on AJAX applications because the requests are hidden, attackers may be able to create a script that can steal a user’s session token and by so doing be able to steal the user’s session remotely.
 
This can be avoided by creating random complex tokens for the AJAX requests which are not identified by the attackers. The server embeds the complex token on the page and checks for it each time the users make a request to the server and if it is any different the server does not process the request.
 
To ensure AJAX security against XSS, the application has to strictly sanitize user input and output. The use of JS functions such as ‘document.write()’, ‘innerHTML()’, ‘eval()’, ‘write()’ may make it possible for XSS attacks in AJAX web applications.
 
Conclusion

AJAX is a very fast and affordable browser technology but needs to be treated just like any other web application when it comes to security. Organizations need to do thorough scanning of their AJAX applications just like on conventional web applications to ensure absolute security from common vulnerabilities.

HostForLIFE.eu AJAX Hosting
HostForLIFE.eu is European Windows Hosting Provider which focuses on Windows Platform only. We deliver on-demand hosting solutions including Shared hosting, Reseller Hosting, Cloud Hosting, Dedicated Servers, and IT as a Service for companies of all sizes. We have customers from around the globe, spread across every continent. We serve the hosting needs of the business and professional, government and nonprofit, entertainment and personal use market segments.


Node.js Hosting Europe - HostForLIFE :: How To Work With File System Module In Node.js

clock March 11, 2022 07:52 by author Peter

Node file system helps us to access the files and also interact with files in our system. Node.js’s file system module is also known as "fs" module. We don’t need to install it explicitly as it comes with Node.js core. We can use the fs module as
var fs = require('fs');

File system module can be used for file operations like creating, reading, deleting, etc. The operations that we need to perform can have synchronous and asynchronous forms depending on our requirements.

Common use cases of File System module:
    Write Files
    Read Files
    Delete Files
    Append Files
    Close Files

Read File
To read the file from our system, fs.ReadFile() function is used. fs.readFile() is a built-in function used to read files located in our system with the syntax given below

Syntax
fs.readFile( filename, encoding, callback_function )

In the parameters, we can provide a filename as the name of the file if it is located in the same directory and a full path if the file is located on locations other than the same directory. Encoding has the encoding value of the file, by default the value of encoding is utf8.

The callback function is the function that is called once the file is read. This function takes two parameters first is err and the other is data. Err indicates if any error has occurred during reading the file and data contains the content of the file.

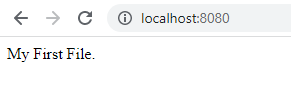
To create a demo for this function let's create a text file. Create a text file named “FirstFile.txt” with “My First File.” as content.

Now let's create a file named “FileRead.js”, to read the contents of the text file that we created.

Example
var http = require('http');
var fs = require('fs');
http.createServer(function (req, res) {
  fs.readFile('FirstFile.txt', "utf-8" , function(err, data) {
    res.writeHead(200, {'Content-Type': 'text/html'});
    res.write(data);
    return res.end();
  });
}).listen(8080);
console.log("File Read!");


Note
If the output is undefined it means the file is null. It starts reading the file and simultaneously executes the code. The function will be called once the file has been read meanwhile the ‘File Read!” statement is printed then the contents of the file are printed.

Initiate the file
node .\FileRead.js

Opening the localhost, we will be able to read the contents of the file as shown below,

Create File
Creating files using node.js can be done through many approaches. Some of the methods that can be used are appendFile(), open(), or  writeFile(). Let’s look into the details of each function and when to use it.
fs.appendFile()

The fs.appendFile() method of Node.js is used to synchronously append the data to the file, if the file doesn’t exist then a new file will be created with the content specified.

Syntax
fs.appendFile(filepath, data, options, callback);

In the parameters, filepath will be the path of the file provided as a string, parameter data is the data that we need to append to the file, options specifies the flag/encoding/mode and the callback is a function that is called when the data is appended to the file.

Example
var fs = require('fs');
fs.appendFile('AppendFile.txt', 'Append File demo!', function (err) {
  if (err) throw err;
  console.log('Content appended/file created.');
});


Initiate the file:

A new file named 'AppendFile.txt' will be created if it doesn’t exist and if the file exists the text provided in the code will be appended.
fs.open()

The fs.open() method is used to create, read, or write a file. Writing to a file using open() method depends on the second parameter flag, passed to the method. If we pass the parameter as “w” then the specified file is opened for writing. If the file doesn’t exist then a new blank file is created with the name specified.

Syntax
fs.open(path, flags, mode, callback)

The parameters path holds the name of the file if the file is located in the same directory and it contains the entire path if the file is located at other locations.

Mode sets the mode of the file for example r-read, w-write, r+ -readwrite, etc. The default value of the mode is readwrite.

The parameter flag indicates the behavior of the file to be opened. The values that we can provide for the value of flag parameter are r, r+, rs, rs+, w, wx, w+, wx+, a, ax, a+ or ax+.

The callback function is the function that is called after reading the file.

Let’s try to create a blank file using the open method of the fs module of Node.js.
var fs = require('fs');
fs.open('OpenFile.txt', 'w', function (err, file) {
  if (err) throw err;
  console.log('New file created!');
});


Initiate the file,

The fs.readFile() method is used only for reading the file and fs.writeFile() method is only for writing to the file, whereas fs.open() method does several operations on a file such as creating, reading, or writing.
fs.writeFile()

The method WriteFile() replaces the specified file and content if the file already exists. If the file doesn’t exist, then a new file will be created with the content as provided. This method is used to asynchronously write the specified data to a file.

Syntax
fs.writeFile(path, data, options, callback)

The path parameter here can be a string, Buffer, URL, or file description integer that denotes the path of the file where it has to be written. Using a file descriptor will make it behave similarly to fs.write() method.

Example
var fs = require('fs');
fs.writeFile('WriteFile.txt', 'New file created with content!', function (err) {
  if (err) throw err;
  console.log('File created and saved!');
});


Initiate the file,

Update Files
To update the files there are some methods from the file system module that can be used.
Methods that can be used for updating the files are fs.appendFile() and fs.writeFile().

As we already have the description of the function fs.appendFile() in the create file section, let’s have a look at an example.
var fs = require('fs');
fs.appendFile('AppendFile.txt', ' Appended text...', function (err) {
  if (err) throw err;
  console.log('Updated!');
});


Initiating this file will append the data to the existing file.

For details of the fs.writeFile() function please refer to create file section. Looking at an example of fs.writeFile() function:
var fs = require('fs');
fs.writeFile('WriteFile.txt', 'File with name WriteFile updated.', function (err) {
  if (err) throw err;
  console.log('File updated and saved!');
});


Initiating the file replaces the specified file and the contents will be updated and the file will be saved.

Delete Files
To delete files using Node.js, we can use the method fs.unlink(). This function is used to remove a file, it doesn’t work on deleting directories. To delete directories we can use the method fs.rmdir().

Syntax
fs.unlink(path, callback)

Here in this method we need to pass two parameters first is the path of the file that we need to remove, it can be string, Buffer, or URL. And another parameter is the callback. The callback is a function that would be called when the method is executed.

Example
var fs = require('fs');
fs.unlink('SampleFile.txt', function (err) {
  if (err) throw err;
  console.log('SampleFile deleted...');
});


Initiating the file, the file that we mentioned in the code will be deleted.

Rename Files
We can also rename the file names using Node.js and to rename the file names we can use the function fs.rename(). The function will be used to rename the file at oldPath to the pathname provided as newPath.

The parameters used to rename the file are oldpath, newpath, and the callback function. Here old path will be the path of the file that already exists, a new path will be the new name of the file that we want to replace the old file name with. And the callback function will be the function that will be called when the method is executed.

In the case that newPath already exists, it will be overwritten. If there is a directory at newPath, an error will be raised instead. No arguments other than a possible exception are given to the completion callback.

Example
var fs = require('fs');
fs.rename('SampleFile.txt', 'SampleFileRenamed.txt', function (err) {
  if (err) throw err;
  console.log('SampleFile File Renamed!');
});

Initiating the file, the old file will be replaced with the new file name provided.

After going through this article and performing the code snippets provided you will be able to work with all the basic file operations such as create, update, delete and rename. Please feel free to post the feedback if any and let me know if you want me to work on any content that would help to learn Node.js further.


AngularJS Hosting Europe - HostForLIFE :: Call Parent Method From Child Component And Child Method From Parent Component

clock March 10, 2022 07:42 by author Peter

In this article, I will discuss how to call child component method from parent component and parent component method from child component. For this article, I have created a demo project using Angular 12. In this demo project, I will create a simple parent and child component and I will demonstrate to call both methods vice versa.


First of all, we have created a project using the following command in the Command Prompt.
ng new myApp

Open project in visual code studio using following command
> cd myApp
> Code .

Call Child Component method from Parent Component
We can use Viewchild to call Child Component method from Parent Component

Viewchild
A ViewChild is a decorator which is used when we want to access a child component inside the parent component, we use the decorator @ViewChild() in Angular.

Here I have declared a variable name child as decorator @ViewChild(). As shown below we can access childMethod of child component inside the parent component.

Use following code for parent component
@ViewChild(ChildComponent ) child !:any ;

callChildMethod() {
   this.child.childMethod("Hello Dear, Parent Method is Called")
 }

Use following code for child component
childMethod(msg: string) {
  this.childmsg=msg;
}


Call Parent Component method from Child Component
For Calling Parent Component method from Child Component, I had created a method getParentMethod and in this method, I had set input property in HTML file of parent component. Then shown as below code inside the child component I am able to access parent method.

Use following code for parent component
getParentMethod():any {
   return {
     callParentMethod: (name:any) => {
       this.parentMethod(name)
     }
   }
 }

 parentMethod(name: string) {
   this.parentMsg=name;
 }

Use following code for child component

@Input() parentApi !: any;

callParent() {
  this.parentApi.callParentMethod("Hello Dear, Child Method is Called")
}

App.component.html
<button (click)="callChildMethod()">call child</button>
<p>{{parentMsg}}</p>
<hr/>
<app-child [_pData]="getParentMethod()"></app-child>


App.component.ts
import { Component, OnInit, ViewChild } from '@angular/core';
import { ChildComponent } from './child-component/child.component';

@Component({
  selector: 'app-root',
  styleUrls: ['./app.component.css'],
  templateUrl: './app.component.html'
})
export class AppComponent implements OnInit {
  parentMsg='';
  @ViewChild(ChildComponent ) child !:any ;

  ngOnInit(): void {
  }

  constructor() { }

  getParentMethod():any {
    return {
      callParentMethod: (name:any) => {
        this.parentMethod(name)
      }
    }
  }

  parentMethod(name: string) {
    this.parentMsg=name;
  }

  callChildMethod() {
    this.child.childMethod("Hello Dear, Parent Method is Called")
  }
}

child.component.html
<button (click)="callParent()">call parent</button>
<p>{{childmsg}}</p>

child.component.ts
import { Component, Input, OnInit } from '@angular/core';

@Component({
  selector: 'app-child',
  templateUrl: 'child.component.html',
  styleUrls: ['./child.component.css']
})
export class ChildComponent {

  @Input() _pData !: any;
  childmsg='';

  constructor() { }

  callParent() {
    this._pData.callParentMethod("Hello Dear, Child Method is Called")
  }

  childMethod(msg: string) {
    this.childmsg=msg;
  }
}


Now, run the project using the following command.
ng serve


About HostForLIFE

HostForLIFE is European Windows Hosting Provider which focuses on Windows Platform only. We deliver on-demand hosting solutions including Shared hosting, Reseller Hosting, Cloud Hosting, Dedicated Servers, and IT as a Service for companies of all sizes.

We have offered the latest Windows 2019 Hosting, ASP.NET 5 Hosting, ASP.NET MVC 6 Hosting and SQL 2019 Hosting.


Tag cloud

Sign in