Full Trust European Hosting

BLOG about Full Trust Hosting and Its Technology - Dedicated to European Windows Hosting Customer

Node.js Hosting Europe - HostForLIFE ::Middleware In Node.js

clock September 27, 2022 09:10 by author Peter

What is middleware and how to use middleware in node.js with express.js
Middleware is a piece of code (function) that is used to execute some code after the server gets a call from a client and before the controller action which will send a response. So it means that whenever a client will call an API, before reaching the request to that API (route), middleware code will be executed.


Middleware is used for different purposes like logging requests, and verifying requests for some specific requirement. Like in this article, we will be using middleware to verify if some specific key is present in the request headers or not.

Creating a Node server using express.js
For creating a node.js server, go to a folder and open vscode in it. Run the command npm init to initialize the node.js project. It will create a package.json file in your root directory. Then command npm install express to install express.js which we will use to create our server.

Optionally, run the command npm install nodemon this will install nodemon in your project. Nodemon is used to auto-refresh your node.js project without starting the server again and again.

In the package.json file, update the scripts tag as follows:
//if nodemon is installed
"scripts": {
        "start": "nodemon index.js"
},
//if nodemon is not installed
"scripts": {
        "start": "node index.js"
},

Then in your root directory, create a file app.js and add the following code to it.
const express = require("express");
const app = express();

app.get("/", (req, res) => {
  res.send("Home Page");
});

app.get("/users", (req, res) => {
  res.send("Users Page");
});

app.listen(3000, () => console.log(`Server is started at port 3000`));


Creating the middleware
In node.js, middleware has three parameters req, res, and next. Next is very important here. When we process our logic in the middleware then at the end we have to call next() so that call can react to the desired route.

We will be creating a middleware that will check every request and verify if some specific key (some-key in our case) is present in the header or not. If a key is there, then it will pass the request to the route otherwise it will reject the call and send the response that the request is invalid.

Create a folder with the name middleware (you can give any name but the code I am using for this article have this name) and add a file middleware.js in it. Then add the following code in the file.
function headersVerificationMiddleware(req, res, next) {
  if (!req.headers["some-key"]) {
    console.log("Invalid request");
    res.send("Invalid request");
  }
  console.log("Inside Middleware");
  next();
}


module.exports = headersVerificationMiddleware;

Then update your app.js code according to the following code.
const express = require("express");
const app = express();

//adding middleware
const headersVerificationMiddleware = require("./middleware");
app.use(headersVerificationMiddleware);

app.get("/", (req, res) => {
  res.send("Home Page");
});

app.get("/users", (req, res) => {
  res.send("Users Page");
});

app.listen(3000, () => console.log(`Server is started at port 3000`));


Output without passing the some-key in HTTP headers.


Output with some-key in HTTP headers

Some key points about Middlewares
 
1. Middlewares are similar to controller actions (routes)
Controller actions which have req, and res variables are similar to middleware. The only difference is that middleware also has a variable next which will be called at the end of middleware. It is not necessary for the next() method to be called at the end of the middleware method. It can be used anywhere in the middleware where the next route needs to be called.

2. Middleware work in order
Middleware work in the same order in which they are defined in the app.js file. For example, there are two middleware MiddlewareA and MiddlewareB these both will be called in order. First MiddlewareA will be executed and then MiddlewareB will be executed.


AngularJS Hosting Europe - HostForLIFE :: Angular Standards And Best Practices

clock September 22, 2022 10:14 by author Peter

Angular is a TypeScript-based free and open-source web application framework.
Best Practices of Angular Development


1. Avoid ‘any’ type
A type-checking language is Typescript. However, there may be other situations, such as when we require dynamic content or when we are unsure of the precise data type of some variables. In these circumstances, we can notify typescript that the variable can be of any type by using the data type 'any'.

But it's not a smart idea to always use "any." Any instructs the typescript to bypass type checking. This could put your code at risk of costly, hard-to-trace, and hard-to-debug problems.

const number_1: any = 1;
const number_2: any = 3;
const string_1: any = ‘a’;
const number_3: any = number_1 + number_2;
console.log(`Value of number_3 is:’, number_3);

// Output
Value of number_3 is 13


How we can overcome this by defining its type as mentioned below
const number_1: number = 1;
const number_2: number = 3;
const string_1: string = ‘a’;
const number_3: number = number_1 + number_2;
console.log(`Value of number_3 is:’, number_3);

// Output
Value of number_3 is 13


If we give the wrong type to any costant than we get the compile time error
const number_1: number = 1;
const string_1: number = ‘a’;
// This will give a compile error saying:
error TS2322: Type 'string'
is not assignable to type 'number'.
const string_1: number


2. Use Features of ES6
ES6 stands for ECMAScript 6, which offers new capabilities and syntax to create code that is more contemporary and understandable. It is always being updated with new features and functionality. JavaScript programming is made simpler with ES6 features like Let and Const, Arrow Functions, and string interpolation.

3. Use trackBy along with ngFor
An angular application that uses simply the *ngFor directive without the trackBy function will destroy all of the DOM elements and then reconstruct them in the DOM tree. Therefore, even when the same data is being used, having a lot of data will cause the programme to perform slowly. The trackBy and *ngFor directives should be used together because of this.

In Component.ts
trackByUserCode(index: number, user: any): string {
return user.code;
}

In Component.html

*ngFor='let user of users; trackBy:trackByUserCode'>


4. Use Lazy Loading
The process of loading various modules, such as documents, JS, CSS, videos, photos, etc., is known as lazy loading. By splitting the application's load time into several packets and loading them as needed, it accelerates application load time. Lazy loading can be helpful when loading a large application rather than utilising other functions to load the modules.

When anything is used, lazy loading only loads it. Instead of loading the component as specified in the AppRoutingModule routes settings, we can just use the lazy-loading function to loadChildren. One of the best angular practises is to lazy load or load a certain app feature when needed rather than when the app launches.
const routes: Routes = [{
path: 'users',
loadChildren: () => import('./modules/users/user.module').then(m => m.UserModule)
}];


5. Prevent Memory Leaks in Angular Observable
The first component is removed and the second component is initialised when we move from one component to the next. The initial component, which had subscribed to the Observable, has now been removed. This can result in memory leaks.

We can prevent this by following techniques

1. Using takeUntil()
TakeUntil monitors second Observables, and when the value of the observables is generated, it will dispose the subscription and the cycle will be complete.

this.authService.GetUserList()
  .pipe(takeUntil(this.ngUnsubscribe))
  .subscribe(res => {this.userList = res;});
...
...
ngOnDestroy() {
this.ngUnsubscribe.next();
this.ngUnsubscribe.complete();
}


2. Using the Async pipe
It returns to the most recent value that was emitted after subscribing to an Observable or Promise.

*ngFor="let item of userService.GetUserList() | async";
{{item.userName}}


3. Using take(1)
It makes sure that you’re getting the data only once.

this.userService.GetUserList()
  .pipe(take(1))
  .subscribe(res = {this.userList = res;})


6. Avoid logic in templates
All template-related business logic can be isolated into a component even when the function calls in angular templates are technically correct. It helps with unit testing and also cuts down on issues in the event that a template change occurs in the future.

7. Declare Safe Datatypes
The first step will be to confirm the categories of data and the range of values it contains. Following that, the variable will only accept the possible values. We can declare a variable as a list of potential values or a different type instead of declaring it as a variable of a specific type.

Example
type Roles = "Admin" | "User";
const user1: Roles = "Admin";
const user2: Roles = "User";
const user3: Roles = "Teacher";


// The last line will give this error: Type ‘"Teacher"’ is not assignable to type 'Roles'.

8. User CDK Virtual Scroll
CDK (Component Development Kit) To present lengthy lists of components more effectively, utilise Virtual Scroll. By setting the container element's height to be the same as the sum of all the elements' heights, virtual scrolling makes it possible to simulate all values effectively.

9. Use Environment Variables
For all types of contexts, Angular provides various environment setups to declare individual variables. Angular environments for development and production are standard. We can even add new environments or variables to the environment files that already exist.

10. Use Lint Rules
The tslint provides a number of built-in parameters that can be customised in the tslint.json file, including no-any, no-console, no-magic-numbers, etc. The programme is forced to be better and more reliable as a result. You can configure it with your own lint rules and settings. This guarantees the clarity and coherence of our code.

11. Maintain proper folder structures
Before beginning any angular project, everyone should take into account the importance of creating and maintaining a correct folder structure. Throughout development, the folder structure should be adaptable to new developments.

12. Break large components into small reusable components.
It can also be seen as a development principle with a single responsibility. It is challenging to manage, test, and debug huge components. Reduce code duplication and make it simpler to manage, maintain, and debug the component by breaking it up into smaller, more reusable components if it grows in size.

13. State Management
One of the most challenging areas of software development is state management. By saving the state of any sort of data, Angular's state management facilitates the handling of state transitions.

NGRX, NGXS, Akita, and other state management libraries for Angular are available on the market, and each of them serves a different purpose. The ideal state management for our application can be chosen before it is put into use.

Some of the advantages of utilizing state management.

It allows data to be shared between multiple components.
It allows for centralized state transition control.
The code will be cleaner and easier to read.
It’s simple to troubleshoot when something goes wrong.
There are development tools that are available for tracing and debugging in state management libraries.

14. Documentation in code
Code documentation is a wise move. It will help a new developer to comprehend the project's logic and readability. A smart Angular practise is to document each variable and method.

The actual task that a method performs must be specified
/**
* This is the get function
* @param age This is the age parameter
* @returns returns a string version of age
*/
function getUserAge(age: number): string {
return age.toString();
}


in multi-line comments that accompany each method definition.

15. Single Responsibility Principle
Instead of grouping them all under a single ts file, it is preferable to make distinct ts files for components, templates, styles, and services. You can write clear, readable, and maintainable code if you treat each file as if it is responsible for a single functionality.

16. Using Interfaces
Whenever we are drafting a contract for our class, we must employ interfaces. By utilising them, we can compel the class to implement the attributes and functions stated in the interface. The best example of this is when your component has angular lifecycle hooks:

The HomeComponent class implements OnInit and OnDestroy.

Interfaces are the best technique to accurately describe the declared objects.

TypeScript will produce an error, enable IntelliSense for us, and begin populating an object if it does not include the properties of the interface:

export interface User {
id: number;
name: string;
email: string;
class: number;
gender: "male" | "female";
stream : "ECE" | "CSE" | "IT";
status: boolean;
}

17. Change Detection Optimisations.
Instead of hiding non-visible DOM components with CSS, it's a good idea to remove them from the DOM using *ngIf.
Transfer difficult computations into the ngDoCheck lifecycle hook to make your expressions faster.
Calculations that are complex should be cached for as long as possible.
Use the OnPush change detection method to tell Angular that no changes have been made. You are then able to bypass the entire change detection procedure.

18. Using Smart – Dumb components / Use Smart – Dumb Components Technique
By informing Angular that the dumb components have not changed, this solution makes it easier to employ the OnPush change detection mechanism. Smart components are employed for processing data through API calls, concentrating on functionality, and managing states. They are more concerned with how they appear than the dumb components, who are only interested in appearances.

I would greatly appreciate it if you would support me by subscribe the channel if have you enjoyed this post and found it useful. Thank you in advance.


AngularJS Hosting Europe - HostForLIFE :: Easily Use MockAPI.io With Angular 14

clock September 19, 2022 08:54 by author Peter

MockAPI (https://mockapi.io/) is a simple tool that lets you easily mockup APIs, generate custom data, and perform operations on it using RESTful interface. We can consume these API endpoints in our Angular 14 application to test the flow without actual Web APIs. 

Create an account in MockAPI.io

It is amazingly easy to create a new account in MockAPI.MockAPI gives various flexible plans. In the free plan, we can create one Project and four resources in that project. In the $5/month plan, we can create 20 projects and 50 resources per project. If you are ready to buy a yearly plan, you will get 20 projects plan at $35. 

For testing purposes, we can choose a Free plan.  We can create a new Project in this free plan.


We can give a valid project name. It is mandatory. Also, we can give an optional API prefix as well.  Please note that we can create up to four resources in a project in Free plan. After creating the project, we can click on the project name, and it will allow us to create resources. We can click on the New Resource button as well. It will open a new popup window and we can give resource details here.  

We are going to create an employee management application and will see all the CRUD operations using MockAPI. Hence, we can create the resource with a specific employee model. Please note that each resource must start with an id property. You can add multiple properties as per your requirements.  

Currently MockAPI supports seven types of properties. 


We can create the employee resource with the following properties.


Each resource will support the below CRUD methods. 


You can see a unique API endpoint for each project. 


If you click the Generate All button, it will create 50 employee sample records automatically. We can also add more employee records by clicking the employee resource button. Please note that Free plan will support a maximum of 100 records per resource.  

You can use the Reset All button to clear all mock data.  

We can use the Data button to view all data for a particular resource. We can use the Edit button to add or remove properties from a resource. The Delete button will remove entire resources from the project.  

We can create an Angular 14 project and consume these API endpoints easily. We will see all the CRUD actions using our Angular 14 project.  

Create Angular 14 project using Angular CLI

We can use the CLI command below to create a new Angular project.

ng new Angular14MockAPI

Choose the routing option as Yes and stylesheet format as CSS.

Add bootstrap and font-awesome libraries to the project.

npm install bootstrap font-awesome   

We must change “styles.css” file in the root folder with below changes to access these packages globally in the application without further references.  

styles.css
@import "~bootstrap/dist/css/bootstrap.css";
@import "~font-awesome/css/font-awesome.css";


Create an environment variable inside environment class for baseUrl. This will be used across the application.  

environment.ts
export const environment = {
  production: false,
  baseUrl: 'https://63261f0eba4a9c4753234af7.mockapi.io/'
};


Copy the API endpoint value from MockAPI and give it as baseUrl in environment file.
Create an employee interface now.  

ng g class employee\employee  

Use the below code.

employee.ts
export interface Employee {
    id: string,
    name: string,
    address: string,
    company: string,
    designation: string,
    cityname: string
}


Create an employee service now.  
ng g service employee\employee  

Use the below code.

employee.service.ts
import { Injectable } from '@angular/core';
import { HttpClient } from '@angular/common/http';
import { Observable, throwError, of } from 'rxjs';
import { catchError, map } from 'rxjs/operators';
import { Employee } from './employee';
import { environment } from 'src/environments/environment';

@Injectable({
  providedIn: 'root'
})
export class EmployeeService {
  private employeesUrl = environment.baseUrl + 'api/employee';

  constructor(private http: HttpClient) { }

  getEmployees(): Observable<Employee[]> {
    return this.http.get<Employee[]>(this.employeesUrl)
      .pipe(
        catchError(this.handleError)
      );
  }

  getEmployee(id: string | null): Observable<Employee> {
    if (id === '') {
      return of(this.initializeEmployee());
    }
    const url = `${this.employeesUrl}/${id}`;
    return this.http.get<Employee>(url)
      .pipe(
        catchError(this.handleError)
      );
  }

  createEmployee(employee: Employee): Observable<Employee> {
    employee.id = '';
    return this.http.post<Employee>(this.employeesUrl, employee)
      .pipe(
        catchError(this.handleError)
      );
  }

  deleteEmployee(id: string): Observable<{}> {
    const url = `${this.employeesUrl}/${id}`;
    return this.http.delete<Employee>(url)
      .pipe(
        catchError(this.handleError)
      );
  }

  updateEmployee(employee: Employee): Observable<Employee> {
    const url = `${this.employeesUrl}/${employee.id}`;
    return this.http.put<Employee>(url, employee)
      .pipe(
        map(() => employee),
        catchError(this.handleError)
      );
  }

  private handleError(err: any) {
    let errorMessage: string;
    if (err.error instanceof ErrorEvent) {
      errorMessage = `An error occurred: ${err.error.message}`;
    } else {
      errorMessage = `Backend returned code ${err.status}: ${err.body.error}`;
    }
    console.error(err);
    return throwError(() => errorMessage);
  }

  private initializeEmployee(): Employee {
    return {
      id: "",
      name: "",
      address: "",
      company: "",
      designation: "",
      cityname: ""
    };
  }
}


We can create a Loader service for entire application. This service can be used for showing a loader while the application is accessing the backend MockAPI.

ng g service loader

Copy the below code.

loader.service.ts
import { Injectable } from '@angular/core';
import { Subject } from 'rxjs';

@Injectable({
  providedIn: 'root'
})
export class LoaderService {

  controlLoader!: Subject<boolean>;
  constructor() {
    this.controlLoader = new Subject<boolean>();
  }

  show() {
    this.controlLoader.next(true);
  }

  hide() {
    this.controlLoader.next(false);
  }
}


Add the modules below to the AppModule class.

    ReactiveFormsModule
    FormsModule
    HttpClientModule

We can create an employee list component. This component will be used to display all the employee information. This component is also used to edit and remove employee data.  

ng g component employee\EmployeeList  

Change the class file with the code below.  

employee-list.component.ts
import { Component, OnInit } from '@angular/core';
import { LoaderService } from 'src/app/loader.service';
import { Employee } from '../employee';
import { EmployeeService } from '../employee.service';

@Component({
  selector: 'app-employee-list',
  templateUrl: './employee-list.component.html',
  styleUrls: ['./employee-list.component.css']
})
export class EmployeeListComponent implements OnInit {
  pageTitle = 'Employee List';
  filteredEmployees: Employee[] = [];
  employees: Employee[] = [];
  errorMessage = '';

  _listFilter = '';
  get listFilter(): string {
    return this._listFilter;
  }
  set listFilter(value: string) {
    this._listFilter = value;
    this.filteredEmployees = this.listFilter ? this.performFilter(this.listFilter) : this.employees;
  }

  constructor(private employeeService: EmployeeService, private loader: LoaderService) { }

  performFilter(filterBy: string): Employee[] {
    filterBy = filterBy.toLocaleLowerCase();
    return this.employees.filter((employee: Employee) =>
      employee.name.toLocaleLowerCase().indexOf(filterBy) !== -1);
  }

  ngOnInit(): void {
    this.getEmployeeData();
  }

  getEmployeeData() {
    this.loader.show();
    this.employeeService.getEmployees()
      .subscribe({
        next: (employees) => {
          this.employees = employees;
          this.filteredEmployees = employees;
        },
        error: (err) => {
          this.errorMessage = <any>err;
          this.loader.hide();
        },
        complete: () => {
          console.info('Get employees in employee list');
          this.loader.hide();
        }
      });
  }

  deleteEmployee(id: string, name: string): void {
    if (id === '') {
      this.onSaveComplete();
    } else {
      if (confirm(`Are you sure want to delete this Employee: ${name}?`)) {
        this.loader.show();
        this.employeeService.deleteEmployee(id)
          .subscribe({
            next: () => this.onSaveComplete(),
            error: (err) => {
              this.errorMessage = <any>err;
              this.loader.hide();
            },
            complete: () => {
              console.info('Delete employee in employee list');
              this.loader.hide();
            }
          });
      }
    }
  }

  onSaveComplete(): void {
    this.employeeService.getEmployees()
      .subscribe({
        next: (employees) => {
          this.employees = employees;
          this.filteredEmployees = employees;
        },
        error: (err) => this.errorMessage = <any>err,
        complete: () => console.info('Get employees in employee list')
      });
  }
}

We can change the template and style files also.  

employee-list.component.html
<div class="card">
    <div class="card-header">
        {{pageTitle}}
    </div>
    <div class="card-body">
        <div class="row" style="margin-bottom:15px;">
            <div class="col-md-2">Filter by:</div>
            <div class="col-md-4">
                <input type="text" [(ngModel)]="listFilter" />
            </div>
            <div class="col-md-2"></div>
            <div class="col-md-4">
                <button class="btn btn-primary mr-3" [routerLink]="['/employees/0/edit']">
                    New Employee
                </button>
            </div>
        </div>
        <div class="row" *ngIf="listFilter">
            <div class="col-md-6">
                <h4>Filtered by: {{listFilter}}</h4>
            </div>
        </div>
        <div class="table-responsive">
            <table class="table mb-0" *ngIf="employees && employees.length">
                <thead>
                    <tr>
                        <th>Name</th>
                        <th>Address</th>
                        <th>Company</th>
                        <th>Designation</th>
                        <th></th>
                        <th></th>
                    </tr>
                </thead>
                <tbody>
                    <tr *ngFor="let employee of filteredEmployees">
                        <td>
                            <a [routerLink]="['/employees', employee.id]">
                                {{ employee.name }}
                            </a>
                        </td>
                        <td>{{ employee.address }}</td>
                        <td>{{ employee.company }}</td>
                        <td>{{ employee.designation}} </td>
                        <td>
                            <button class="btn btn-outline-primary btn-sm"
                                [routerLink]="['/employees', employee.id, 'edit']">
                                Edit
                            </button>
                        </td>
                        <td>
                            <button class="btn btn-outline-warning btn-sm"
                                (click)="deleteEmployee(employee.id,employee.name);">
                                Delete
                            </button>
                        </td>
                    </tr>
                </tbody>
            </table>
        </div>
    </div>
</div>
<div *ngIf="errorMessage" class="alert alert-danger">
    Error: {{ errorMessage }}
</div>

Change the stylesheet as well.

employee-list.component.css   

thead {
    color: #337AB7;
}


We can create employee edit component with the below command  

ng g component employee\EmployeeEdit  

Modify the class file with the code below.  

employee-edit.component.ts
import { Component, OnInit, OnDestroy, ElementRef, ViewChildren } from '@angular/core';
import { FormControlName, FormGroup, FormBuilder, Validators } from '@angular/forms';
import { Subscription } from 'rxjs';
import { ActivatedRoute, Router } from '@angular/router';
import { Employee } from '../employee';
import { EmployeeService } from '../employee.service';
import { LoaderService } from 'src/app/loader.service';

@Component({
  selector: 'app-employee-edit',
  templateUrl: './employee-edit.component.html',
  styleUrls: ['./employee-edit.component.css']
})
export class EmployeeEditComponent implements OnInit, OnDestroy {
  @ViewChildren(FormControlName, { read: ElementRef }) formInputElements!: ElementRef[];
  pageTitle = 'Employee Edit';
  errorMessage!: string;
  employeeForm!: FormGroup;
  tranMode!: string;
  employee!: Employee;
  private sub!: Subscription;

  displayMessage: { [key: string]: string } = {};
  private validationMessages: { [key: string]: { [key: string]: string } };

  constructor(private fb: FormBuilder,
    private route: ActivatedRoute,
    private router: Router,
    private employeeService: EmployeeService,
    private loader: LoaderService) {

    this.validationMessages = {
      name: {
        required: 'Employee name is required.',
        minlength: 'Employee name must be at least three characters.',
        maxlength: 'Employee name cannot exceed 50 characters.'
      },
      cityname: {
        required: 'Employee city name is required.',
      }
    };
  }

  ngOnInit() {
    this.tranMode = "new";
    this.employeeForm = this.fb.group({
      name: ['', [Validators.required,
      Validators.minLength(3),
      Validators.maxLength(50)
      ]],
      address: '',
      cityname: ['', [Validators.required]],
      company: '',
      designation: '',
    });

    this.sub = this.route.paramMap.subscribe(
      params => {
        const id = params.get('id');
        const cityname = params.get('cityname');
        if (id == '0') {
          const employee: Employee = { id: "0", name: "", address: "", company: "", designation: "", cityname: "" };
          this.displayEmployee(employee);
        }
        else {
          this.getEmployee(id);
        }
      }
    );
  }

  ngOnDestroy(): void {
    this.sub.unsubscribe();
  }

  getEmployee(id: string | null): void {
    this.loader.show();
    this.employeeService.getEmployee(id)
      .subscribe({
        next: (employee: Employee) => this.displayEmployee(employee),
        error: (err) => {
          this.errorMessage = <any>err;
          this.loader.hide();
        },
        complete: () => {
          console.info('Get employee in employee edit');
          this.loader.hide();
        }
      });
  }

  displayEmployee(employee: Employee): void {
    if (this.employeeForm) {
      this.employeeForm.reset();
    }
    this.employee = employee;
    if (this.employee.id == '0') {
      this.pageTitle = 'Add Employee';
    } else {
      this.pageTitle = `Edit Employee: ${this.employee.name}`;
    }
    this.employeeForm.patchValue({
      name: this.employee.name,
      address: this.employee.address,
      company: this.employee.company,
      designation: this.employee.designation,
      cityname: this.employee.cityname
    });
  }

  deleteEmployee(): void {
    if (this.employee.id == '0') {
      this.onSaveComplete();
    } else {
      if (confirm(`Are you sure want to delete this Employee: ${this.employee.name}?`)) {
        this.loader.show();
        this.employeeService.deleteEmployee(this.employee.id)
          .subscribe({
            next: () => this.onSaveComplete(),
            error: (err) => {
              this.errorMessage = <any>err;
              this.loader.hide();
            },
            complete: () => {
              console.info('Delete employee in employee edit');
              this.loader.hide();
            }
          });
      }
    }
  }

  saveEmployee(): void {
    if (this.employeeForm.valid) {
      if (this.employeeForm.dirty) {
        const e = { ...this.employee, ...this.employeeForm.value };
        if (e.id === '0') {
          this.loader.show();
          this.employeeService.createEmployee(e)
            .subscribe({
              next: () => this.onSaveComplete(),
              error: (err) => {
                this.errorMessage = <any>err;
                this.loader.hide();
              },
              complete: () => {
                console.info('Create employee in employee edit');
                this.loader.hide();
              }
            });
        } else {
          this.loader.show();
          this.employeeService.updateEmployee(e)
            .subscribe({
              next: () => this.onSaveComplete(),
              error: (err) => {
                this.errorMessage = <any>err;
                this.loader.hide();
              },
              complete: () => {
                console.info('Update employee in employee edit');
                this.loader.hide();
              }
            });
        }
      } else {
        this.onSaveComplete();
      }
    } else {
      this.errorMessage = 'Please correct the validation errors.';
    }
  }

  onSaveComplete(): void {
    this.employeeForm.reset();
    this.router.navigate(['/employees']);
  }
}

We can change the template file also.  

employee-edit.component.html
<div class="card">
    <div class="card-header">
      {{pageTitle}}
    </div>

    <div class="card-body">
      <form novalidate (ngSubmit)="saveEmployee()" [formGroup]="employeeForm">

        <div class="form-group row mb-2">
          <label class="col-md-3 col-form-label" for="employeeNameId">Employee Name</label>
          <div class="col-md-7">
            <input class="form-control" id="employeeNameId" type="text" placeholder="Name (required)"
              formControlName="name" />
          </div>
        </div>

        <div class="form-group row mb-2">
          <label class="col-md-3 col-form-label" for="citynameId">City</label>
          <div class="col-md-7">
            <input class="form-control" id="citynameid" type="text" placeholder="Cityname (required)"
              formControlName="cityname" />
          </div>
        </div>

        <div class="form-group row mb-2">
          <label class="col-md-3 col-form-label" for="addressId">Address</label>
          <div class="col-md-7">
            <input class="form-control" id="addressId" type="text" placeholder="Address" formControlName="address" />
          </div>
        </div>

        <div class="form-group row mb-2">
          <label class="col-md-3 col-form-label" for="companyId">Company</label>
          <div class="col-md-7">
            <input class="form-control" id="companyId" type="text" placeholder="Company" formControlName="company" />
          </div>
        </div>

        <div class="form-group row mb-2">
          <label class="col-md-3 col-form-label" for="designationId">Designation</label>
          <div class="col-md-7">
            <input class="form-control" id="designationId" type="text" placeholder="Designation"
              formControlName="designation" />
          </div>
        </div>

        <div class="form-group row mb-2">
          <div class="offset-md-2 col-md-6">
            <button class="btn btn-primary" style="width:80px;margin-right:10px;" type="submit"
              [title]="employeeForm.valid ? 'Save your entered data' : 'Disabled until the form data is valid'"
              [disabled]="!employeeForm.valid">
              Save
            </button>
            <button class="btn btn-outline-secondary" style="width:80px;margin-right:10px;" type="button"
              title="Cancel your edits" [routerLink]="['/employees']">
              Cancel
            </button>
            <button class="btn btn-outline-warning" *ngIf="pageTitle != 'Add Employee'"
              style="width:80px;margin-right:10px" type="button" title="Delete this product" (click)="deleteEmployee()">
              Delete
            </button>
          </div>
        </div>
      </form>
    </div>

    <div class="alert alert-danger" *ngIf="errorMessage">{{errorMessage}}
    </div>
  </div>


We need one more component to display the employee details in a separate window. We can create now.  

ng g component employee\EmployeeDetail  


We can change the class file with the code below.  

employee-detail.component.ts
import { Component, OnInit } from '@angular/core';
import { ActivatedRoute, Router } from '@angular/router';
import { LoaderService } from 'src/app/loader.service';
import { Employee } from '../employee';
import { EmployeeService } from '../employee.service';

@Component({
  selector: 'app-employee-detail',
  templateUrl: './employee-detail.component.html',
  styleUrls: ['./employee-detail.component.css']
})
export class EmployeeDetailComponent implements OnInit {
  pageTitle = 'Employee Detail';
  errorMessage = '';
  employee: Employee | undefined;

  constructor(private route: ActivatedRoute,
    private router: Router,
    private employeeService: EmployeeService,
    private loader:LoaderService) { }

  ngOnInit() {
    const id = this.route.snapshot.paramMap.get('id');
    if (id) {
      this.getEmployee(id);
    }
  }

  getEmployee(id: string) {
    this.loader.show();
    this.employeeService.getEmployee(id)
      .subscribe({
        next: (employee) => this.employee = employee,
        error: (err) => {
          this.errorMessage = <any>err;
          this.loader.hide();
        },
        complete: () => {
          console.info('Get employee in employee details');
          this.loader.hide();
        }
      });
  }

  onBack(): void {
    this.router.navigate(['/employees']);
  }
}

Modify the template file with the code below.  

employee-detail.component.html
<div class="card">
    <div class="card-header"
         *ngIf="employee">
      {{pageTitle + ": " + employee.name}}
    </div>
    <div class="card-body"
         *ngIf="employee">
      <div class="row">
        <div class="col-md-8">
          <div class="row">
            <div class="col-md-3">Name:</div>
            <div class="col-md-6">{{employee.name}}</div>
          </div>
          <div class="row">
            <div class="col-md-3">City:</div>
            <div class="col-md-6">{{employee.cityname}}</div>
          </div>
          <div class="row">
            <div class="col-md-3">Address:</div>
            <div class="col-md-6">{{employee.address}}</div>
          </div>
          <div class="row">
            <div class="col-md-3">Company:</div>
            <div class="col-md-6">{{employee.company}}</div>
          </div>
          <div class="row">
            <div class="col-md-3">Designation:</div>
            <div class="col-md-6">{{employee.designation}}</div>
          </div>
        </div>
      </div>
      <div class="row mt-4">
        <div class="col-md-4">
          <button class="btn btn-outline-secondary mr-3"
                  style="width:80px;margin-right:10px;"
                  (click)="onBack()">
            <i class="fa fa-chevron-left"></i> Back
          </button>
          <button class="btn btn-outline-primary"
                  style="width:80px;margin-right:10px;"
                  [routerLink]="['/employees', employee.id,'edit']">
            Edit
          </button>
        </div>
      </div>
    </div>
    <div class="alert alert-danger"
         *ngIf="errorMessage">
      {{errorMessage}}
    </div>
  </div>


Create the navigation menu component now.  

ng g component NavMenu  

Modify the class file with the code below.  

nav-menu.component.ts
import { Component, OnInit } from '@angular/core';

@Component({
  selector: 'app-nav-menu',
  templateUrl: './nav-menu.component.html',
  styleUrls: ['./nav-menu.component.css']
})
export class NavMenuComponent implements OnInit {

  isExpanded = false;

  ngOnInit() {
  }

  collapse() {
    this.isExpanded = false;
  }

  toggle() {
    this.isExpanded = !this.isExpanded;
  }

}


Change the template file with the code below.  

nav-menu.component.html
<header>
    <nav class='navbar navbar-expand-sm navbar-toggleable-sm navbar-light bg-white border-bottom box-shadow mb-3'>
      <div class="container">
        <a class="navbar-brand" [routerLink]='["/"]'>Employee App</a>
        <button class="navbar-toggler" type="button" data-toggle="collapse" data-target=".navbar-collapse"
          aria-label="Toggle navigation" [attr.aria-expanded]="isExpanded" (click)="toggle()">
          <span class="navbar-toggler-icon"></span>
        </button>
        <div class="navbar-collapse collapse d-sm-inline-flex flex-sm-row-reverse" [ngClass]='{"show": isExpanded}'>
          <ul class="navbar-nav flex-grow">
            <li class="nav-item" [routerLinkActive]='["link-active"]' [routerLinkActiveOptions]='{ exact: true }'>
              <a class="nav-link text-dark" [routerLink]='["/"]'>Home</a>
            </li>
            <li class="nav-item" [routerLinkActive]='["link-active"]'>
              <a class="nav-link text-dark" [routerLink]='["/employees"]'>Employees</a>
            </li>
          </ul>
        </div>
      </div>
    </nav>
  </header>
  <footer>
    <nav class="navbar navbar-light bg-white mt-5 fixed-bottom">
      <div class="navbar-expand m-auto navbar-text">
        Developed with <i class="fa fa-heart"></i> by <b>Sarathlal
          Saseendran</b>
      </div>
    </nav>
  </footer>


We can also change the stylesheet file with the code below.  

nav-menu.component.css
html {
    font-size: 14px;
}

@media (min-width: 768px) {
    html {
        font-size: 16px;
    }
}

.fa-heart {
    color: hotpink;
}

Create the final component Home now.  

ng g component home  

There is no code change for the class file. We can change the html template file with the code below.  

home.component.html

<div style="text-align:center;">
    <h3>Easily use MockAPI.io with Angular 14</h3>
    <p>Welcome to our new single-page Employee application using MockAPI</p>
    <img src="../../assets/angular mockapi.jpg" width="800px">
</div>

We must add below route values in the app-routing.module class as well.  

app-routing.module.ts

import { NgModule } from '@angular/core';
import { RouterModule, Routes } from '@angular/router';
import { EmployeeDetailComponent } from './employee/employee-detail/employee-detail.component';
import { EmployeeEditComponent } from './employee/employee-edit/employee-edit.component';
import { EmployeeListComponent } from './employee/employee-list/employee-list.component';
import { HomeComponent } from './home/home.component';

const routes: Routes = [
  { path: '', component: HomeComponent, pathMatch: 'full' },
  {
    path: 'employees',
    component: EmployeeListComponent
  },
  {
    path: 'employees/:id',
    component: EmployeeDetailComponent
  },
  {
    path: 'employees/:id/edit',
    component: EmployeeEditComponent
  },
]

@NgModule({
  imports: [RouterModule.forRoot(routes)],
  exports: [RouterModule]
})
export class AppRoutingModule { }


Change the AppComponent with the code below.

app.component.ts
import { AfterContentChecked, ChangeDetectorRef, Component, OnInit } from '@angular/core';
import { LoaderService } from './loader.service';

@Component({
  selector: 'app-root',
  templateUrl: './app.component.html',
  styleUrls: ['./app.component.css']
})
export class AppComponent implements OnInit, AfterContentChecked {
  title = 'Angular14MockAPI';
  showLoader!: boolean;
  constructor(private loader: LoaderService, private ref: ChangeDetectorRef) {

  }
  ngOnInit() {
    this.loader.controlLoader.subscribe((result) => {
      this.showLoader = result;
    });
  }

  ngAfterContentChecked() {
    this.ref.detectChanges();
  }
}

We can change the app.component.html with the code below.  

app.component.html
<body>
  <app-nav-menu></app-nav-menu>
  <div class="container">
    <div class="file-loader" *ngIf="showLoader">
      <div class="upload-loader">
        <div class="loader"></div>
      </div>
    </div>
    <router-outlet></router-outlet>
  </div>
</body>

Change the stylesheet with the code below.

app.component.css
/* Spin Start*/

.file-loader {
    background-color:
  rgba(0, 0, 0, .5);
    overflow: hidden;
    position: fixed;
    top: 0;
    left: 0;
    right: 0;
    bottom: 0;
    z-index: 100000 !important;
  }

  .upload-loader {
    position: absolute;
    width: 60px;
    height: 60px;
    left: 50%;
    top: 50%;
    transform: translate(-50%, -50%);
  }

    .upload-loader .loader {
      border: 5px solid
  #f3f3f3 !important;
      border-radius: 50%;
      border-top: 5px solid
  #005eb8 !important;
      width: 100% !important;
      height: 100% !important;
      -webkit-animation: spin 2s linear infinite;
      animation: spin 2s linear infinite;
    }

  @-webkit-keyframes spin {
    0% {
      -webkit-transform: rotate(0deg);
    }

    100% {
      -webkit-transform: rotate(360deg);
    }
  }

  @keyframes spin {
    0% {
      transform: rotate(0deg);
    }

    100% {
      transform: rotate(360deg);
    }
  }

  /* Spin End*/


We have completed the entire coding part. We can run the application now.

Click the Employees menu and add a new employee record.

Added employees will be listed as a grid format on the screen.

We have search, edit, and remove features also available in the application.  

Conclusion
In this post, we have seen how to create a mock API using MockAPI.io. MockAPI provides a free plan to create one project and four resources. We have created an employee resource and consumed this resource from an Angular 14 application. We have seen all CRUD operations using MockAPI and Angular 14 application. MockAPI also provides various paid plans as well. You can try from your end and feel free to write your valuable feedback.


AngularJS Hosting Europe - HostForLIFE :: How To Create Voice Recognition Using Ngx-Speech-Recognition In Angular?

clock September 16, 2022 06:52 by author Peter

In this article, we are going to see how voice recognition can translate spoken words into text using closed captions to enable a person with hearing loss to understand what others are saying. It's most useful for students, employees, and client communications purposes rather than using voice commands instead of typing.

First, we have created a basic Angular application using Angular CLI.

Here I have used ngx Speech Recognition for custom plugins or we can create a separate library inside the application, and be able to use the newly created library.  

Please refer to this link for angular custom library creations.

I have used Ngx Speech Recognition service library from the applications created as ngx-speech-recognition-test.

How to Create Voice Recognition using Ngx-Speech-Recognition in Angular

Then created main and sub-components. The main components are just using some project-related purpose or whatever content we need to add this main component. If you don’t need it, please ignore it. In the sub-components, we used the voice recognition part. Please check the following code.

Here I have added all sub-components codes.

Sub.component.ts

import {
    Component
} from '@angular/core';
import {
    ColorGrammar
} from './sub.component.grammar';
import {
    SpeechRecognitionLang,
    SpeechRecognitionMaxAlternatives,
    SpeechRecognitionGrammars,
    SpeechRecognitionService,
} from '../../../../../projects/ngx-speech-recognition-test/src/public_api';
@Component({
    selector: 'test-sub',
    templateUrl: './sub.component.html',
    styleUrls: ['./sub.component.css'],
    providers: [
        // Dependency Inject to SpeechRecognitionService
        // like this.
        {
            provide: SpeechRecognitionLang,
            useValue: 'en-US',
        }, {
            provide: SpeechRecognitionMaxAlternatives,
            useValue: 1,
        }, {
            provide: SpeechRecognitionGrammars,
            useValue: ColorGrammar,
        },
        SpeechRecognitionService,
    ],
})
export class SubComponent {
    public started = false;
    public message = '';
    constructor(private service: SpeechRecognitionService) {
        // Dependency The injected services are displayed on the console.
        // Dependence was resolved from SubComponent's provider.
        this.service.onstart = (e) => {
            console.log('voice start');
        };
        this.service.onresult = (e) => {
            this.message = e.results[0].item(0).transcript;
            console.log('voice message result', this.message, e);
        };
    }
    start() {
        this.started = true;
        this.service.start();
    }
    stop() {
        this.started = false;
        this.service.stop();
    }
}


SpeechRecognitionLang, SpeechRecognitionMaxAlternatives, SpeechRecognitionGrammars and SpeechRecognitionService all imported from ngx-speech-recognition-test.

We need to inject SpeechRecognitionServices. SpeechRecognitionLang provides mapping, we can map language code mentioned 'en-US'

SpeechRecognitionMaxAlternatives is Recognition voice count. I have marked 1.  

SpeechRecognitionGrammars purpose checked to translate text for grammar validations.  

ColorGrammar(Sub.component.grammar.ts). All the setup configurations are in the above codes.

Sub.component.grammar.ts
/**
 * @see https://developer.mozilla.org/ja/docs/Web/API/SpeechGrammarList#Examples
 */
export const ColorGrammar = new SpeechGrammarList();
ColorGrammar.addFromString(`#JSGF V1.0;
grammar colors;
public <color> = aqua | azure | beige | bisque |
  black | blue | brown | chocolate | coral | crimson | cyan | fuchsia |
  ghostwhite | gold | goldenrod | gray | green | indigo | ivory | khaki |
  lavender | lime | linen | magenta | maroon | moccasin | navy | olive |
  orange | orchid | peru | pink | plum | purple | red | salmon | sienna |
  silver | snow | tan | teal | thistle | tomato | turquoise |
  violet | white | yellow ;
`, 1);

Sub.component.html
<p>Voice message: {{message}}</p>
    <button [disabled]="started" (click)="start()">Voice start</button>
    <button [disabled]="!started" (click)="stop()">Voice end</button>
<p>lang: en-US</p>


Sub.module.ts
import { NgModule } from '@angular/core';
import { CommonModule } from '@angular/common';
import { SubComponent} from './components';
@NgModule({
  imports: [CommonModule],
  declarations: [SubComponent],
  exports: [SubComponent,],
})
export class SubModule { }


Then copy and paste the codes to demo.component.ts, demo. Component.html and demo.module.ts.

demo.component.ts
import { Component } from '@angular/core';
@Component({
  selector: 'demo-root',
  templateUrl: './demo.component.html',
  styleUrls: ['./demo.component.css'],
})
export class DemoComponent { }


demo.component.html
<test-main></test-main>
<test-sub></test-sub>


Demo.module.ts
import { BrowserModule } from '@angular/platform-browser';
import { NgModule } from '@angular/core';
import { RouterModule } from '@angular/router';
import { CommonModule } from '@angular/common';
import { DemoComponent } from './demo.component';
import { MainComponent } from './components';
import { SubModule } from '../demo/sub';
import { SpeechRecognitionModule } from '../../projects/ngx-speech-recognition-test/src/public_api';
@NgModule({
  declarations: [
    // app container.
    DemoComponent, MainComponent,
  ],
  imports: [
    BrowserModule,
    CommonModule,
    RouterModule,
    SpeechRecognitionModule.withConfig({
      lang: 'en',
      interimResults: true,
      maxAlternatives: 10,
      // sample handlers.
  onaudiostart:  (ev: Event) => console.log('onaudiostart',ev),
      onsoundstart:  (ev: Event) => console.log('onsoundstart',ev),
      onspeechstart: (ev: Event) => console.log('onspeechstart',ev),
      onspeechend:   (ev: Event) => console.log('onspeechend',ev),
      onsoundend:    (ev: Event) => console.log('onsoundend',ev),
      onaudioend:    (ev: Event) => console.log('onaudioend', ev),
      onresult:      (ev: SpeechRecognitionEvent) => console.log('onresult',ev),
      onnomatch:     (ev: SpeechRecognitionEvent) => console.log('onnomatch',ev),
      onerror:       (ev: SpeechRecognitionError) => console.log('onerror',ev),
      onstart:       (ev: Event) => console.log('onstart', ev),
      onend:         (ev: Event) => console.log('onend',ev),
    }),
    // In SubModule, Component's providers are doing Demo
    // using SpeechRecognitionService generated.
    //
    SubModule,
  ],
  providers: [],
  bootstrap: [DemoComponent]
})
export class DemoModule { }

Added the above codes in the applications. Then please run the applications using ng serve --open or npm start. The application windows http://localhost:4200/ will be opened in the default browser.

If going to run the application first time and click the voice start button browser asks “Use your microphone” permission. If click allows and continues the following steps.


After that, I have to click the Voice start button and then speak input words like “hello welcome to angular”. The voice recognition captures them one by one and stores them into the message. Then, give another input into the voice like “I learn typescript”. And click the Voice end button. The whole words into the single lines of message like “hello welcome to angular I learn typescript”.

If you click the voice end button and we have end voice input process has complete sentence will show in the message field. I hope this article is of most helpful for you.


AJAX Hosting - HostForLIFE :: Consuming Web API Using jQuery(AJAX)

clock September 13, 2022 10:28 by author Peter

In this article, we are going to discuss an interesting and useful topic: Consuming Web API using jQuery(AJAX). This method is an easy and quick way to access the web API. We don’t need to write a bunch of code to get access to the API. We will also discuss those errors that are raised at the time of calling an API with jQuery like AddCos and Allow origin. It is normal to get errors like this. I had also faced those errors in early phases.

In this article, I’m going to access my previously created Asp.NET Core API, named Story.com. You can use the one that is required for your desired tasks.

Before we start the steps to consume a Web API, I want to give a brief introduction to both Web API and jQuery AJAX.

Web API
A web API is an Application Programming Interface that is used to access a database in a well-managed way. A web API is an intermediate between a Web application and a database. If we want to access the database in multiple applications, then a Web API is the best way to perform such a task. We don't need to write code again and again to get, post, or update data - we can simply pass the URL and get the response.

jQuery AJAX
In the current context, AJAX is widely used to request data asynchronously from a server. This means that we can send requests to the server without reloading the web page. This is an easy way to interact with the server.

In this article, I will use my previously created API, Story.com, that has a "Get" method.


Here is a Get method that is showing all the data from the database.


This API is attached with the resource file.

To Access a web API with jQuery, we need to follow these steps.

Step 1
In the first step, we are going to create an ASP.Net Core MVC project. I’m using Visual Studio 2022 here. You can use whatever is installed on your machine. So, start Visual Studio and click on create a new project.


Choose Asp.NET Core MVC with Model View Controller and click Next. Then, enter a project name and click create.


Next, we need to enter the Project name.


Step 2
I’m using the default HomeController View. You can add any other controller or view or HTML page to perform this task. Now you need to open the index view, located at View>>Home>>index. cshtml. Now we need to Call the javaScript, located in the wwwRoot folder.


Step 3
First, we call the javascrip.min.js file using @section and Scripts. We’ll write our jQuery within the script tag.
@section Scripts{
    <script>
    </script>
}

Before we move forward to the next step, we need a controller to hold the value of the API. Here I’ve used the table to hold the value of the API. In this table, I only defined the structure of the table. We will define its data rows at run time.
<div class="container">
    <table id="table1" class="table table-dark">
        <tr><th>ID</th><th>Content</th><th>StoryDate</th><th>Author</th><th>Title</th></tr>
    </table>
</div>

In the code above, I created a table with table ID=”table1” and defined their headers.

Note
While creating a table or other control, to bind it using jQuery it must give the ID or name of the control. This is because we will bind data on that control using its Id or its Name.

Step 4
Now, let’s go to our script tag and call a method to load the data from the API. When the document is ready, this means our page is loaded.
$(document).ready(function() {
    GetData();
})


This method calls a method GetData(); when our page is ready.

Step 5
Next, we need to define the functionality to get data from the Web API.
<script>
function GetData() {
    $.ajax({
        url: "https://localhost:7138/api/Story",
        method: "GET",
        success: function(res) {
            var tableString = "";
            $.each(res, function(index, value) {
                tableString += "<tr><td>" + value.iD + "</td><td>" + value.content + "</td><td>" + value.storyStartDate + "</td><td>" + value.auther + "</td><td>" + value.title + "</td></tr>";
            });
            $("#table1").append(tableString);
        },
        error: function(error) {
            console.log(error);
        }
    });
}


Here in this code:
    First we have used the $.ajax() method is used to send the request to the server.
    URL: is used to pass the URL of the Web API here I have the URL of my get API you can use your API URL to get the data from our API.
    method: "GET", here we have to define the method if we are getting the data or we are posting the data. By default, it's set to "GET" data. If you are getting data, then it's not necessary to define, but if we want to post data then it's necessary to define the method as "POST".
    Next,

    success: function(res) {
            var tableString = "";
            $.each(res, function(index, value) {
                tableString += "<tr><td>" + value.iD + "</td><td>" + value.content + "</td><td>" + value.storyStartDate + "</td><td>" + value.auther + "</td><td>" + value.title + "</td></tr>";
            });


In this code we are checking whether the result of the getting method is a success. This means we have gotten the proper or desired response to our request. Then, we need to store the response of the request. So, in the next step, we created a variable with the name tableString to hold the response. To store all these values, we have used $.each loop, which is similar to the for each loop. This loop works dynamically for each element stored in the collection. Here we have stored all data that is coming from the response in the format of table data. Always remember that it is case-sensitive. We have to write the variable names as they are to get the proper value.
Next, we need to append this data into table data. Here we need that controller's Id, in which we want to bind it. In my case, I created a table control to hold the data with the name "table1". This append() will append the data into the table using its id.
$("#table1").append(tableString);

Next, we can also create a method to deal with the errors.
error: function(error) {
    console.log(error);
}


Now if any error occurs when we are getting or loading data from the Web API, we can get the details related to errors in the console. It's not a necessary part; it's optional.

Now, if we run the Program and if your API is live or running, your data will be loaded in the table format.


In this article, we got the data from the ASP.NET Core API using  jQuery AJAX. We can also post or update the data using jQuery AJAX without reloading the page. We just need to pass the desired URL and pass the data with method type "POST", and we can perform the task.


AngularJS Hosting Europe - HostForLIFE :: Angular - Route Guard

clock September 12, 2022 09:14 by author Peter

Introduction
In this article, we are going to discuss an important concept of Angular called Route Guard. We will create a simple angular application to get a better understanding of this concept. This article can be used by beginners, intermediates, and professionals.


I have divided this topic into 3 articles. The below topics will be coved in the first article.
    What is Route Guard?
    Why is it Required?
    Type of Angular Route Guard?
    How to Implement CanActivateGuard?

What is Route Guard?

In the traditional web application, we were checking users' access and permission using Authentication and Authorization on the server side. If the user doesn’t have sufficient access or permission, we were redirecting a user to the login page with an appropriate error message.

Now a question comes to mind; how we will achieve this in Angular? I mean how will restrict a user to access a certain area of the application without login/permission?

That’s one of the scenarios where Route Guard comes into the picture.

Route Guards help us to prevent users to access a certain area of the application that is not permitted or has access to.

Type of Route Guard?
Four types of Route guards are available in Angular. In this article, we will cover the “CanActivate” Route guard and the rest will cover in subsequent articles.
    CanActivate
    CanActivateChild
    CanDeactivate
    CanLoad

Please note that all Route guards have interfaces that need to be implemented in the component class.

eg. “CanActivate” is an interface that has a method called “canActivate”

Please see the below screen to get a better understanding,    

Suppose we have multiple Route guards applied to a specific route then all route guards should return true to navigate. If any route guard returns false then the navigation will be canceled. Let's see below the screen to understand,

In the above screen, we have two route guards,
    MemberAuthGaurd
    DetailsAuthGuard

So both route guards should return true. In case any of the route guards return false then “member” navigation will not work.

Now we will implement “CanActivateGaurd”
How to Implement a CanActivateGuard?

First, we will see the syntax/command used to create a route guard.

Syntax
ng g g “name of the guard”


Now we will create an angular application and implement RouteGuard to get hands-on experience.

Example
In this example, we will
    Create a new angular application,
    Create Two components
    Implement Routing
    Create a new Auth service.
    Create RouteGaurd
    Configure Service in the RouteGuard
    Configure

Please follow the below steps to create the CanActivate Route guard in the Angular application

Step 1 - Create Angular Application.
ng new "routeguarddemo"

Once the application created, we will add two components,

Step 2 - Add two components
ng g c "home"

This command will create HomeComponent. Now let's add another component called “member”
ng g c “member”

Once both components are created. We will configure routing in the next step.

Step 3 - Add routing and create links
Step 3.1

Add the below code in app-routing.module.ts file
import { NgModule } from '@angular/core';
import { RouterModule, Routes } from '@angular/router';
import { HomeComponent } from './home/home.component';
import { MemberComponent } from './member/member.component';

const routes: Routes = [

  {path:'home',component:HomeComponent},
  {path:'member',component:MemberComponent}
];

@NgModule({
  imports: [RouterModule.forRoot(routes)],
  exports: [RouterModule]
})
export class AppRoutingModule { }
export const RoutingComponents =[HomeComponent,MemberComponent];


Step 3.2
Add the below code in app.moule.ts file,
import { NgModule } from '@angular/core';
import { BrowserModule } from '@angular/platform-browser';

import { AppRoutingModule, RoutingComponents } from './app-routing.module';
import { Router } from '@angular/router';
import { AppComponent } from './app.component';

@NgModule({
  declarations: [
    AppComponent,
    RoutingComponents
  ],
  imports: [
    BrowserModule,
    AppRoutingModule
 ],
  providers: [],
  bootstrap: [AppComponent]
})
export class AppModule { }


Step 3.3
Add the below code in app.comoponent.html file
<div>
  <a routerLink="/home"  routerLinkActive="active">Home</a>
</div>
<div>
  <a routerLink="/member" routerLinkActive="active">Member</a>
</div>
<router-outlet></router-outlet>


Routing is ready now. Please note that we have not used lazy loading to keep this example simple.

Now we will add Auth service to check user credential and permission.

Step 4 - Add Auth Service and create property called “getUserPermission”
Step 4.1

Execute below command to create service,
ng g s “Auth”

Step 4.2
Add function called get MemberAuth in the service file.

This function should have actual business logic but for demo purpose, I am returning hardcoded “true” or “false” from this function.
import { Injectable } from '@angular/core';
@Injectable({
    providedIn: 'root'
  })
   export class AuthService {

   constructor() { }
   get MemberAuth()
   {
     //Login for Member Auth
     return false;
   }
 }

In the above code, we have created the “MemberAuth” property. In the real world, we will check member authentication and authorization here and return true and false accordingly. But for demo purposes, we are returning hard coded.

Step 5 - Create a RouteGuard
ng g g "memberAuth"

Use the above command to create RouteGuard.

We can create a route guard by selecting any interface but for this example, we will choose the “CanActivate” guard.

New “member-auth.guard.ts “ - RouteGuard file added in the project,
import { Injectable } from '@angular/core';
import { ActivatedRouteSnapshot, CanActivate, RouterStateSnapshot, UrlTree } from '@angular/router';
import { Observable } from 'rxjs';

@Injectable({
  providedIn: 'root'
})
export class MemberAuthGuard implements CanActivate {
  canActivate(
    route: ActivatedRouteSnapshot,
    state: RouterStateSnapshot): Observable<boolean | UrlTree> | Promise<boolean | UrlTree> | boolean | UrlTree {
    return true;
  }

}

Step 6 - Configure the route guard in the routing file.
import { NgModule } from '@angular/core';
import { RouterModule, Routes } from '@angular/router';
import { HomeComponent } from './home/home.component';
import { MemberComponent } from './member/member.component';
import { MemberAuthGuard } from './member-auth.guard';

const routes: Routes = [

  {path:'home',component:HomeComponent},
  {path:'member',component:MemberComponent,canActivate:[MemberAuthGuard]}
];

@NgModule({
  imports: [RouterModule.forRoot(routes)],
  exports: [RouterModule]
})
export class AppRoutingModule { }
export const RoutingComponents =[HomeComponent,MemberComponent];


In the above code,
    We have added “canActivate:[MemberAuthGuard]” in the route object.
    Imported “MemberAuthGuard” from ‘./member-auth.guard’

Step 7
Call Auth service from route guard to check member access and privileges.
import { Injectable } from '@angular/core';
import { ActivatedRouteSnapshot, CanActivate, RouterStateSnapshot, UrlTree } from '@angular/router';
import { Observable } from 'rxjs';
import { AuthService } from './auth.service';

@Injectable({
  providedIn: 'root'
})
export class MemberAuthGuard implements CanActivate {
  constructor(private _authservice :AuthService)
  {}
  canActivate(
    route: ActivatedRouteSnapshot,
    state: RouterStateSnapshot): Observable<boolean | UrlTree> | Promise<boolean | UrlTree> | boolean | UrlTree {

      if(this._authservice.MemberAuth)
      {
        return true;
      }
      else{
        window.alert("You dont have access!!! Please connect to Administrator ");
        return false;
      }

  }
}


In the above code,
    We have configured “AuthService” in the constructor of MemberAuthGuard.
    Imported Auth service from’./auth.services’
    Called the “MemberAuth” property to check member has access or not. This value comes from Auth Service.
    Alert message in case members don't have access.

Now we will set “false” to return from Auth Service – MemberAuth properly and execute the application.

Output

Member component navigation is not working and getting an error message in the alert. That means that our Route Guard is working fine. You can change AuthSerive – MemberAuth return value to true and check.

I hope, this article has helped you to understand “route guard” and found it useful.


AngularJS Hosting Europe - HostForLIFE :: Building Blocks Of Angular

clock September 8, 2022 10:05 by author Peter

In this article, we are going to see about the building blocks of Angular
    Modules
    Components
    Templates
    Metadata
    Data binding
    Directives
    Services
    Dependency injection

Modules
In angular app has at least one module which we call app module. A module is a container for a group of related components. There are two types of modules one is encapsulating block of function within the single component and the other is encapsulating block of function within a single or group of components by providing exposure in an interface. we need to divide our app module into sub smaller modules and each module is responsible for a specific section.

Components
Its component represents a unique "View" and "View Model" in Model-View-ViewModel (MVVM) pattern or exactly like what components do in Angular. The "View" or Template shows how the complete component will look–when displayed on the browser. "View Model" has all required logic parts to provide "View" with rich functionality and data.

In this case, we followed some steps like below
    Create the Component.
    Register the component in module.
    Add the element in HTML Markup.

Create the Component.

To create the component, we can use the below ng command followed by some name.  
ng generates component component_name

OR

ng g c component_name

Here I have entered the command like ng g c sample. After successfully create component, it will create additionally  
    sample.component.ts (Class with @Component decorator)
    sample.component.html (For the template design)
    sample.component.css (For stylesheets)

Register the component in module
import { BrowserModule } from '@angular/platform-browser';
import { NgModule } from '@angular/core';
import { AppComponent } from './app.component';
import { SampleComponent } from './sample.component';
@NgModule({
  declarations: [AppComponent,SampleComponent],
  imports: [ BrowserModule],
  providers: [],
  bootstrap: [AppComponent]
})
export class AppModule { }


I have registered the component on the appmodule.ts page. We are going to declarations in the samplecomponent.

Add the element in HTML Markup.

Added some markup design in the sample.component.html page like the below code.
<h3>Test Component</h3>

Templates
The templates' view represents a view that improves HTML with Angular functionality like data binding.
import { Component } from '@angular/core';
@Component({
    selector: 'app-root',
    template: '<h2>Test Angular</h2>'
})
export class AppComponent {}


If we want is to encapsulate the data in the container and show it in the template markup dynamically.

In the template to encapsulate the data and when the data changes here at runtime, Angular automatically updates it in the browser view as well.
import { Component } from '@angular/core';
@Component({
    selector: 'app-root',
    template: '<h2> {{ name + "Angular" }}</h2>'
})
export class AppComponent {name = "Test Sat";}


Metadata

Metadata helps in connecting everything in the applications, a "View" with a "View Model" with styles.

    the selector is Metadata in Angular the custom HTML to be included with the component.
    template URL is the exclusive URL for the template to be used when processing the component,
    an array of directives with this kind of Metadata will tell Angular which other Component or the directives should be included in that component.
    an array of style URLs with this type of Metadata you can easily define customized styles for the component.
    Angular how to inject dependencies like services in a component or @RouterConfig that helps you to configure routing in your project application.

Data binding
Data binding is a technique, where the data stays in sync between the component and the view.

There are two different types of data bindings
    one-way  
    two-way binding.

One-way data binding

One-way data binding is a one-way interaction between a component and its HTML template. If you perform any changes in your component, then it will reflect the HTML elements also.
import { Component } from '@angular/core';
@Component({
    selector: 'app-root',
    template: '<h2> {{  name }}</h2>'
})
export class AppComponent {name = "Test Sat";}

Two-way data binding
Two-way data binding is a both-way interaction with components and HTML, data flows in both ways from component to HTML views and HTML views to the component. A simple example is ngModel. If you do any changes in your object model then, it reflects in your HTML view.

Here testdata is one of the objects and another one temptestdata. Initially assign some values in the testdata object and change the value after the user manually enter using passdata click event.
import { Component } from '@angular/core';
@Component({
    selector: 'app-root',
    templateUrl: './app.component.html',
     styleUrls: ['./app.component.css']
})
export class AppComponent {
  testdata:string = "Virat Sat";
  temptestdata:String="";
passData(){
    this.temptestdata=testdata;
  }
}


HTML
<input type="text" (ngModel)="testdata">
<button (ngClick)="passData()"> Pass Data Click here </button>
<h3>{{temptestdata}}</h3>


There are three types of Directives present in Angular

Components Directive The component can be used as a directive. Every component has an and Output option to pass between the component and its parent HTML elements.

<selector-name [input-reference]="input-value"> </selector-name>
For Example,
<list-data [items]="datavalues"></list-data>

Structural Directive is like *ngFor and *ngIf which enables you to make changes to DOM with the help of adding or by the Input moving nodes.
<div *ngIf="true">Test Sat data</div>
<li *ngFor="let data of list-data">
  {{ data }}
</li>


Attribute Directive helps in adding behavior or do a change in the look or appearance of a specific element just like ngmodel directive which implements two-way data binding is an Attribute Directive.
<HTMLTag [attrDirective]='value' /></HTMLTag>
For Example,
<p [showToolTip]='Test Virat' />


Services
Services simply help in making reuse of service. As the project becomes bigger naturally more components will add to it and which also will require data to access. So, every time making a copy-paste of code it will create a single reusable singleton data service.

Dependency injection
Dependency Injection to inject the necessary dependencies for a given component/service at runtime and provide flexibility, extensibility, and testability to the framework and your application.

import { Component } from '@angular/core';
import { Service } from './service';
@Component({
    selector: 'app-root',
    template: `
    <ul>
        <li *ngFor="let data of datalist">
            {{ data }}
        </li>
    </ul>
})
export class AppComponent {
    datalist;
    constructor(){
        let service = new Service();
        this.datalist = service.getCourses();
    }
}

We need to explicitly instruct the Angular to create an instance of Service and passes to our AppComponent. This concept is called Dependency Injection. So, we should instruct Angular to inject the dependency of this component into its constructor.

I hope this article was most helpful for you.


AngularJS Hosting Europe - HostForLIFE :: Angular ngx-pagination Sample Implementation Step By Step Guide

clock September 5, 2022 08:41 by author Peter

Angular ngx-pagination Sample Implementation Step By Step Guide
In this example, I will show you how to implement ngx-pagination in your Angular Application.

ngx-pagination is the simplest pagination solution in Angular.

ngx-pagination also offers flexibility, responsiveness, and very handy customization.
I assumed that you have already installed Angular on your local machine. If not then here’s the link to basic Angular Installation.
    FYI: I’m a newbie in Angular I’m just enjoying documenting my journey in learning it.

Step 1: Create Angular Project

Create a new project called ngx-pagination-sample
ng new ngx-paging-sample
    Answer the 2 Angular CLI Questions:
    Would you like to add Angular routing? No
    Which stylesheet format whould you line to use? CSS

After installation, Navigate inside the project folder and open the application.
In my case, I Created a folder in drive: C called Angular and created the ngx-pagination-sample allication inside of it.
C:\Angular>cd ngx-pagination-sample
C:\Angular\ngx-paging-sample>code .


Step 2: Install ngx-pagination
Open Git Bash on your VS Code Terminal, Excecute the following command to add ngx-pagination
ng add ngx-pagination

OR
npm install ngx-pagination

The difference between ng add and npm install ng add, to look for the compatible version to install for your Angular Application while npm install installs the latest version of ngx-pagination which sometimes there are some incompatibility issues especially if you’re using an older version of Angular.

    If you’re using latest Angular Version then use npm install.

Step 3: Install Bootstrap for table and styles
    We need to install the Bootstrap UI package for styling the table and pagination.

Execute the following command:
npm install bootstrap

Go to the angular.json file and look for styles then add the following:
"./node_modules/bootstrap/dist/css/bootstrap.min.css"

Step 4: Setting up Data Model, Service, and Temporary Data
Go to app.module.ts and Import HttClientModule.

This module will help the service to fetch data from a third-party server but in our case, we’re going to use json file for our temporary data.
import { HttpClientModule } from ‘@angular/common/http’;
@NgModule({
    declarations: […],
    imports: [
        HttpClientModule
    ],
    bootstrap: […]
})
export class AppModule {}


Download Temporary Data customers.json then paste it inside your application assets folder.

Create a folder called _models

Inside of _models folder create an interface model called customer.model.ts
export interface Customer {
    id: number;
    firstName: string;
    lastName: string;
    birthday: Date;
    mobileNumber: string;
    email: string;
    createdOn: Date;
}

Inside of _models folder create an interface model called paging-config.model.ts
export interface PagingConfig {
    currentPage: number;
    itemsPerPage: number;
    totalItems: number;
}

Create a folder called _service and inside of it generate a data service called customer, you may create the service manually or type the following:
ng generate service customer

OR
ng g s customer

Add the code in customer.service.ts
import { HttpClient } from '@angular/common/http';
import { Injectable } from '@angular/core';
import { Observable } from 'rxjs';
import { Customer } from '../_models/customer.model';
@Injectable({
providedIn: 'root'
})
export class CustomerService {
    constructor(private httpClient: HttpClient) {}
    getCustomers(): Observable < Customer[] > {
        return this.httpClient.get < Customer[] > ("assets/customers.json");
    }
}

Step 5: Setting up Angular ngx-pagination
Implement PagingConfig on your AppComponent.ts and add initial values on the properties that will be implemented.

Code in the app.component.ts
import { Component } from '@angular/core';
import { Customer } from './_models/customer.model';
import { PagingConfig } from './_models/paging-config.model';
import { CustomerService } from './_services/customer.service';

@Component({
  selector: 'app-root',
  templateUrl: './app.component.html',
  styleUrls: ['./app.component.css']
})
export class AppComponent implements PagingConfig {
  title = 'ngx-paging-sample';

  currentPage:number  = 1;
  itemsPerPage: number = 5;
  totalItems: number = 0;

  tableSize: number[] = [5, 10, 15, 20];
  customers = new Array<Customer>();

  pagingConfig: PagingConfig = {} as PagingConfig;

  constructor(private customerService: CustomerService){
    this.getCustomers();

    this.pagingConfig = {
      itemsPerPage: this.itemsPerPage,
      currentPage: this.currentPage,
      totalItems: this.totalItems
    }
  }

  getCustomers(){
    this.customerService.getCustomers()
    .subscribe(res=> {
      this.customers = res;
      this.pagingConfig.totalItems = res.length;
    });
  }

  onTableDataChange(event:any){
    this.pagingConfig.currentPage  = event;
    this.getCustomers();
  }
  onTableSizeChange(event:any): void {
    this.pagingConfig.itemsPerPage = event.target.value;
    this.pagingConfig.currentPage = 1;
    this.getCustomers();
  }
}
    pagingConfig property is used for ngx-pagination paginate configuration.
    pagingConfig property will be instantiated inside the AppComponent constructor.

Add the HTML code on your app.component.html
<div class="container">
<div class="row justify-content-between">
  <div class="col-4">
    <h5 class="h3">NGX Pagination</h5>
  </div>
  <div class="col-2">
    <div class="row g-3 align-items-center">
      <div class="col-auto">
      <label class="control-label" for="noOfRows">No. of Rows</label>
    </div>
    <div class="col-auto">
      <select name="noOfRows" (change)="onTableSizeChange($event)" class="form-select form-select-sm">
        <option *ngFor="let size of tableSize" [ngValue]="size">
          {{ size }}
        </option>
      </select>
    </div>
  </div>
</div>
</div>
<br>
<table class="table  table-bordered">
  <thead class="table-dark">
    <tr>
      <th>Id</th>
      <th>Firt Name</th>
      <th>Last Name</th>
      <th>Birth Date</th>
      <th>Mobile Number</th>
      <th>Email</th>
      <th>Registration Date</th>
    </tr>
  </thead>
  <tr *ngFor="let customer of customers | paginate : pagingConfig; let i = index">
    <td>{{ customer.id }}</td>
    <td>{{ customer.firstName }}</td>
    <td>{{ customer.lastName }}</td>
    <td>{{ customer.birthday | date : 'MMMM dd,yyyy' }}</td>
    <td>{{ customer.mobileNumber }}</td>
    <td>{{ customer.email }}</td>
    <td>{{ customer.createdOn | date : 'MM/dd/yyyy' }}</td>
  </tr>
</table>
<div class="d-flex justify-content-center">
  <pagination-controls
  previousLabel="Prev"
  nextLabel="Next"
  (pageChange)="onTableDataChange($event)">
  </pagination-controls>
</div>
</div>


Run the application,
ng serve -o


AngularJS Hosting Europe - HostForLIFE :: How To Use Kendo UI In Angular Application?

clock September 1, 2022 07:26 by author Peter

Preconditions
    Basic knowledge of Angular CLI
    Bootstrap
    Node.js
    V.S. Code

We Covers the belowing things
    Create Angular application
    Create header,side menu and layout component with admin module.
    Angular Routing
    Kendo UI setup

Now let's use following command to create angular project,
ng new KendoUI
cd KendoUI

Now install bootstrap by using the following command,
npm install bootstrap --save

Now install KendoUI packages using following command,
npm install --save @progress/kendo-angular-charts @progress/kendo-angular-common @progress/kendo-angular-intl @progress/kendo-angular-l10n @progress/kendo-angular-popup @progress/kendo-drawing hammerjs @progress/kendo-licensing

Now install KendoUI theme using following command, I used default theme,
Default theme
npm install --save @progress/kendo-theme-default


Bootstrap theme
npm install --save @progress/kendo-theme-bootstrap

Material theme
npm install --save @progress/kendo-theme-material

Now Create the dashboard and layout component using the following command,
ng g c dashboard
ng g c layout

Now add the code in the following pages-:
Add this in app.module.ts
import { NgModule } from '@angular/core';
import { BrowserModule } from '@angular/platform-browser';
import { AppRoutingModule } from './app-routing.module';
import { AppComponent } from './app.component';
import { GridModule } from '@progress/kendo-angular-grid';
import { BrowserAnimationsModule } from '@angular/platform-browser/animations';
import { LayoutComponent } from './layout/layout.component';
import { DashboardComponent } from './dashboard/dashboard.component';
import { InputsModule } from '@progress/kendo-angular-inputs';
import { LabelModule } from '@progress/kendo-angular-label';
import { ChartsModule } from '@progress/kendo-angular-charts';
import { ButtonsModule } from '@progress/kendo-angular-buttons';
import { DialogModule } from '@progress/kendo-angular-dialog';
import { UploadModule } from '@progress/kendo-angular-upload';
import { FileSelectModule } from '@progress/kendo-angular-upload';
import { PDFExportModule } from '@progress/kendo-angular-pdf-export';
import { NotificationModule } from '@progress/kendo-angular-notification';
import { NavigationModule } from '@progress/kendo-angular-navigation';
import { IconsModule } from '@progress/kendo-angular-icons';
import { IndicatorsModule } from '@progress/kendo-angular-indicators';
import { LayoutModule } from '@progress/kendo-angular-layout';

@NgModule({
  declarations: [
    AppComponent,
    LayoutComponent,
    DashboardComponent
  ],
  imports: [
    BrowserModule,
    AppRoutingModule,
    GridModule,
    BrowserAnimationsModule,
    InputsModule,
    LabelModule,
    ChartsModule,
    ButtonsModule,
    DialogModule,
    UploadModule,
    FileSelectModule,
    PDFExportModule,
    NotificationModule,
    NavigationModule,
    IconsModule,
    IndicatorsModule,
    LayoutModule
  ],
  providers: [],
  bootstrap: [AppComponent]
})
export class AppModule { }


Add this in app.component.html
<router-outlet></router-outlet>

Add this in app-routing.module.ts
import {
    NgModule
} from '@angular/core';
import {
    RouterModule,
    Routes
} from '@angular/router';
import {
    DashboardComponent
} from './dashboard/dashboard.component';
import {
    LayoutComponent
} from './layout/layout.component';
const routes: Routes = [{
    path: 'Admin',
    component: LayoutComponent,
    children: [{
        path: 'Dashboard',
        component: DashboardComponent
    }]
}, {
    path: '**',
    redirectTo: "/Admin/Dashboard",
    pathMatch: 'full'
}, {
    path: '',
    redirectTo: "/Admin/Dashboard",
    pathMatch: 'full'
}];
@NgModule({
    imports: [RouterModule.forRoot(routes)],
    exports: [RouterModule]
})
export class AppRoutingModule {}


Add this in layout.component.ts
import {
    Component,
    OnInit
} from '@angular/core';
@Component({
    selector: 'app-layout',
    templateUrl: './layout.component.html',
    styleUrls: ['./layout.component.css']
})
export class LayoutComponent implements OnInit {
    private data: any;
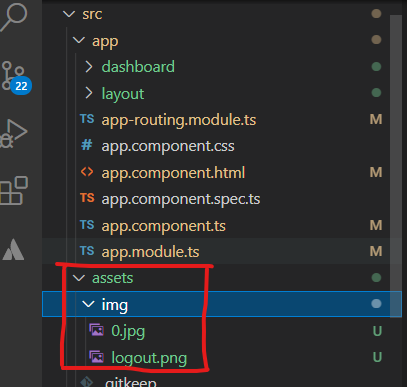
    public kendokaAvatar = '/assets/img/0.jpg';
    public logout = '/assets/img/logout.png';
    constructor() {}
    ngOnInit(): void {}
    public bottomNavigationItems: Array < any > = [{
        text: 'Home',
        icon: 'home',
        selected: true
    }, {
        text: 'Calendar',
        icon: 'calendar'
    }, {
        text: 'Notifications',
        icon: 'bell'
    }];
}


Add this in layout.component.html
<!--The content below is only a placeholder and can be replaced.-->
<!DOCTYPE html>
<html lang="en">
<head>
  <meta charset="utf-8">
  <meta http-equiv="X-UA-Compatible" content="IE=edge">
  <meta name="viewport" content="width=device-width, initial-scale=1">
  <meta name="description" content="">
  <meta name="author" content="">
  <title>Kendo</title>
    <!-- HTML5 Shim and Respond.js IE8 support of HTML5 elements and media queries -->
    <!-- WARNING: Respond.js doesn't work if you view the page via file:// -->
    <!--[if lt IE 9]>
        <script src="https://oss.maxcdn.com/libs/html5shiv/3.7.0/html5shiv.js"></script>
        <script src="https://oss.maxcdn.com/libs/respond.js/1.4.2/respond.min.js"></script>
    <![endif]-->
</head>
<body>
<!-- <kendo-breadcrumb [items]="breadCrumbItems"></kendo-breadcrumb> -->
<!-- <kendo-bottomnavigation [border]="true" [items]="bottomNavigationItems"></kendo-bottomnavigation> -->
<br />
  <div id="wrapper">
    <!-- Navigation -->
    <nav class="navbar navbar-default navbar-static-top" role="navigation" style="margin-bottom: 0">
      <!-- <div class="navbar-header"> -->
        <!-- <button type="button" class="navbar-toggle" data-toggle="collapse" data-target=".navbar-collapse">
          <span class="sr-only">Toggle navigation</span>
          <span class="icon-bar"></span>
          <span class="icon-bar"></span>
          <span class="icon-bar"></span>
        </button> -->
        <!-- <a class="navbar-brand" href="index.html">Kendo Project</a> -->
      <!-- </div> -->
      <!-- /.navbar-header -->
      <!-- /.navbar-top-links -->
      <kendo-appbar position="top">
        <!-- <kendo-appbar-section>
            <button class="k-button k-button-clear">
                <kendo-icon name="menu"></kendo-icon>
            </button>
        </kendo-appbar-section> -->
        <!-- <kendo-appbar-section>
            <h1 class="title">Kendo Project</h1>
        </kendo-appbar-section> -->
        <kendo-appbar-spacer width="32px"></kendo-appbar-spacer>
        <kendo-appbar-section>
            <ul>
                <li><a class="DashFont" [routerLink]="['/Admin/Dashboard']">Dashboard</a></li>
                <!-- <li><a [routerLink]="['/Admin/userlist']">Users</a></li>
                <li><a [routerLink]="['/Admin/profile']">Profile</a></li>
                <li><a [routerLink]="['/Admin/userserver']">User List</a></li> -->
            </ul>
        </kendo-appbar-section>
        <kendo-appbar-spacer></kendo-appbar-spacer>
        <kendo-appbar-section>
          <a [routerLink]="['/Admin/profile']"><kendo-avatar [imageSrc]="kendokaAvatar" shape="circle" width="26px" height="26px"> </kendo-avatar></a>
        </kendo-appbar-section>
        <kendo-appbar-section class="actions">
          <a [routerLink]="['/AdminLogout']"><kendo-avatar [imageSrc]="logout" shape="circle" width="26px" height="26px"> </kendo-avatar></a>
            <kendo-badge-container>
                <button class="k-button k-button-clear">
                    <kendo-icon name="bell"></kendo-icon>
                </button>
                <kendo-badge shape="dot" themeColor="warning" size="small" position="inside"></kendo-badge>
            </kendo-badge-container>
            <span class="k-appbar-separator"></span>
        </kendo-appbar-section>
    </kendo-appbar>
      <!-- <div class="navbar-default sidebar" role="navigation">
        <div class="sidebar-nav navbar-collapse">
          <ul class="nav" id="side-menu">

            <li>
              <a [routerLink]="['/Admin/Dashboard']"><i class="fa fa-edit fa-fw"></i>Dashboard</a>
            </li>
            <li>
              <a [routerLink]="['/Admin/userlist']"><i class="fa fa-edit fa-fw"></i>Users List</a>
            </li>
            <li>
              <a [routerLink]="['/Admin/userserver']"><i class="fa fa-edit fa-fw"></i>Users Server List</a>
            </li>
            <li>
              <a [routerLink]="['/Admin/imagegrid']"><i class="fa fa-edit fa-fw"></i>Image Grid</a>
            </li>
            <li>
              <a [routerLink]="['/AdminLogout']"><i class="fa fa-edit fa-fw"></i>Logout</a>
            </li>
          </ul>
        </div>
      </div> -->
    </nav>
    <div id="page-wrapper">
      <div class="row">
        <div class="col-lg-12">
         <router-outlet></router-outlet>
        </div>
        <!-- /.col-lg-12 -->
      </div>
      <!-- /.row -->
    </div>
  </div>
  <!-- /#page-wrapper -->
  <!-- /#wrapper -->
</body>
</html>

Add this inlayout.component.css
: host {
    padding: 0;
}
kendo - appbar.title {
    font - size: 18 px;
    margin: 10 px;
}
kendo - badge - container {
    margin - right: 8 px;
}
kendo - appbar ul {
    font - size: 14 px;
    list - style - type: none;
    padding: 0;
    margin: 0;
    display: flex;
}
kendo - appbar li {
    margin: 0 9 px;
}
kendo - appbar li: hover {
    cursor: pointer;
    color: #d6002f;
}
kendo - appbar.actions.k - button {
    padding: 0;
}
kendo - breadcrumb {
    margin - left: 30 px;
}.DashFont {
    font - size: 16 px;
    font - family: 'Segoe UI', Tahoma, Geneva, Verdana, sans - serif;
}

Add this in dashboard.component.ts
import {
    Component,
    OnInit
} from '@angular/core';
@Component({
    selector: 'app-dashboard',
    templateUrl: './dashboard.component.html',
    styleUrls: ['./dashboard.component.css']
})
export class DashboardComponent implements OnInit {
    ngOnInit(): void {}
    constructor() {}
    public events: string[] = [];
    public series: any[] = [{
        name: "India",
        data: [
            3.907, 7.943, 7.848, 9.284, 9.263, 9.801, 3.89, 8.238, 9.552, 6.855,
        ],
    }, {
        name: "Russian Federation",
        data: [4.743, 7.295, 7.175, 6.376, 8.153, 8.535, 5.247, -7.832, 4.3, 4.3],
    }, {
        name: "Germany",
        data: [
            0.01, -0.375, 1.161, 0.684, 3.7, 3.269, 1.083, -5.127, 3.69, 2.995,
        ],
    }, {
        name: "World",
        data: [
            1.988, 2.733, 3.994, 3.464, 4.001, 3.939, 1.333, -2.245, 4.339, 2.727,
        ],
    }, ];
    public categories: number[] = [
        2002, 2003, 2004, 2005, 2006, 2007, 2008, 2009, 2010, 2011,
    ];
    public onRender(): void {
        this.log("render");
    }
    public onAxisLabelClick(e: any): void {
        this.log("axisLabelClick", e);
    }
    public onLegendItemClick(e: any): void {
        this.log("legendItemClick", e);
    }
    public onLegendItemHover(e: any): void {
        this.log("legendItemHover", e);
    }
    public onPlotAreaClick(e: any): void {
        this.log("plotAreaClick", e);
    }
    public onPlotAreaHover(e: any): void {
        this.log("plotAreaHover", e);
    }
    public onSeriesClick(e: any): void {
        this.log("seriesClick", e);
    }
    public onSeriesHover(e: any): void {
        this.log("seriesHover", e);
    }
    private log(event: string, arg: any = null): void {
        this.events.push(`${event}`);
        console.log(arg);
    }
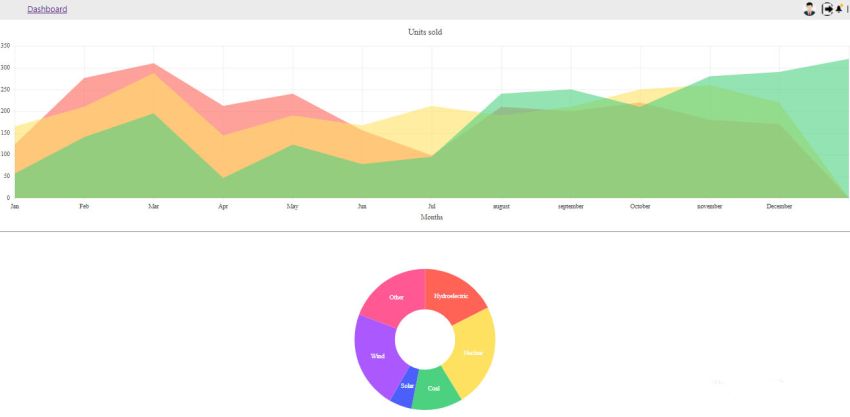
    public data: any[] = [{
        kind: 'Hydroelectric',
        share: 0.175
    }, {
        kind: 'Nuclear',
        share: 0.238
    }, {
        kind: 'Coal',
        share: 0.118
    }, {
        kind: 'Solar',
        share: 0.052
    }, {
        kind: 'Wind',
        share: 0.225
    }, {
        kind: 'Other',
        share: 0.192
    }];
    public labelContent(e: any): string {
        return e.category;
    }
}


Add this in dashboard.component.html
<kendo-chart>
    <kendo-chart-title text="Units sold"></kendo-chart-title>
    <kendo-chart-category-axis>
        <kendo-chart-category-axis-item
            [categories]="['Jan', 'Feb', 'Mar', 'Apr', 'May', 'Jun', 'Jul', 'august' , 'september' , 'October', 'november', 'December']"
            [title]="{ text: 'Months' }">
        </kendo-chart-category-axis-item>
    </kendo-chart-category-axis>
    <kendo-chart-series-defaults [highlight]="{ inactiveOpacity: 0.3 }">
    </kendo-chart-series-defaults>
    <kendo-chart-series>
      <kendo-chart-series-item type="area" [data]="[123, 276, 310, 212, 240, 156, 98, 210, 200, 220, 180, 170]">
      </kendo-chart-series-item>
      <kendo-chart-series-item type="area" [data]="[165, 210, 287, 144, 190, 167, 212, 190, 210, 250, 260, 220]">
      </kendo-chart-series-item>
      <kendo-chart-series-item type="area" [data]="[56, 140, 195, 46, 123, 78, 95, 240, 250, 210, 280, 290, 320]">
      </kendo-chart-series-item>
    </kendo-chart-series>
  </kendo-chart>
<hr>
<kendo-chart>
    <kendo-chart-series>
      <kendo-chart-series-item
          type="donut" [data]="data"
          categoryField="kind" field="share">
        <kendo-chart-series-item-labels
          [content]="labelContent"
          color="#fff" background="none">
        </kendo-chart-series-item-labels>
      </kendo-chart-series-item>
    </kendo-chart-series>
    <kendo-chart-legend [visible]="false"></kendo-chart-legend>
  </kendo-chart>

JavaScript

Add this in package.json dependencies

"private": true,
  "dependencies": {
    "@angular/animations": "~12.1.0-",
    "@angular/common": "~12.1.0-",
    "@angular/compiler": "~12.1.0-",
    "@angular/core": "~12.1.0-",
    "@angular/forms": "~12.1.0-",
    "@angular/localize": "~12.1.0-",
    "@angular/platform-browser": "~12.1.0-",
    "@angular/platform-browser-dynamic": "~12.1.0-",
    "@angular/router": "~12.1.0-",
    "@progress/kendo-angular-buttons": "^7.0.0",
    "@progress/kendo-angular-charts": "^6.0.0",
    "@progress/kendo-angular-common": "^2.0.0",
    "@progress/kendo-angular-dateinputs": "^6.0.0",
    "@progress/kendo-angular-dialog": "^6.0.1",
    "@progress/kendo-angular-dropdowns": "^6.0.0",
    "@progress/kendo-angular-excel-export": "^4.0.0",
    "@progress/kendo-angular-grid": "^6.0.1",
    "@progress/kendo-angular-icons": "^1.0.0",
    "@progress/kendo-angular-indicators": "^1.1.2",
    "@progress/kendo-angular-inputs": "^8.0.0",
    "@progress/kendo-angular-intl": "^3.0.0",
    "@progress/kendo-angular-l10n": "^3.0.0",
    "@progress/kendo-angular-label": "^3.0.0",
    "@progress/kendo-angular-layout": "^6.5.0",
    "@progress/kendo-angular-navigation": "^1.1.4",
    "@progress/kendo-angular-notification": "^3.0.4",
    "@progress/kendo-angular-pdf-export": "^3.0.0",
    "@progress/kendo-angular-popup": "^4.0.3",
    "@progress/kendo-angular-progressbar": "^2.0.3",
    "@progress/kendo-angular-treeview": "^6.0.0",
    "@progress/kendo-angular-upload": "^8.0.0",
    "@progress/kendo-data-query": "^1.0.0",
    "@progress/kendo-drawing": "^1.0.0",
    "@progress/kendo-licensing": "^1.0.2",
    "@progress/kendo-svg-icons": "^0.1.2",
    "@progress/kendo-theme-default": "^5.0.0",
    "rxjs": "~6.6.0",
    "tslib": "^2.2.0",
    "zone.js": "~0.11.4"
  },

Now add the attached images

Now run the following command.
npm i

Now, please run the application using the 'npm start' command and check the result.


About HostForLIFE

HostForLIFE is European Windows Hosting Provider which focuses on Windows Platform only. We deliver on-demand hosting solutions including Shared hosting, Reseller Hosting, Cloud Hosting, Dedicated Servers, and IT as a Service for companies of all sizes.

We have offered the latest Windows 2019 Hosting, ASP.NET 5 Hosting, ASP.NET MVC 6 Hosting and SQL 2019 Hosting.


Tag cloud

Sign in