This article will explain how to perform CRUD (Create, Read, Update and Delete) operations in Angular. We will see step-by-step instructions about CRUD operations in Angular.
So, let's get started.

Create Angular App
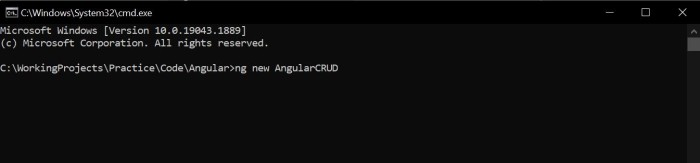
Open Command Prompt -> Navigate to the path where you want to create an angular app project using the below command.
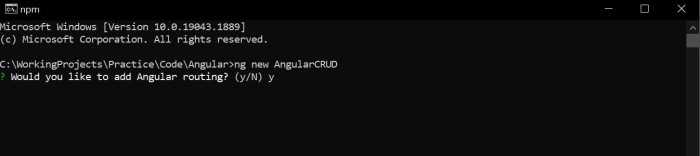
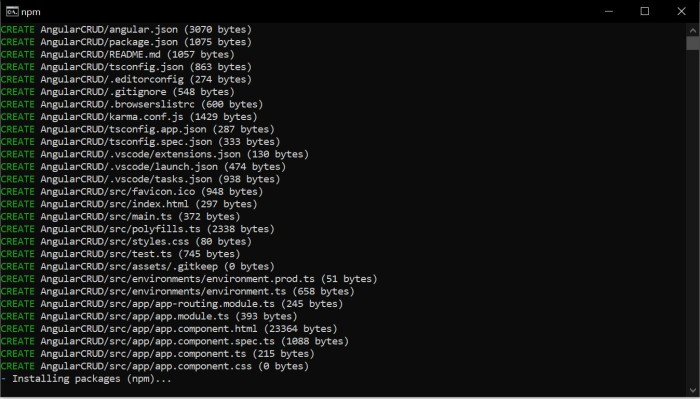
ng new AngularCRUD
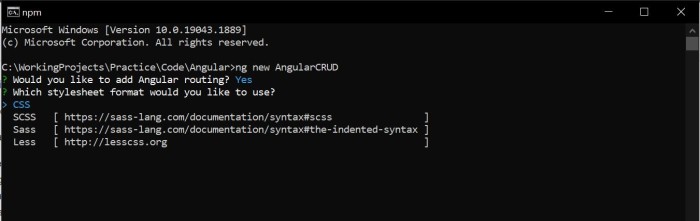
Would you like to add Angular routing? - Y (Yes)
Which stylesheet format would you like to use? - CSS
Now, Once the project is created type code . + enter button to open the project in VS Code.
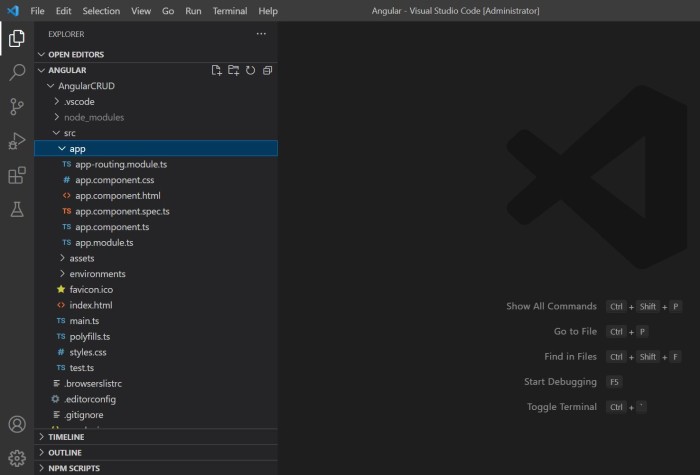
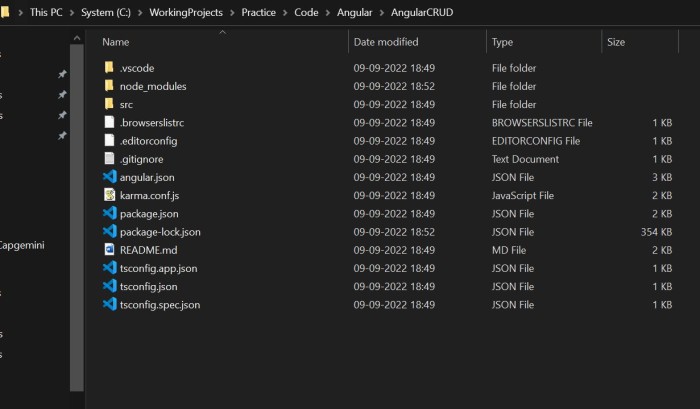
Once the angular app is created we can check in the folder path.
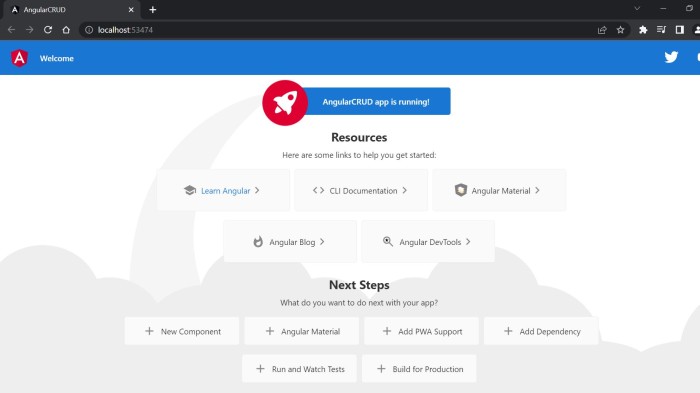
Now, open the terminal and run the project.
ng serve -o
OR
ng serve --open
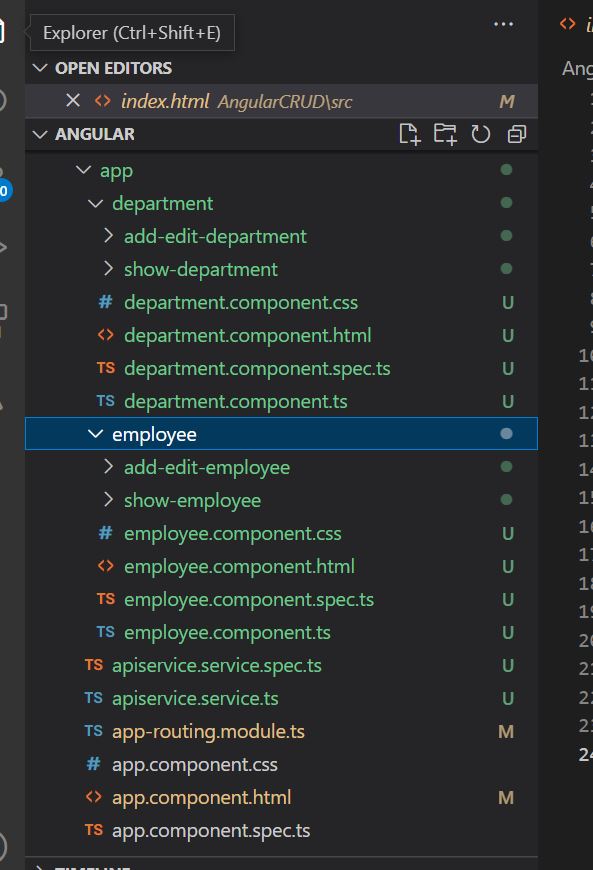
Adding Service & Adding Components
Now, we need to add service and components to our angular app. Using the below command.
Add Department component
ng g c department
Now, add Department child components
Add/ Edit Department component
ng g c department/add-edit-department
Show Department
ng g c department/show-department
Now, same goes for Employee
Add Employee component
ng g c employee
Now, add Employee child components
Add/ Edit Employee component
ng g c employee/add-edit-employee
Show Employee
ng g c employee/show-employee
Now, add service which will comunicate with Web API
ng g s apiservice
Note
g - generate
c - component
s - service
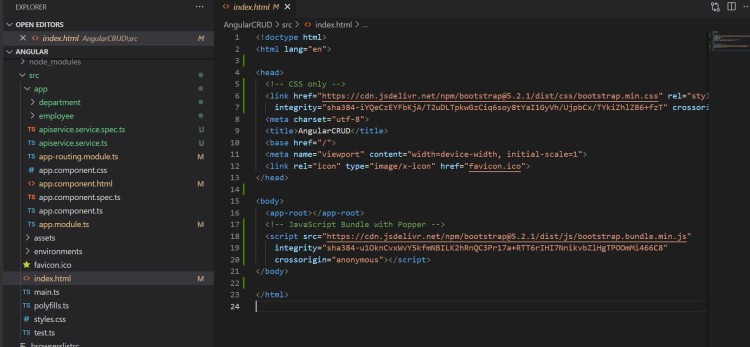
Adding Bootstrap
Now go to https://getbootstrap.com/ and copy the bootstrap.min.css and bootstrap.bundle.min.js links.
Open index.html page and past .css link in head section and .js after body section.
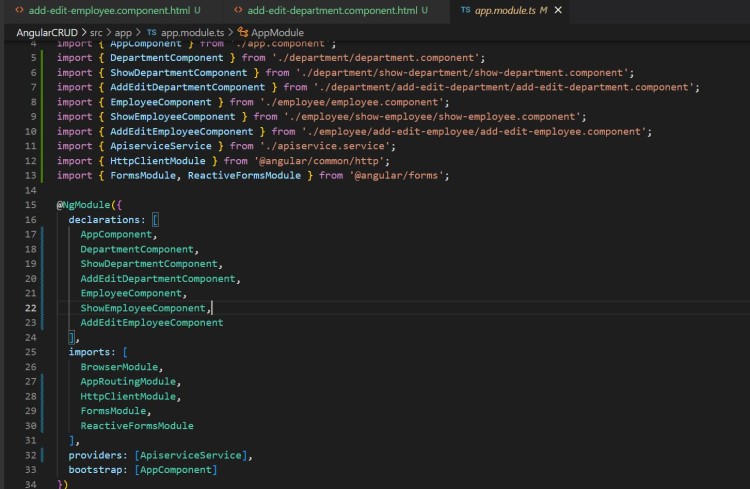
Register modules
Now, open app.module.ts to register services and module. In app.module we can see all the components are been auto added. Now, we need to add service so we can use in our angular app. Also we need to add HTTP module and other modules which we will require.
In Providers add Apiservice
In Imports add HttpClientModule, FormsModule and ReactiveFormsModule
Add Routing
Now, Open app-routing.module.ts file and add Department and Employee in Routs
import { NgModule } from '@angular/core';
import { RouterModule, Routes } from '@angular/router';
import { EmployeeComponent } from './employee/employee.component';
import { DepartmentComponent } from './department/department.component';
const routes: Routes = [
{ path: 'employee', component: EmployeeComponent },
{ path: 'department', component: DepartmentComponent }
];
@NgModule({
imports: [RouterModule.forRoot(routes)],
exports: [RouterModule]
})
export class AppRoutingModule { }
Navigating menus for routing
Now, Open app.component.html and add navigations.
<div class="container">
<h3 class="d-flex justify-content-center">Angular 13 CRUD using .Net Core Web API </h3>
<nav class="navbar navbar-expand-sm bg-light navbar-dark">
<ul class="navbar-nav">
<li class="nav-item">
<button routerLink="department" class="m-1 btn btn-light btn-outline-primary" Button>Departments</button>
</li>
<li class="nav-item">
<button routerLink="employee" class="m-1 btn btn-light btn-outline-primary" Button>Employees</button>
</li>
</ul>
</nav>
<router-outlet></router-outlet>
</div>
Adding service, component codes & Filtering & Sorting
Service
Now, Open apiservice.service.ts file and add code.
import { Injectable } from '@angular/core';
import { HttpClient, HttpEvent, HttpHeaders } from '@angular/common/http';
import { Observable } from 'rxjs';
@Injectable({
providedIn: 'root'
})
export class ApiserviceService {
readonly apiUrl = 'http://localhost:50306/api/';
readonly photoUrl = "http://localhost:50306/Photos/";
constructor(private http: HttpClient) { }
// Department
getDepartmentList(): Observable<any[]> {
return this.http.get<any[]>(this.apiUrl + 'department/GetDepartment');
}
addDepartment(dept: any): Observable<any> {
const httpOptions = { headers: new HttpHeaders({ 'Content-Type': 'application/json' }) };
return this.http.post<any>(this.apiUrl + 'department/AddDepartment', dept, httpOptions);
}
updateDepartment(dept: any): Observable<any> {
const httpOptions = { headers: new HttpHeaders({ 'Content-Type': 'application/json' }) };
return this.http.put<any>(this.apiUrl + 'department/UpdateDepartment/', dept, httpOptions);
}
deleteDepartment(deptId: number): Observable<number> {
const httpOptions = { headers: new HttpHeaders({ 'Content-Type': 'application/json' }) };
return this.http.delete<number>(this.apiUrl + 'department/DeleteDepartment/' + deptId, httpOptions);
}
// Employee
getEmployeeList(): Observable<any[]> {
return this.http.get<any[]>(this.apiUrl + 'employee/GetEmployee');
}
addEmployee(emp: any): Observable<any> {
const httpOptions = { headers: new HttpHeaders({ 'Content-Type': 'application/json' }) };
return this.http.post<any>(this.apiUrl + 'employee/AddEmployee', emp, httpOptions);
}
updateEmployee(emp: any): Observable<any> {
const httpOptions = { headers: new HttpHeaders({ 'Content-Type': 'application/json' }) };
return this.http.put<any>(this.apiUrl + 'employee/UpdateEmployee/', emp, httpOptions);
}
deleteEmployee(empId: number): Observable<number> {
const httpOptions = { headers: new HttpHeaders({ 'Content-Type': 'application/json' }) };
return this.http.delete<number>(this.apiUrl + 'employee/DeleteEmployee/' + empId, httpOptions);
}
uploadPhoto(photo: any) {
return this.http.post(this.apiUrl + 'employee/savefile', photo);
}
getAllDepartmentNames(): Observable<any[]> {
return this.http.get<any[]>(this.apiUrl + 'employee/GetAllDepartmentNames');
}
}
Components
Department Components
Now, Open the department.component.html and add app-show-department selector
<app-show-department></app-show-department>
Now, Open the show-department.component.html and add code.
Note
I have added filtering and sorting in show-department.
I have used Boostrap model popup design (https://getbootstrap.com/docs/5.2/components/modal/)
<button type="button" class="btn btn-primary m-2 float-end" data-bs-toggle="modal" data-bs-target="#exampleModal"
(click)="addClick()">
Add Department
</button>
<!-- Modal -->
<div class="modal fade" id="exampleModal" tabindex="-1" role="dialog" aria-labelledby="exampleModalLabel"
aria-hidden="true">
<div class="modal-dialog modal-dialog-centered modal-xl" role="document">
<div class="modal-content">
<div class="modal-header">
<h5 class="modal-title" id="exampleModalLabel">{{ModalTitle}}</h5>
<button type="button" class="close" data-bs-dismiss="modal" aria-label="Close" (click)="closeClick()">
<span aria-hidden="true">×</span>
</button>
</div>
<div class="modal-body">
<app-add-edit-department [depart]="depart" *ngIf="ActivateAddEditDepartComp">
</app-add-edit-department>
</div>
</div>
</div>
</div>
<table class="table table-striped">
<thead>
<tr>
<th>
<div class="d-flex flex-row">
<input class="form-control m-2" [(ngModel)]="DepartmentIdFilter" (keyup)="FilterFn()" placeholder="Filter">
<button type="button" class="btn btn-light" (click)="sortResult('DepartmentId',true)">
<svg xmlns="http://www.w3.org/2000/svg" width="16" height="16" fill="currentColor"
class="bi bi-arrow-down-square-fill" viewBox="0 0 16 16">
<path
d="M2 0a2 2 0 0 0-2 2v12a2 2 0 0 0 2 2h12a2 2 0 0 0 2-2V2a2 2 0 0 0-2-2H2zm6.5 4.5v5.793l2.146-2.147a.5.5 0 0 1 .708.708l-3 3a.5.5 0 0 1-.708 0l-3-3a.5.5 0 1 1 .708-.708L7.5 10.293V4.5a.5.5 0 0 1 1 0z" />
</svg>
</button>
<button type="button" class="btn btn-light" (click)="sortResult('DepartmentId',false)">
<svg xmlns="http://www.w3.org/2000/svg" width="16" height="16" fill="currentColor"
class="bi bi-arrow-up-square-fill" viewBox="0 0 16 16">
<path
d="M2 16a2 2 0 0 1-2-2V2a2 2 0 0 1 2-2h12a2 2 0 0 1 2 2v12a2 2 0 0 1-2 2H2zm6.5-4.5V5.707l2.146 2.147a.5.5 0 0 0 .708-.708l-3-3a.5.5 0 0 0-.708 0l-3 3a.5.5 0 1 0 .708.708L7.5 5.707V11.5a.5.5 0 0 0 1 0z" />
</svg>
</button>
</div>
Department Id
</th>
<th>
<div class="d-flex flex-row">
<input class="form-control m-2" [(ngModel)]="DepartmentNameFilter" (keyup)="FilterFn()" placeholder="Filter">
<button type="button" class="btn btn-light" (click)="sortResult('DepartmentName',true)">
<svg xmlns="http://www.w3.org/2000/svg" width="16" height="16" fill="currentColor"
class="bi bi-arrow-down-square-fill" viewBox="0 0 16 16">
<path
d="M2 0a2 2 0 0 0-2 2v12a2 2 0 0 0 2 2h12a2 2 0 0 0 2-2V2a2 2 0 0 0-2-2H2zm6.5 4.5v5.793l2.146-2.147a.5.5 0 0 1 .708.708l-3 3a.5.5 0 0 1-.708 0l-3-3a.5.5 0 1 1 .708-.708L7.5 10.293V4.5a.5.5 0 0 1 1 0z" />
</svg>
</button>
<button type="button" class="btn btn-light" (click)="sortResult('DepartmentName',false)">
<svg xmlns="http://www.w3.org/2000/svg" width="16" height="16" fill="currentColor"
class="bi bi-arrow-up-square-fill" viewBox="0 0 16 16">
<path
d="M2 16a2 2 0 0 1-2-2V2a2 2 0 0 1 2-2h12a2 2 0 0 1 2 2v12a2 2 0 0 1-2 2H2zm6.5-4.5V5.707l2.146 2.147a.5.5 0 0 0 .708-.708l-3-3a.5.5 0 0 0-.708 0l-3 3a.5.5 0 1 0 .708.708L7.5 5.707V11.5a.5.5 0 0 0 1 0z" />
</svg>
</button>
</div>
Department Name
</th>
<th>Options</th>
</tr>
</thead>
<tbody>
<tr *ngFor="let dataItem of DepartmentList">
<td>{{dataItem.DepartmentId}}</td>
<td>{{dataItem.DepartmentName}}</td>
<td>
<button type="button" class="btn btn-light mr-1" data-bs-toggle="modal" data-bs-target="#exampleModal"
(click)="editClick(dataItem)" data-backdrop="static" data-keyboard="false">
<svg width="1em" height="1em" viewBox="0 0 16 16" class="bi bi-pencil-square" fill="currentColor"
xmlns="http://www.w3.org/2000/svg">
<path
d="M15.502 1.94a.5.5 0 0 1 0 .706L14.459 3.69l-2-2L13.502.646a.5.5 0 0 1 .707 0l1.293 1.293zm-1.75 2.456l-2-2L4.939 9.21a.5.5 0 0 0-.121.196l-.805 2.414a.25.25 0 0 0 .316.316l2.414-.805a.5.5 0 0 0 .196-.12l6.813-6.814z" />
<path fill-rule="evenodd"
d="M1 13.5A1.5 1.5 0 0 0 2.5 15h11a1.5 1.5 0 0 0 1.5-1.5v-6a.5.5 0 0 0-1 0v6a.5.5 0 0 1-.5.5h-11a.5.5 0 0 1-.5-.5v-11a.5.5 0 0 1 .5-.5H9a.5.5 0 0 0 0-1H2.5A1.5 1.5 0 0 0 1 2.5v11z" />
</svg>
</button>
<button type="button" class="btn btn-light mr-1" (click)="deleteClick(dataItem)">
<svg width="1em" height="1em" viewBox="0 0 16 16" class="bi bi-trash-fill" fill="currentColor"
xmlns="http://www.w3.org/2000/svg">
<path fill-rule="evenodd"
d="M2.5 1a1 1 0 0 0-1 1v1a1 1 0 0 0 1 1H3v9a2 2 0 0 0 2 2h6a2 2 0 0 0 2-2V4h.5a1 1 0 0 0 1-1V2a1 1 0 0 0-1-1H10a1 1 0 0 0-1-1H7a1 1 0 0 0-1 1H2.5zm3 4a.5.5 0 0 1 .5.5v7a.5.5 0 0 1-1 0v-7a.5.5 0 0 1 .5-.5zM8 5a.5.5 0 0 1 .5.5v7a.5.5 0 0 1-1 0v-7A.5.5 0 0 1 8 5zm3 .5a.5.5 0 0 0-1 0v7a.5.5 0 0 0 1 0v-7z" />
</svg>
</button>
</td>
</tr>
</tbody>
</table>
Now, Open the show-department.component.ts file and add code.
import { Component, OnInit } from '@angular/core';
import { ApiserviceService } from 'src/app/apiservice.service';
@Component({
selector: 'app-show-department',
templateUrl: './show-department.component.html',
styleUrls: ['./show-department.component.css']
})
export class ShowDepartmentComponent implements OnInit {
constructor(private service: ApiserviceService) { }
DepartmentList: any = [];
ModalTitle = "";
ActivateAddEditDepartComp: boolean = false;
depart: any;
DepartmentIdFilter = "";
DepartmentNameFilter = "";
DepartmentListWithoutFilter: any = [];
ngOnInit(): void {
this.refreshDepList();
}
addClick() {
this.depart = {
DepartmentId: "0",
DepartmentName: ""
}
this.ModalTitle = "Add Department";
this.ActivateAddEditDepartComp = true;
}
editClick(item: any) {
this.depart = item;
this.ModalTitle = "Edit Department";
this.ActivateAddEditDepartComp = true;
}
deleteClick(item: any) {
if (confirm('Are you sure??')) {
this.service.deleteDepartment(item.DepartmentId).subscribe(data => {
alert(data.toString());
this.refreshDepList();
})
}
}
closeClick() {
this.ActivateAddEditDepartComp = false;
this.refreshDepList();
}
refreshDepList() {
this.service.getDepartmentList().subscribe(data => {
this.DepartmentList = data;
this.DepartmentListWithoutFilter = data;
});
}
sortResult(prop: any, asc: any) {
this.DepartmentList = this.DepartmentListWithoutFilter.sort(function (a: any, b: any) {
if (asc) {
return (a[prop] > b[prop]) ? 1 : ((a[prop] < b[prop]) ? -1 : 0);
}
else {
return (b[prop] > a[prop]) ? 1 : ((b[prop] < a[prop]) ? -1 : 0);
}
});
}
FilterFn() {
var DepartmentIdFilter = this.DepartmentIdFilter;
var DepartmentNameFilter = this.DepartmentNameFilter;
this.DepartmentList = this.DepartmentListWithoutFilter.filter(
function (el: any) {
return el.DepartmentId.toString().toLowerCase().includes(
DepartmentIdFilter.toString().trim().toLowerCase()
) &&
el.DepartmentName.toString().toLowerCase().includes(
DepartmentNameFilter.toString().trim().toLowerCase())
}
);
}
}
Now, Open the add-edit-department.component.html and add code.
<div class="d-flex flex-row bd-highlight mb-9">
<div class="p-2 w-100 bd-highlight">
<div class="input-group mb-12">
<span class="input-group-text">Department Name</span>
<input type="text" class="form-control" [(ngModel)]="DepartmentName">
</div>
</div>
</div>
<button (click)="addDepartment()" *ngIf="depart.DepartmentId == '0'" class="btn btn-primary">
Add
</button>
<button (click)="updateDepartment()" *ngIf="depart.DepartmentId !='0'" class="btn btn-primary">
Update
</button>
Now, Open the add-edit-department.component.ts and add code.
import { Component, OnInit, Input } from '@angular/core';
import { ApiserviceService } from 'src/app/apiservice.service';
@Component({
selector: 'app-add-edit-department',
templateUrl: './add-edit-department.component.html',
styleUrls: ['./add-edit-department.component.css']
})
export class AddEditDepartmentComponent implements OnInit {
constructor(private service: ApiserviceService) { }
@Input() depart: any;
DepartmentId = "";
DepartmentName = "";
ngOnInit(): void {
this.DepartmentId = this.depart.DepartmentId;
this.DepartmentName = this.depart.DepartmentName;
}
addDepartment() {
var dept = {
DepartmentId: this.DepartmentId,
DepartmentName: this.DepartmentName
};
this.service.addDepartment(dept).subscribe(res => {
alert(res.toString());
});
}
updateDepartment() {
var dept = {
DepartmentId: this.DepartmentId,
DepartmentName: this.DepartmentName
};
this.service.updateDepartment(dept).subscribe(res => {
alert(res.toString());
});
}
}
Employee Components
Now, Open the employee.component.html and add app-show-employee selector
<app-show-employee></app-show-employee>
Now, Open the show-employee.component.html and add code.
<button type="button" class="btn btn-primary m-2 float-end" data-bs-toggle="modal" data-bs-target="#exampleModal"
(click)="addClick()">
Add Employee
</button>
<!-- Modal -->
<div class="modal fade" id="exampleModal" tabindex="-1" role="dialog" aria-labelledby="exampleModalLabel"
aria-hidden="true">
<div class="modal-dialog modal-dialog-centered modal-xl" role="document">
<div class="modal-content">
<div class="modal-header">
<h5 class="modal-title" id="exampleModalLabel">{{ModalTitle}}</h5>
<button type="button" class="close" data-bs-dismiss="modal" aria-label="Close" (click)="closeClick()">
<span aria-hidden="true">×</span>
</button>
</div>
<div class="modal-body">
<app-add-edit-employee [emp]="emp" *ngIf="ActivateAddEditEmpComp">
</app-add-edit-employee>
</div>
</div>
</div>
</div>
<table class="table table-striped">
<thead>
<tr>
<th>Employee Id</th>
<th>Employee Name</th>
<th>Department</th>
<th>Date Of Joining</th>
<th>Options</th>
</tr>
</thead>
<tbody>
<tr *ngFor="let dataItem of EmployeeList">
<td>{{dataItem.EmployeeId}}</td>
<td>{{dataItem.EmployeeName}}</td>
<td>{{dataItem.Department}}</td>
<td>{{dataItem.DateOfJoining}}</td>
<td>
<button type="button" class="btn btn-light mr-1" data-bs-toggle="modal" data-bs-target="#exampleModal"
(click)="editClick(dataItem)" data-backdrop="static" data-keyboard="false">
<svg width="1em" height="1em" viewBox="0 0 16 16" class="bi bi-pencil-square" fill="currentColor"
xmlns="http://www.w3.org/2000/svg">
<path
d="M15.502 1.94a.5.5 0 0 1 0 .706L14.459 3.69l-2-2L13.502.646a.5.5 0 0 1 .707 0l1.293 1.293zm-1.75 2.456l-2-2L4.939 9.21a.5.5 0 0 0-.121.196l-.805 2.414a.25.25 0 0 0 .316.316l2.414-.805a.5.5 0 0 0 .196-.12l6.813-6.814z" />
<path fill-rule="evenodd"
d="M1 13.5A1.5 1.5 0 0 0 2.5 15h11a1.5 1.5 0 0 0 1.5-1.5v-6a.5.5 0 0 0-1 0v6a.5.5 0 0 1-.5.5h-11a.5.5 0 0 1-.5-.5v-11a.5.5 0 0 1 .5-.5H9a.5.5 0 0 0 0-1H2.5A1.5 1.5 0 0 0 1 2.5v11z" />
</svg>
</button>
<button type="button" class="btn btn-light mr-1" (click)="deleteClick(dataItem)">
<svg width="1em" height="1em" viewBox="0 0 16 16" class="bi bi-trash-fill" fill="currentColor"
xmlns="http://www.w3.org/2000/svg">
<path fill-rule="evenodd"
d="M2.5 1a1 1 0 0 0-1 1v1a1 1 0 0 0 1 1H3v9a2 2 0 0 0 2 2h6a2 2 0 0 0 2-2V4h.5a1 1 0 0 0 1-1V2a1 1 0 0 0-1-1H10a1 1 0 0 0-1-1H7a1 1 0 0 0-1 1H2.5zm3 4a.5.5 0 0 1 .5.5v7a.5.5 0 0 1-1 0v-7a.5.5 0 0 1 .5-.5zM8 5a.5.5 0 0 1 .5.5v7a.5.5 0 0 1-1 0v-7A.5.5 0 0 1 8 5zm3 .5a.5.5 0 0 0-1 0v7a.5.5 0 0 0 1 0v-7z" />
</svg>
</button>
</td>
</tr>
</tbody>
</table>
Markup
Now, Open the show-employee.component.ts and add code.
import { Component, OnInit } from '@angular/core';
import { ApiserviceService } from 'src/app/apiservice.service';
@Component({
selector: 'app-show-employee',
templateUrl: './show-employee.component.html',
styleUrls: ['./show-employee.component.css']
})
export class ShowEmployeeComponent implements OnInit {
constructor(private service: ApiserviceService) { }
EmployeeList: any = [];
ModalTitle = "";
ActivateAddEditEmpComp: boolean = false;
emp: any;
ngOnInit(): void {
this.refreshEmpList();
}
addClick() {
this.emp = {
EmployeeId: "0",
EmployeeName: "",
Department: "",
DateOfJoining: "",
PhotoFileName: "anonymous.png"
}
this.ModalTitle = "Add Employee";
this.ActivateAddEditEmpComp = true;
}
editClick(item: any) {
this.emp = item;
this.ModalTitle = "Edit Employee";
this.ActivateAddEditEmpComp = true;
}
deleteClick(item: any) {
if (confirm('Are you sure??')) {
this.service.deleteEmployee(item.EmployeeId).subscribe(data => {
alert(data.toString());
this.refreshEmpList();
})
}
}
closeClick() {
this.ActivateAddEditEmpComp = false;
this.refreshEmpList();
}
refreshEmpList() {
this.service.getEmployeeList().subscribe(data => {
this.EmployeeList = data;
});
}
}
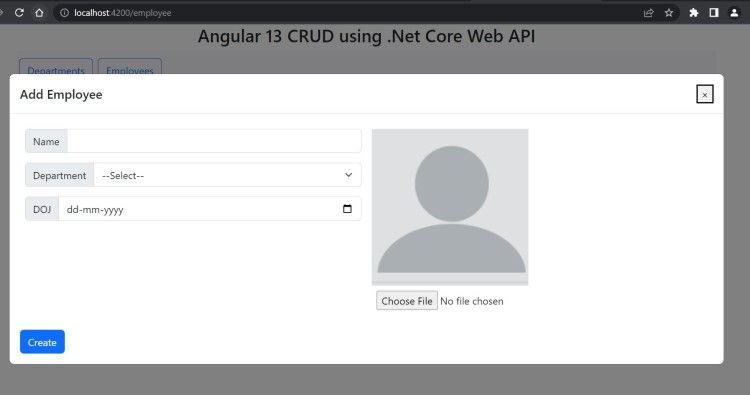
Now, Open the add-edit-employee.component.html and add code.
Note: I have added Photo upload code.
<div class="d-flex flex-row bd-highlight mb-3">
<div class="p-2 w-50 bd-highlight">
<div class="input-group mb-3">
<span class="input-group-text">Name</span>
<input type="text" class="form-control" [(ngModel)]="EmployeeName">
</div>
<div class="input-group mb-3">
<span class="input-group-text">Department</span>
<select class="form-select" [(ngModel)]="Department">
<option>--Select--</option>
<option *ngFor="let dep of DepartmentList">
{{dep.DepartmentName}}
</option>
</select>
</div>
<div class="input-group mb-3">
<span class="input-group-text">DOJ</span>
<input type="date" class="form-control" [(ngModel)]="DateOfJoining">
</div>
</div>
<div class="p-2 w-50 bd-highlight">
<img width="250px" height="250px" [src]="PhotoFilePath" />
<input class="m-2" type="file" (change)="uploadPhoto($event)">
</div>
</div>
<button type="button" (click)="addEmployee()" *ngIf="emp.EmployeeId=='0'" class="btn btn-primary">
Create
</button>
<button type="button" (click)="updateEmployee()" *ngIf="emp.EmployeeId!='0'" class="btn btn-primary">
Update
</button>
Now, Open the add-edit-employee.component.ts and add code.
import { Component, Input, OnInit } from '@angular/core';
import { ApiserviceService } from 'src/app/apiservice.service';
@Component({
selector: 'app-add-edit-employee',
templateUrl: './add-edit-employee.component.html',
styleUrls: ['./add-edit-employee.component.css']
})
export class AddEditEmployeeComponent implements OnInit {
constructor(private service: ApiserviceService) { }
@Input() emp: any;
EmployeeId = "";
EmployeeName = "";
Department = "";
DateOfJoining = "";
PhotoFileName = "";
PhotoFilePath = "";
DepartmentList: any = [];
ngOnInit(): void {
this.loadEmployeeList();
}
loadEmployeeList() {
this.service.getAllDepartmentNames().subscribe((data: any) => {
this.DepartmentList = data;
this.EmployeeId = this.emp.EmployeeId;
this.EmployeeName = this.emp.EmployeeName;
this.Department = this.emp.Department;
this.DateOfJoining = this.emp.DateOfJoining;
this.PhotoFileName = this.emp.PhotoFileName;
this.PhotoFilePath = this.service.photoUrl + this.PhotoFileName;
});
}
addEmployee() {
var val = {
EmployeeId: this.EmployeeId,
EmployeeName: this.EmployeeName,
Department: this.Department,
DateOfJoining: this.DateOfJoining,
PhotoFileName: this.PhotoFileName
};
this.service.addEmployee(val).subscribe(res => {
alert(res.toString());
});
}
updateEmployee() {
var val = {
EmployeeId: this.EmployeeId,
EmployeeName: this.EmployeeName,
Department: this.Department,
DateOfJoining: this.DateOfJoining,
PhotoFileName: this.PhotoFileName
};
this.service.updateEmployee(val).subscribe(res => {
alert(res.toString());
});
}
uploadPhoto(event: any) {
var file = event.target.files[0];
const formData: FormData = new FormData();
formData.append('file', file, file.name);
this.service.uploadPhoto(formData).subscribe((data: any) => {
this.PhotoFileName = data.toString();
this.PhotoFilePath = this.service.photoUrl + this.PhotoFileName;
})
}
}
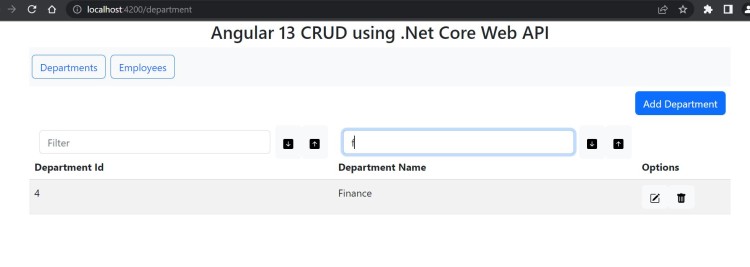
Now Run the Project using ng serve -o OR ng serve --open
Department
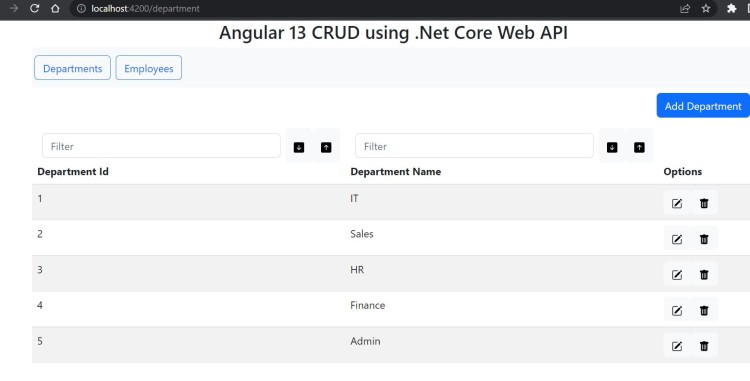
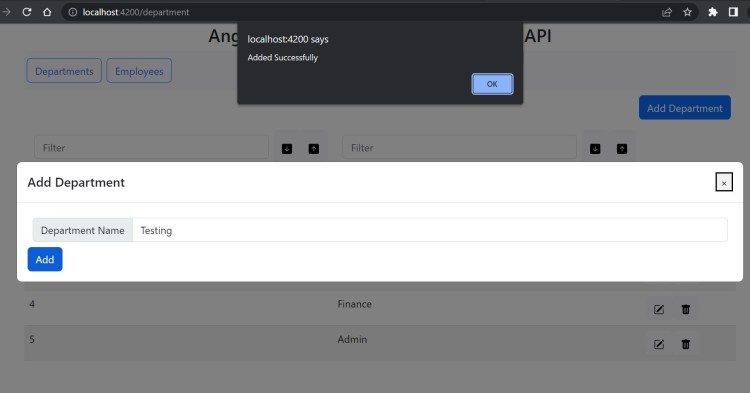
Add Department
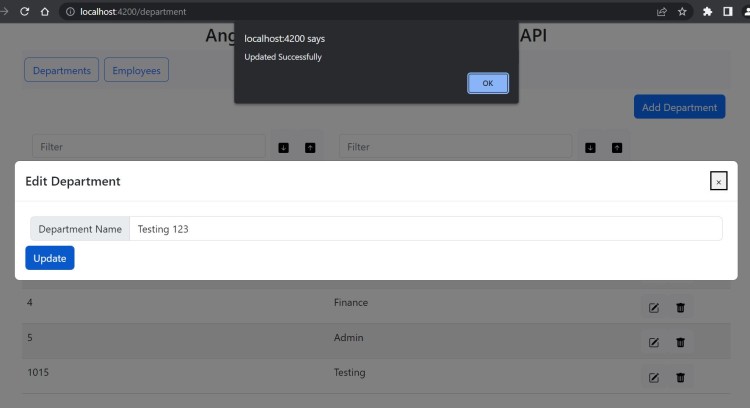
Edit Department
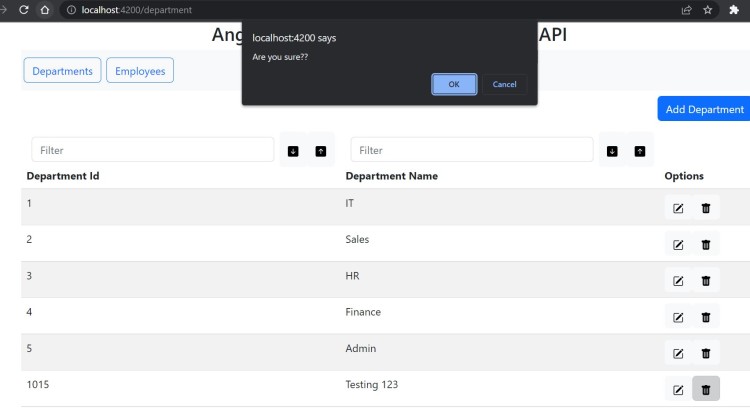
Delete Department
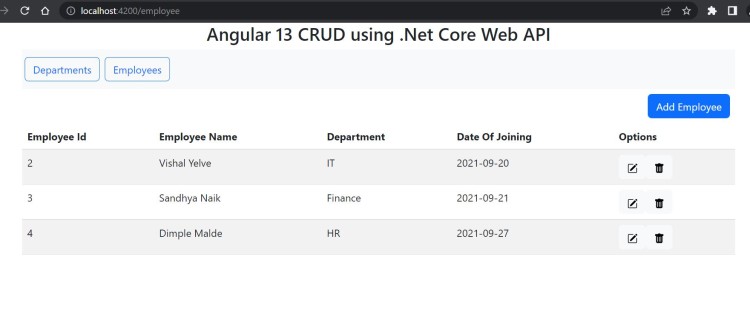
Employee
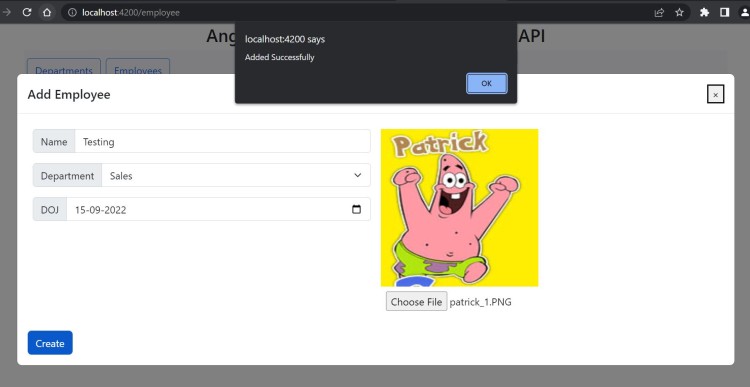
Add Employee
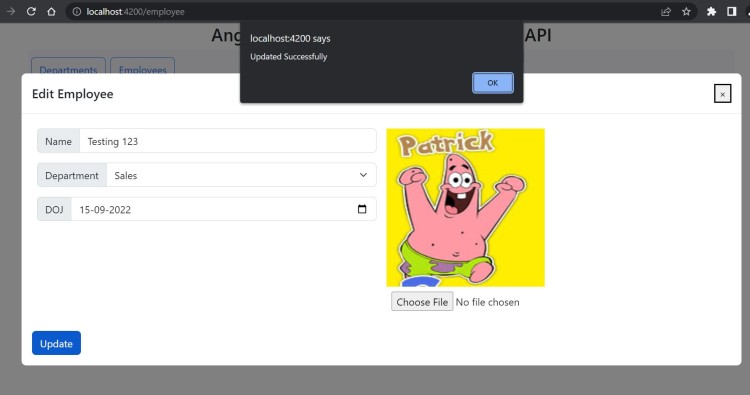
Edit Employee
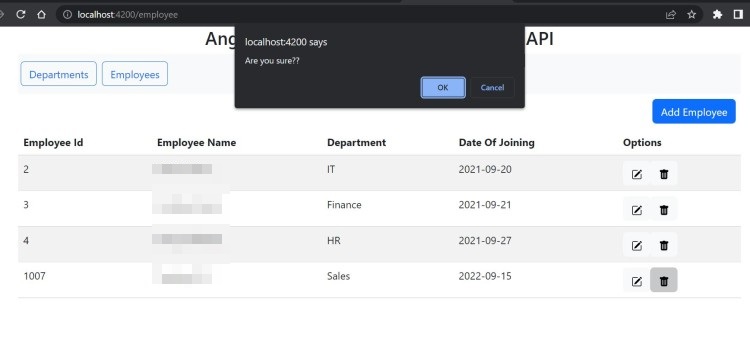
Delete Employee
Filtering & Sorting
Filtering & Sorting