Full Trust European Hosting

BLOG about Full Trust Hosting and Its Technology - Dedicated to European Windows Hosting Customer

FREE Magento Spain Hosting - HostForLIFE.eu :: How to Reinstall Magento Engine without ReUploading The Files

clock March 29, 2014 19:55 by author Peter

Magento is ecommerce software that is available for free download for their website. There are three versions of Magento Hosting available and only one of them is free. The three versions are the community edition, Enterprise Edition and Magento Go.

Magento is highly versatile software and has become popular in a very short span of time. There are many ecommerce software that have been around for a long time though Magento has a great many features built in to the basic installation that attracts a lot many more people. The fact that it also provides a very simple interface helps too. In addition to that, Magento also provides the feature where you can add additional modules to the system. This is done via the extension interface. Furthermore you can make your own functionality or modules to suit the unique requirement that you may be having.

While messing around with the Magento system yourself trying to implement new feature or simply trying a new skin it often happens that Magento freezes itself due to some incompatibility. This is when it will display an error stating that you require to reinstall the Magento Engine. The end users often try to go around the admin panel and begin searching for a button that would reinstall the Magento Engine. But things are not that simple when it comes to reinstalling the Magento Engine and each situation is usually unique. You need to follow proper steps and procedures in order to do so. The Magento Engine can be reinstalled in the following manner.

1. Login to your web server via the cPanel and access the database via phpMyAdmin or a similar database administrator.

2. Drop the tables and in case you have made customizations to the tables you can simply empty the tables.

3. You can then open Magento directory in the file manager and go to the folder app/etc.

4. Here you need to delete the file by the name local.xml.

5. Now when you try to load your Magento website in the browser you will find that the installation page is disp.


Free Italy SQL Server 2012 Hosting - HostForLIFE.eu :: Encrypting SQL Server Connections

clock March 20, 2014 07:44 by author Peter

If you use SQL Server 2012 in the cloud you may not always have a secure connection. Thankfully there is support in several areas within SQL Server to help secure connections. Let’s take a look at a couple.

SQL Server Management Studio
1. In SSMS, go to Object Explorer
2. Click the Connect drop-down, and select Database Engine
3. Enter the Server name and login credentials (don’t click Connect yet!)
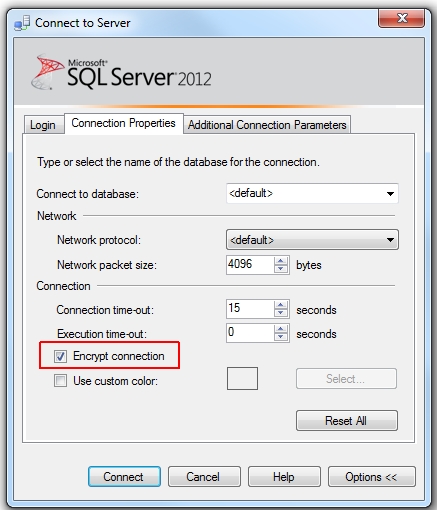
4. Click on the ‘Options >>’ button
5. On the ‘Connection Properties’ tabe, check the box for ‘Encrypt Connection’

6. If you have an untrusted certificate on your server (see below), click on the ‘Additional Connection Parameters’ tab. Enter ‘TrustServerCertificate=True’.

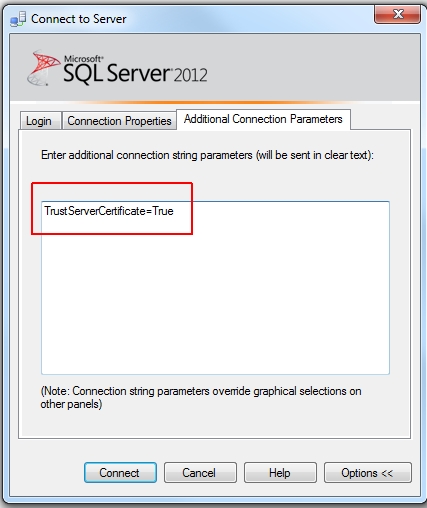
7. Click the ‘Connect’ button.

PowerPivot
1. Open Excel
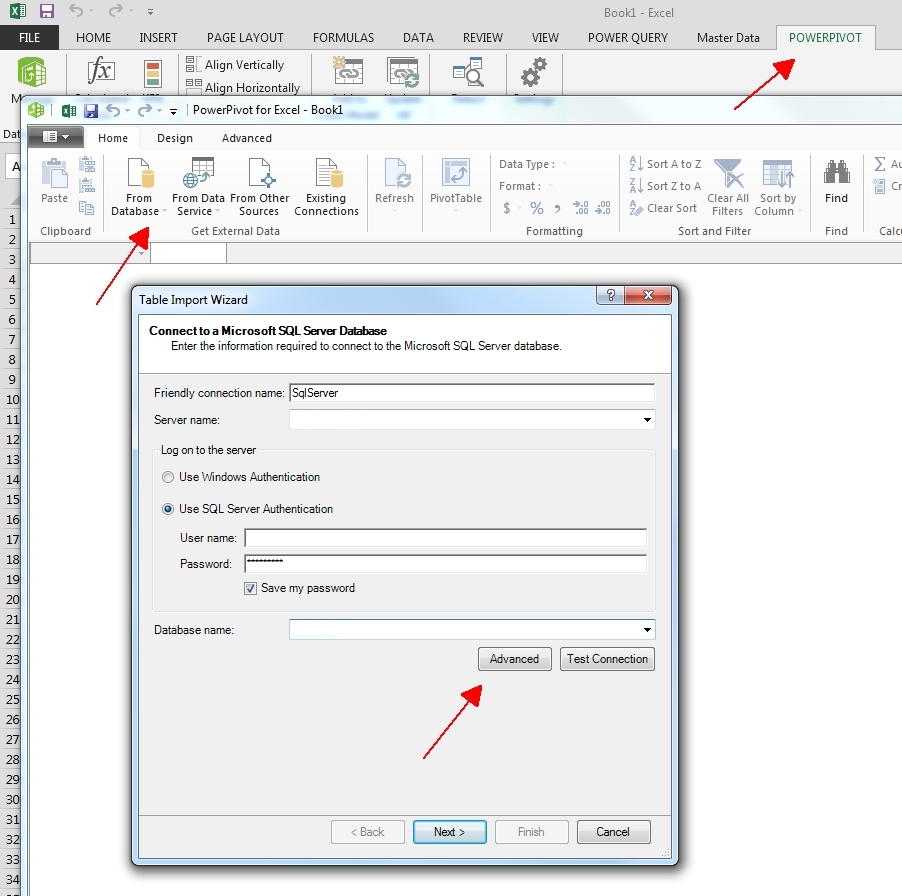
2. Click on the PowerPivot tab
3. Click on the Manage button
4. Select the drop down under ‘From Database’
5. Select ‘From SQL Server’
6. Enter the Server name, login credentials, and Database name
7. Click the ‘Advanced’ button

8. Scroll down to the bottom and set the following:

Trust Server Certificate = True (see certificates below)

Use Encryption for Data = True
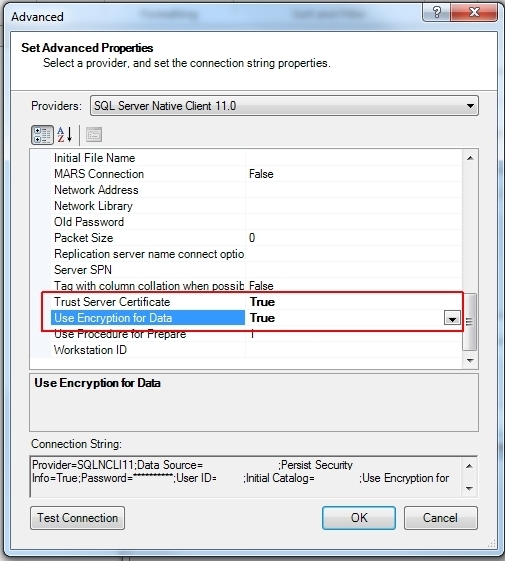
9. Click Ok

10. Select the data sources (tables)

Certificates

Digital certificates can come from various sources. There are several ‘trusted’ 3rd party sources such as Thawte and VeriSign that are called Certificate Authorities (CA). To get a certificate from a trusted source you will most likely need to pay an annual fee. If you have a trusted certificate, you shouldn’t have to tell SQL Server that you want to trust the certificate.On the other hand, if you don’t have a trusted certificate, you should already have a self signed certificate that Windows created.

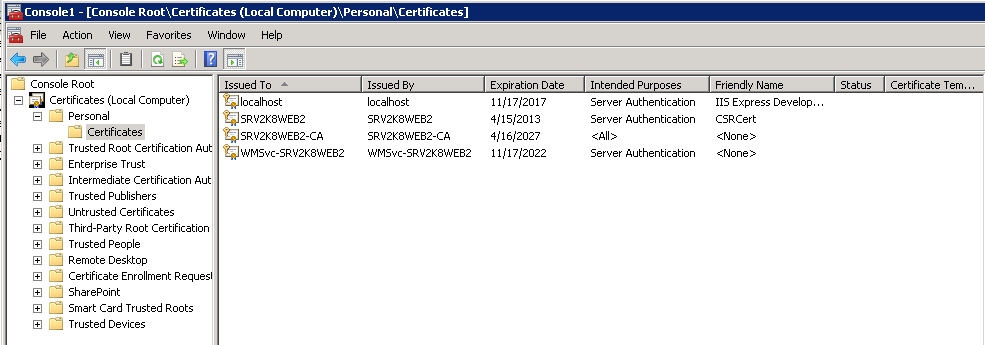
To see a list of certificates installed on your computer, do the following:

1. click on Start, Run, MMC
2. File, Add/Remove Snap-in…
3. Certificates, Add
4. Select Computer Account, Next
5. Local Computer, Finish
6. Ok
7. Expand Certificates, Personal, and click on CertificatesThis shows a list of certificates currently installed. From here you can import and export certificates by right clicking and going under the ‘All Tasks’ menu.

Securing connections in SQL Server is a great way to keep your data private over unsecure lines. SQL Server uses certificates to establish secure connections. Be sure to use these techniques to create secure connections from SSMS or PowerPivot when venturing out into the open cloud.


About HostForLIFE

HostForLIFE is European Windows Hosting Provider which focuses on Windows Platform only. We deliver on-demand hosting solutions including Shared hosting, Reseller Hosting, Cloud Hosting, Dedicated Servers, and IT as a Service for companies of all sizes.

We have offered the latest Windows 2019 Hosting, ASP.NET 5 Hosting, ASP.NET MVC 6 Hosting and SQL 2019 Hosting.


Tag cloud

Sign in