Full Trust European Hosting

BLOG about Full Trust Hosting and Its Technology - Dedicated to European Windows Hosting Customer

European ASP.NET Core Hosting :: How To Install Multiple Versions Of Angular On The Same System?

clock December 22, 2021 06:50 by author Peter

In this article, we are going to discuss “how to install multiple Angular versions on the same computer”. This is an important interview question that was asked by many reputed IT companies.

USECASE
Google’s team is working hard to make Angular better and better and for that, they are releasing new versions frequently. Many times we fall into a situation where we have two projects developed in two different versions, and we need to support both.

This situation raises the requirement to install two different versions on the same computer.

Suppose we have 2 different projects like below
    Project 1 – Angular 12 – Install Locally.
    Project 2 – Angular 13 - Install Globally

In this case, we need two different versions to run both projects correctly.

We can do that using NVM. NVM permits us to do so. But here we are going to discuss using Angular CLI which is a more preferable way.
How to Install Multiple Angular Versions?

STEP 1 - Use the below command to install Angular 13 Globally.
npm install -g @angular/cli

Once Installation is done, we will check the version using the below command,
ng --version


I assume that you are already aware of how to create an Angular project, as the scope of this article is how to install multiple versions.

STEP 2 - Please create a project using Angular 13. If you don’t know then please create a project using the command mentioned in step 5. Kindly refer to this article to set up/install and create a project.

Create Project Folder for Angular Version 12.


STEP 3 - Open Command Prompt and set the working directory to “Angular12.1”.

STEP 4 - Now install angular 12 locally using the below command.


STEP 5 - Create a new project using the below command,
ng new “Angular122Project”

Below screen appear, once created successfully


STEP 6 - Execute Angular 12 Project using the below command. As we have created Angular 13 on port 4200. We will give a new port to Angular 12.
ng serve --port 4002

Install Multiple Angular Versions


Let's browse URL given in the above screen,

STEP 7 - I assume that we have created the Angular 13 Project using the above steps which are running at port 4200.


Let's browse the Angular 13 application using the given URL in the above image.


That’s all for this article. Hope you enjoyed it and find it useful.

HostForLIFE.eu ASP.NET Core Hosting

European best, cheap and reliable ASP.NET hosting with instant activation. HostForLIFE.eu is #1 Recommended Windows and ASP.NET hosting in European Continent. With 99.99% Uptime Guaranteed of Relibility, Stability and Performace. HostForLIFE.eu security team is constantly monitoring the entire network for unusual behaviour. We deliver hosting solution including Shared hosting, Cloud hosting, Reseller hosting, Dedicated Servers, and IT as Service for companies of all size.


European VB.NET Hosting - HostForLIFE :: Namespace Aliases In Visual Basic .NET

clock December 17, 2021 08:28 by author Peter

In Visual Basic .NET, it is possible to declare aliases for namespaces, giving the possibility of using more concise declarations, if the developer desires to do so.

Let's see an example: Typically, the use of StringBuilder class could follow the following three declarative ways:

Without Imports statement

    Dim s As New System.Text.StringBuilder("test")  
    s.Append("123")  

This kind of implementation requires the developer to declare the "s" variable writing down the path to the desired class, in our case StringBuilder, contained into System.Text namespace.

With Imports statement
    Imports System.Text  
    ' ...  
    Dim s As New StringBuilder("test")  
    s.Append("123")  


Using an Imports statement, the programmer can simply use the classes names, for the namespace(s) to be used will be declared at the beginning of the code.

Using Aliases
    Imports sb = System.Text.StringBuilder  
    '...  
    Dim s As New sb("test")  
    s.Append("123")  


The Imports statement could be implemented with customized names. In the example above, I have stated that in the rest of the code, the class System.Text.StringBuilder will be redefined as "sb". So, we can declare a new StringBuilder with the function "New sb()", accessing the same constructors possessed by System.Text.StringBuilder, being sb a simple alias of the real thing.


AngularJS Hosting Europe - HostForLIFE :: What Is Angular And The Latest Feature Release In Angular 13?

clock December 14, 2021 06:38 by author Peter

In this article, we are going to discuss Angular and the latest features released in Angular 13. I will post a series of articles on Angular 13. This is the first article of the series.

We will cover

    What is Angular?
    What is a Single Page Application?
    Important Feature release in Angular version 13

What is Angular?

Let’s see the below image to get a better understanding of what Angular is,

The above image describes the below 4 points, it says,

    Open Source
    Type Script-Based Framework
    Developed by Google.
    Used for Single Page Application.

Let’s combine all the above points and the Angular definition would be,

“Angular is an open-source, TypeScript framework created by Google for single page application using TypeScript and HTML.”

Angular is written in TypeScript and mainly used for

    Large Enterprise Application
    Single Page Application
    Progressive Web Application

Now the question is,

What is a Single Page Application? Let’s understand that,
SPA – Single Page Application

First we will discuss the traditional web page life cycle,


In traditional page life cycle,
The client sent a request to the server. Server renders a new HTML page. This triggers a page refresh in the browser.


In Single Page Application, 

  1. Page load successfully the first time. I mean Client sent a request to the server. The server renders a new HTML page. This trigges a page refresh in the browser.
  2. After that, all subsequent requests with the server happen through AJAX call. I mean client requests to server and server will provide only JSON data instead of HTML.

Important Features release in Angular version 13

The latest version of Angular is 13. Angular 13 was released on 04-Nov-2021. 

Below is a few important features release in Angular 13,

  1. Angular written in TypeScript.
  2. Latest Type version 4.4 support added in Angular 13.
  3. Node.js versions Older than v12.20 are no longer supported in Angular 13.
  4. Rxjs v7.0 library supported.
  5. Dynamically enabled/disabled building properties like min, max etc
  6. Error messaging is improved
  7. A simplified ViewContainerRef.createComponent API allows for the dynamic creation of components.
  8. IE11 support dropped.
  9. Restore history after canceled navigation.
  10. Accessibility improvements for angular material components
  11. Angular now supports the use of persistent build-cache by default for new v13 projects, which results in 68% improvement in build speed.
  12. Custom conditions can be set in ng_package.
  13. Angular CLI has been improved.
  14. Service worker cache is cleared in the safety worker to ensure stale or broken contents are not served in future requests.
  15. The error message has been improved for a missing animation trigger for the Platform browser.

That's all for this article. Hope you enjoy this article.


European ASP.NET Core Hosting :: Node.js API Authentication With JSON Web Tokens

clock December 7, 2021 08:38 by author Peter

In this article, we are going to cover how to access the JSON web token (jwt) and also to protect our routes by the JSON web token.
 
Have you ever thought about the process of authentication? What lies under the layers of abstraction and complexity? Nothing out of the ordinary. It's a method of encrypting data and generating a one-of-a-kind token that users can use to identify themselves. Your identity is verified with this token. It will verify your identity and grant you access to a variety of services. If you don't recognize any of these words, don't worry, I'll explain everything below.
 
Setup
Before we get started into this we should have few things installed in our machine.
    Visual Studio Code ->  VS Code
    Node.js -> Node.js

Prerequisites & Dependencies

Create a new folder with project name (NodeAuthAPI) and open the same folder in Visual Studio Code (VS Code)
 
Run the following command to initialize our package.json file.
    npm init --yes  

 Install all our remaining dependencies
    npm install express jsonwebtoken  

    npm install -g nodemon   

Why these Dependencies?
express - running on the server (Port number)
 
jsonwebtoken - This will be used to sign and verify Json web tokens.
 
nodemon - will use this to restart our server automatically whenever we make changes to our files.
 
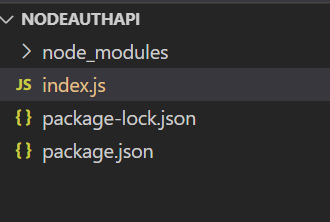
Create a file named index.js inside the project.
 
Project Structure

Let's import the packages in index.js file
    const express = require("express");  
    const jwt = require("jsonwebtoken");  

 Now initialize the app variable with express
    const app = express();  

setup the port number for our server to process
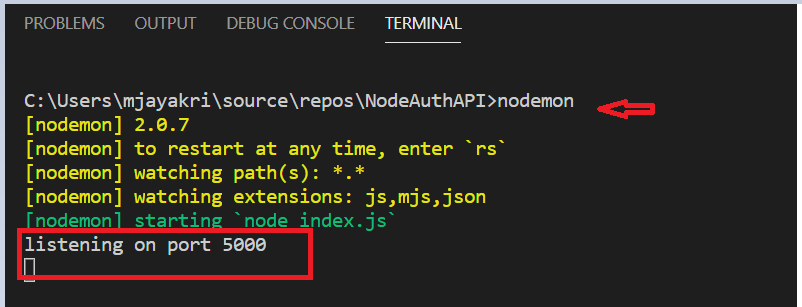
    app.listen(5000,()=>console.log('listening on port 5000'));  

 Let's run and test whether our app is running under the same port number which we mentioned above.
 
Run the command in the terminal - nodemon  to check the output

Create a simple get method to check the output in Postman.
 
index.js
    app.get('/api',(req, res) => {  
        res.json({   
            message: 'Welcome to the API!',  
        });  
    });  


Postman

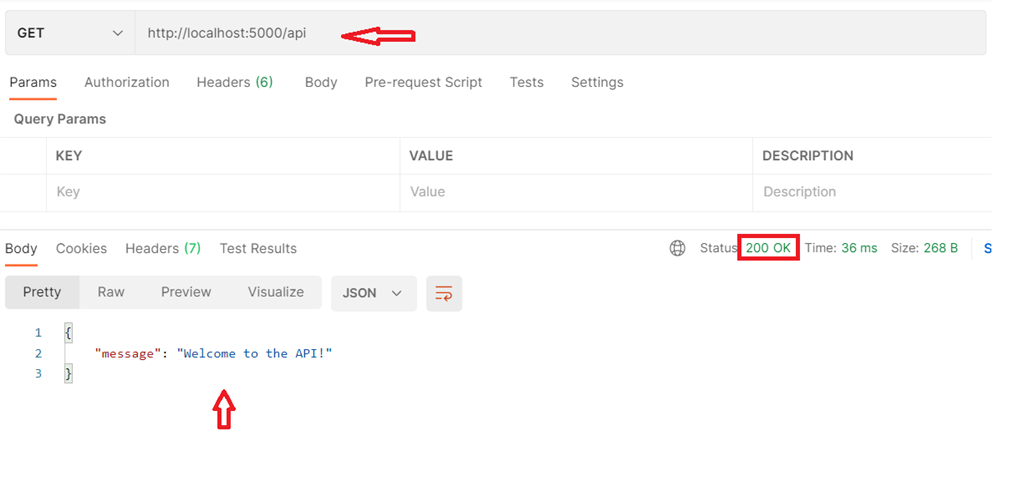
So it is confirmed that our get method is working as expected, Now configure the jwt setup to check with the actual authentication mechanism. Create a post API Login Method with Mock username and Email and also i have setup the token expiration seconds in the same method.

    app.post('/api/Login',(req, res) => {  
        //Mock user  
        const user ={  
            username: 'peter',  
            email: '[email protected]'  
        }  
        jwt.sign({user:user},'secretkey',{expiresIn: '30s'},(err,token)=>{  
            res.json({token})  
        })  
    })  

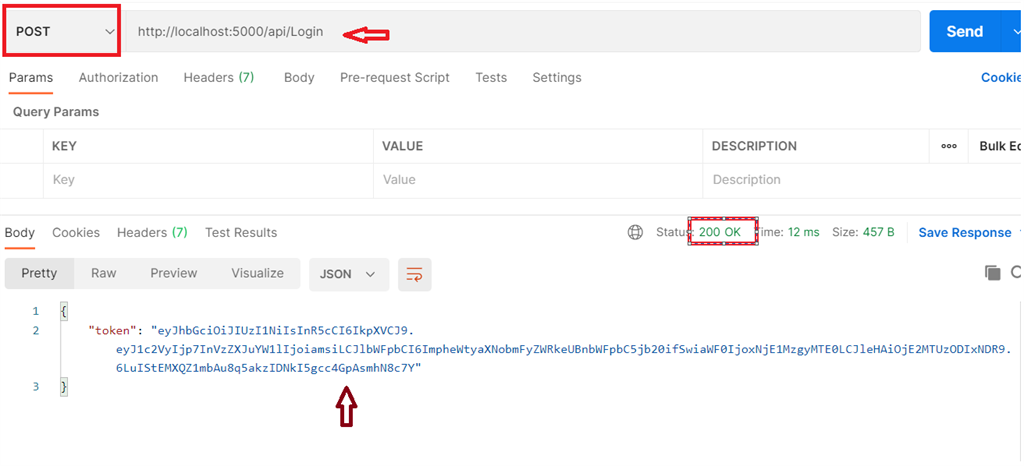
The token is generated with basic credentials, Now we need to validate another API with this token to access the credentials.
 
Create a function and verify the token which will be passed as a header
 Sample   Authorization :   Bearer <your token>

    //Access token  
    //Authorization : Bearer <access token>
      
    //Verify Token  
    function verifyToken(req, res,next) {  
        //Get Auth header value  
        const bearerHearder = req.headers['authorization'];  
        //check if bearer is undefined  
        if(typeof bearerHearder != 'undefined'){  
            //split at the space  
            const bearer = bearerHearder.split(' ');  
            //Get the token from array  
            const bearerToken = bearer[1];  
            // set the token  
            req.token = bearerToken;  
            //Next middleware  
            next();  
      
        }else{  
            //Forbidden  
            res.sendStatus(403);  
        }  
    }  


Let's create an API to validate this token
    // Post to Validate the API with jwt token  
    app.post('/api/validate',verifyToken,(req, res)=>{  
        jwt.verify(req.token,'secretkey',(err,authData)=>{  
            if(err){  
                res.sendStatus(403);  
            }else{  
                res.json({  
                    message: 'Validated',  
                    authData  
                });  
            }  
        });  
    });  


Testing with Postman

If you are trying to access the validate API without passing the token it will give us 403 Forbidden because of unauthorized access.
Now let's get the token first by accessing the Login API and then pass the same token as the header in the Validate API to get the access.

Note
After 30 sec the token will expire because we defined the expiration time in code, we need to get the token again by accessing the login API 


European ASP.NET Core Hosting :: How To Make Your Connection String Encrypted In ASP.NET Using C#?

clock December 6, 2021 06:07 by author Peter

INITIAL CHAMBER

    Open Visual Studio 2010 and create an empty website. Give a suitable name connectionstring_demo.
    In Solution Explorer you get your empty website. Add a web form, SQL Database. Here are the steps:

For Web Form

    connectionstring _demo (Your Empty Website) - Right Click, Add New Item, click Web Form. Name it connectionstring _demo.aspx.

For SQL Server Database
    connectionstring _demo (Your Empty Website) - Right Click, Add New Item, click SQL Server Database. Add Database inside the App_Data_folder.

DESIGN CHAMBER
    Now open your connectionstring _demo.aspx file, where we create our design for encrypting our Connection String.

connectionstring _demo.aspx
    <%@ Page Language="C#" AutoEventWireup="true" CodeFile="Default.aspx.cs" Inherits="_Default" %>  
    <!DOCTYPE html PUBLIC "-//W3C//DTD XHTML 1.0 Transitional//EN" "http://www.w3.org/TR/xhtml1/DTD/xhtml1-transitional.dtd">  
    <html  
        xmlns="http://www.w3.org/1999/xhtml">  
        <head runat="server">  
            <title></title>  
        </head>  
        <body>  
            <form id="form1" runat="server">  
                <div>  
                    <asp:Button ID="Button1" runat="server" onclick="Button1_Click"   
    Text="Press to Encrypt your Connection String" />  
                </div>  
                <p>  
     </p>  
                <p>  
     </p>  
                <p>  
                    <asp:Label ID="Label1" runat="server" Text="Label"></asp:Label>  
                </p>  
            </form>  
        </body>  
    </html>  


CODE CHAMBER:
    Open your connectionstring _demo.aspx.cs and write some code so that our application starts working.

connectionstring _demo.cs
    using System;  
    using System.Collections.Generic;  
    using System.Linq;  
    using System.Web;  
    using System.Web.UI;  
    using System.Configuration;  
    using System.Web.Configuration;  
    using System.Web.UI.WebControls;  
    public partial class _Default: System.Web.UI.Page  
    {  
        const string PROVIDER = "DataProtectionConfigurationProvider";  
        protected void Page_Load(object sender, EventArgs e)  
        {}  
        protected void Button1_Click(object sender, EventArgs e)  
        {  
            Configuration con = WebConfigurationManager.OpenWebConfiguration(Request.ApplicationPath);  
            ConnectionStringsSection sect = con.ConnectionStrings;  
            sect.SectionInformation.ProtectSection(PROVIDER);  
            con.Save();  
            Label1.Text = "Your Connection String is Encrypted Now";  
            Label1.Text += "Your Connection String is:" + ConfigurationManager.ConnectionStrings["dbcon"].ConnectionString;  
        }  
    }  

OUTPUT CHAMBER

Open your Web.config File


    <?xml version="1.0"?>  
    <!--  
    For more information on how to configure your ASP.NET application, please visit  
    http://go.microsoft.com/fwlink/?LinkId=169433  
    -->  
    <configuration>  
        <system.web>  
            <compilation debug="false" targetFramework="4.0" />  
        </system.web>  
        <connectionStrings configProtectionProvider="DataProtectionConfigurationProvider">  
            <EncryptedData>  
                <CipherData>  
                    <CipherValue>  
      
    // Your encrypted string  
      
      
    </CipherValue>  
                </CipherData>  
            </EncryptedData>  
        </connectionStrings>  
    </configuration>  

Hope you liked this. Thank you for reading. Have a good day.

HostForLIFE.eu ASP.NET Core Hosting

European best, cheap and reliable ASP.NET hosting with instant activation. HostForLIFE.eu is #1 Recommended Windows and ASP.NET hosting in European Continent. With 99.99% Uptime Guaranteed of Relibility, Stability and Performace. HostForLIFE.eu security team is constantly monitoring the entire network for unusual behaviour. We deliver hosting solution including Shared hosting, Cloud hosting, Reseller hosting, Dedicated Servers, and IT as Service for companies of all size.


About HostForLIFE

HostForLIFE is European Windows Hosting Provider which focuses on Windows Platform only. We deliver on-demand hosting solutions including Shared hosting, Reseller Hosting, Cloud Hosting, Dedicated Servers, and IT as a Service for companies of all sizes.

We have offered the latest Windows 2019 Hosting, ASP.NET 5 Hosting, ASP.NET MVC 6 Hosting and SQL 2019 Hosting.


Tag cloud

Sign in