Full Trust European Hosting

BLOG about Full Trust Hosting and Its Technology - Dedicated to European Windows Hosting Customer

European Blazor Hosting - HostForLIFE :: TypeScript With Blazor

clock November 26, 2021 07:36 by author Peter

This particular blog will help you to setup and use TypeScript in a Blazor client project.

What is TypeScript ?
TypeScript is a strongly typed programing language built on top of Javascript. TypeScript have lot of pros over the Javascript which includes the power of Object Oriented Programing. TypeScript supports concepts from Object Oriented Programing and will be able to build a scalable and well organised code compared to JavaScript. TypeScript is always very much predictable. Everything in it always stays in the same way it was defined, if you decalre a variable with a type as boolean , it will always stays as boolean.
How to integrate TypeScript with Blazor?

In order to integrate TypeScript with blazor we can follow the below steps,
Install Microsoft.TypeScript.MSBuild nuget package in Blazor client project
Create a TypeScript File in the project
Create a class and the method which to be invoed from blazor C# code

ex

namespace common {
    class Prompt {
        public showAlert() {
            alert("thhis is a test");
        }
    }
}


Now we need to create a method which will return an instance of Prompt class.
export function getPromptInstance(): Prompt {
    return new Prompts();
}


Thats all from TypeScript side. Now lets move to C# side.
Create a Blazor component from where we need to access this type script method
Invoke the getPromptInstance() to get the instance of Prompt class from the razor or cs file using IJSRuntime object.

ex
var promptObject = await this._jSRuntime.InvokeAsync<IJSObjectReference>("common.getPromptInstance");

Now we can invoke the showAlert() using the prompt object
await promptObject.InvokeVoidAsync("showAlert");

Rebuild the solution and make sure .js and .js.map version of newly added TypeScript file has been created as below


European PHP Hosting - HostForLIFE :: User Management With Location Track Using PHP/MySQL

clock November 23, 2021 06:25 by author Peter

In this article, I will explain how to perform user management with their location in PHP using XAMPP server. This application is used to add the user name, email, mobile number and address and is also able to edit details and remove users. Download the XAMPP server in https://www.apachefriends.org/download.html. We can learn using this article curd operation and basic core PHP and MySQL server databases connection. Also all added user can view the google map location.

Here will see MySQL database connection, fetch all user details also insert, update and delete.
Create DB and Table in MySQL database

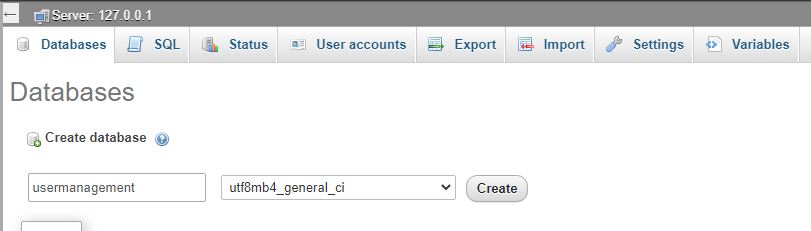
Using phpMyAdmin XAMPP server we can create our db.My database name is usermanagement.

To create table follow this below set of queries.

-- Database: `usermanagement`
-- ---------------------------
-- Table structure for table `tblusers`

CREATE TABLE `tblusers` (
  `ID` int(10) NOT NULL,
  `FirstName` varchar(200) DEFAULT NULL,
  `LastName` varchar(200) DEFAULT NULL,
  `MobileNumber` bigint(10) DEFAULT NULL,
  `Email` varchar(200) DEFAULT NULL,
  `Address` mediumtext DEFAULT NULL,
  `CreationDate` timestamp NOT NULL DEFAULT current_timestamp() ON UPDATE current_timestamp(),
  `Country` varchar(255) DEFAULT NULL
) ENGINE=InnoDB DEFAULT CHARSET=utf8mb4;

-- Dumping data for table `tblusers`

INSERT INTO `tblusers` (`ID`, `FirstName`, `LastName`, `MobileNumber`, `Email`, `Address`, `CreationDate`, `Country`) VALUES
(13, 'Peter', 'S', 9879887711, '[email protected]', 'New York', '2020-10-16 13:51:16', NULL),
(14, 'Scott', 's', 4654564111, '[email protected]', 'London', '2020-10-16 15:21:12', NULL),
(20, 'Leo', 'boss', 908776543, '[email protected]', 'london', '2021-03-03 05:42:04', NULL),
(34, 'Thea', 's', 2323298830, '[email protected]', 'London\r\n', '2021-10-19 06:36:47', NULL),
(36, 'Mark', 'd', 2987123390, '[email protected]', 'Sweden', '2021-10-19 06:36:02', NULL),
(43, 'Friedrich', 'f', 3333333333, '[email protected]', 'Germany', '2021-10-19 06:36:28', NULL);

-- Indexes for dumped tables

-- Indexes for table `tblusers`
ALTER TABLE `tblusers`
  ADD PRIMARY KEY (`ID`);

-- AUTO_INCREMENT for dumped tables

-- AUTO_INCREMENT for table `tblusers`

ALTER TABLE `tblusers`
  MODIFY `ID` int(10) NOT NULL AUTO_INCREMENT, AUTO_INCREMENT=48;
COMMIT;

PHP database connection using MySQL
Create a database.php file and write below code to connect Database
<?php
$con=mysqli_connect("localhost","root","","usermanagement");
if(mysqli_connect_errno($con))
{
  echo "connection failed".mysqli_connect_error($con);
}
?>


index.php
index.php file is our application first page to view all added users.
<?php
$ret = mysqli_query($con, "select * from tblusers");
$cnt = 1;
$row = mysqli_num_rows($ret);
if ($row > 0)
{
    while ($row = mysqli_fetch_array($ret))
    {

?>
    <!--Fetch the Records -->
        <tr>
            <td><?php echo $cnt; ?></td>
            <td><?php echo $row['FirstName']; ?> <?php echo $row['LastName']; ?></td>
            <td><?php echo $row['Email']; ?></td>
            <td><?php echo $row['MobileNumber']; ?></td>
            <td> <?php echo $row['CreationDate']; ?></td>
            <td>
  <a href="read.php?viewid=<?php echo htmlentities($row['ID']); ?>" class="view" title="View" data-toggle="tooltip"><i class="material-icons">&#xE417;</i></a>
                <a href="edit.php?editid=<?php echo htmlentities($row['ID']); ?>" class="edit" title="Edit" data-toggle="tooltip"><i class="material-icons">&#xE254;</i></a>
                <a href="index.php?delid=<?php echo ($row['ID']); ?>" class="delete" title="Delete" data-toggle="tooltip" onclick="return confirm('Do you really want to Delete ?');"><i class="material-icons">&#xE872;</i></a>
            </td>
      <td> <a href="weblocation.php?id=<?php echo ($row['ID']); ?>" class="location" title="location" data-toggle="tooltip"><i class="fa fa-map-marker" aria-hidden="true"></i></a></td>
        </tr>
        <?php
        $cnt = $cnt + 1;
    }
}


insert.php
insert.php file is used to add user information like user name, email, mobile number, and address.
<?php
//Databse Connection file
include ('dbconnection.php');
if (isset($_POST['submit']))
{
    //getting the post values
    $fname = $_POST['fname'];
    $lname = $_POST['lname'];
    $contno = $_POST['contactno'];
    $email = $_POST['email'];
    $add = $_POST['address'];
    //Query select
    $selectquery = mysqli_query($con, "select Email,MobileNumber from  tblusers");
    $cnt = 1;
    while ($row = mysqli_fetch_array($selectquery))
    {

        if ($row['Email'] == $email)
        {

            echo "<script>alert('email is already exists');</script>";
            echo "<script type='text/javascript'> document.location ='insert.php'; </script>";
        }
        if ($row['MobileNumber'] == $contno)
        {
            echo "<script>alert('contactno is already exists');</script>";
            echo "<script type='text/javascript'> document.location ='insert.php'; </script>";
        }
        $cnt = $cnt + 1;
    }
    // Query for data insertion
    $query = mysqli_query($con, "insert into tblusers(FirstName,LastName, MobileNumber, Email, Address) value('$fname','$lname', '$contno', '$email', '$add' )");
    if ($query)
    {
        echo "<script>alert('You have successfully inserted the data');</script>";
        echo "<script type='text/javascript'> document.location ='index.php'; </script>";
    }
    else
    {
        echo "<script>alert('Something Went Wrong. Please try again');</script>";
    }
}
?>

edit.php
We can edit all user details in edit.php
<?php
//Database Connection
include ('dbconnection.php');
if (isset($_POST['submit']))
{
    $eid = $_GET['editid'];
    //Getting Post Values
    $fname = $_POST['fname'];
    $lname = $_POST['lname'];
    $contno = $_POST['contactno'];
    $email = $_POST['email'];
    $add = $_POST['address'];
    //Query for data updation
    $query = mysqli_query($con, "update  tblusers set FirstName='$fname',LastName='$lname', MobileNumber='$contno', Email='$email', Address='$add' where ID='$eid'");

    if ($query)
    {
        echo "<script>alert('You have successfully update the data');</script>";
        echo "<script type='text/javascript'> document.location ='index.php'; </script>";
    }
    else
    {
        echo "<script>alert('Something Went Wrong. Please try again');</script>";
    }
}
?>


delete.php
delete.php file is used to remove each user separately
<?php
//database conection  file
include ('dbconnection.php');
//Code for deletion
if (isset($_GET['delid']))
{
    $rid = intval($_GET['delid']);
    $sql = mysqli_query($con, "delete from tblusers where ID=$rid");
    echo "<script>alert('Data deleted');</script>";
    echo "<script>window.location.href = 'index.php'</script>";
}
?>


weblocation.php
Location of users we can track via Google Maps.
<?php
include ('dbconnection.php');
$eid = $_GET['id'];
$ret = mysqli_query($con, "select Address from tblusers where ID='$eid'");
$row = mysqli_fetch_array($ret);
$selectall = mysqli_query($con, "select Address,FirstName,LastName from tblusers where Id !='$eid'");
if (mysqli_num_rows($selectall) > 0) echo "<b>Same Location users</b><br>";
while ($rows = mysqli_fetch_array($selectall))
{
    if ($rows['Address'] == $row['Address'])
    {
        $match = 1;
        echo $rows['FirstName'] . '' . $rows['LastName'] . '<br>';

    }
}
echo "<br>";
$add = $row['Address'];
?>
<html>
<div class="text-center"><a href="index.php">Back</a></div>
<div>
 <iframe width="50%" height="300" frameborder="0" scrolling="no" marginheight="0" marginwidth="0" src="https://maps.google.com/maps?q=<?=$add; ?>&amp;ie=UTF8&amp;&amp;output=embed"></iframe><br />
</div>
</html>


European VB.NET Hosting - HostForLIFE :: Invoke Method To Update UI From Secondary Threads In VB.NET

clock November 17, 2021 07:36 by author Peter

As many developers well knows it's not possible -- using .NET Framework -- to realize a direct interaction between processes which run on threads different from the one on which the UI resides (typically, the main thread of the program). We are in a situation from which we can exploit the many advantages of multi-threading programming to execute parallel operations, but if those tasks must return an immediate graphical result, we won't be able to access the user controls from those processes.

In this brief article, we'll see how it can be possible, through the Invoke method, which is available to all controls through the System.Windows.Form namespace, to realize such functionality in order to execute a graphic refresh and update through delegates.

Delegates
The MSDN documentation states delegates are constructs which could be compared to the pointer of functions in languages like C or C++. Delegates incapsulate a method inside an object. The delegate object could then be passed to code which will execute the referenced method, or method that could be unknown during the compilation phase of the program itself. Delegates could be EventHandler instances, MethodInvoker-type objects, or any other form of object which ask for a void list of parameters.

Here follows a pretty trivial, though effective, example of their use.

Basic example

Let's consider a WinForm on which will reside a Label, Label2. That label must be use to show an increasing numeric counter. Since we desire to execute the value increase on a separated thread, we will incur into the named problem. Let's see why. First of all, we will write the code that will execute the increment of our numerical value on a secondary task from the main one, trying to update Label2, to observe the result of the operation.
    Private Sub Form1_Load(sender As Object, e As EventArgs) Handles MyBase.Load  
      Dim n As Integer = 0  
       
      Dim t As New Task(New Action(Sub()  
                                  n += 1  
                    Label2.Text = n.ToString  
         End Sub))  
     t.Start()  
    End Sub


At runtime, the raised exception will attest what we saw up to here: it's not possible to modify an object properties (in reality, some of them), if the object itself is managed from a different thread other than the main one.

Yet, the Label control has - like any other control - a method named Invoke, through which we can call delegates toward the main thread. We can rewrite our method like the following. This time, for the sake of completeness, inserting our increment in a loop, to show how Invoke can work inside loops too.
    Private Sub Form1_Load(sender As Object, e As EventArgs) Handles MyBase.Load  
      Dim n As Integer = 0  
       
      Dim t As New Task(New Action(Sub()  
      For n = 1 To 60000  
       
      Label2.Invoke(Sub()  
               Label2.Text = n.ToString  
               End Sub)  
      Next  
     End Sub))  
      t.Start()  
    End Sub


Running the program we can see how the graphical data update will be correctly executed, simultaneously with the development of the numerical variable.

That's -- as aforementioned -- a very basic and trivial example, but in a delegate context it's possible to execute an arbitrary number of operations of different complexity, making it possible to realize any feature in regarding of cross-threading operations.

Update UI from different tasks
To explore the subject further, we'll see now a more demanding example, in terms of resources needed. In this case, we'll make a program that will process simultaneously many text files, to update the UI to show what a single thread is doing in a given moment.

Example definition
We have 26 different text files, each of which contains a variable number of words, mainly italian but not exclusively. Those words begin with a particular letter: for example, the file "dizionario_a.txt" will contain only words which stars with "a", "dizionario_b.txt" only those which starts with "b", and so on. We want to write a program which possesses 26 labels and, starting a task for each letter, will proceed in inserting every read word in a variable of type List(Of String). Each task must show the processed word, so that every thread will execute -- through the Invoke() method -- the refreshing of the content of the Label on which it works.

Let's take a look to the code, to make some considerations after it.
    imports System.IO  
       
    public class Form1  
       
        Dim wordList As New List(Of String)  
       
        Public Sub AddWords(letter As Char, lbl As Label)  
            Using sR As New StreamReader(Application.StartupPath & "\text\dizionario_" & letter & ".txt")  
                While Not sR.EndOfStream  
                    Dim word As String = sR.ReadLine  
       
                    wordList.Add(word)  
       
                    lbl.Invoke(Sub()  
                          lbl.Text = word  
                          counter.Text = wordList.Count.ToString  
                          Me.Refresh()  
                        End Sub)  
                End While  
            End Using  
       
            lbl.ForeColor = Color.Green  
        End Sub  
       
        Private Sub Form1_Load(sender As Object, e As EventArgs) Handles MyBase.Load  
            Me.DoubleBuffered = True  
       
            Dim _x As Integer = 8  
            Dim _y As Integer = 40  
       
            For ii As Integer = Asc("a") To Asc("z")  
       
                Dim c As New Label  
                c.Name = "Label" & ii.ToString("000")  
                c.Text = "---"  
                c.Top = _y  
                c.Left = _x  
                Me.Controls.Add(c)  
       
                _y += 20  
                If _y > 180 Then  
                    _y = 40  
                    _x += 120  
                End If  
       
                Dim j As Integer = ii  
                Dim t As New Task(Sub()  
                      AddWords(Chr(j), CType(Me.Controls("Label" & j.ToString("000")), Label))  
                     End Sub)  
       
                t.Start()  
            Next  
       
        End Sub  
       
    End Class


The project is a simple WinForms program. During Load() event, we'll create all the Labels we need, starting the tasks that will use, each of them on a different word, the AddWords() subroutine, to process a single dictionary (dictionary files will be found in the downloadable project, at the end of the article). We will see, taking a look at the loop in the Load() event, that each created task is launched immediately, letting the OS the worries of queueing those processes which aren't immediately manageable.

Each task, calling the AddWords() subroutine, will provide in: 1) opening the file having a given letter, 2) read each line, 3) save that value in the List wordList. We will also note a calling to the method Invoke() on the Label passed as argument to the subroutine. An interesting particular is that inside a single Invoke() a developer can manage more than a single UI update. In our specific case, we can see how the Label is updated, updating also the one named "counter", which we will use to show the global number of words read to a given moment. Moreover, to help the graphical rendering of our controls, we will call upon the Refresh() method of the Form itself, though - doing so - we will impair the overall performances, since the program will dedicate part of its cycles to refresh the Form and all its children, at every iteration.

As we can see running the code, or through the following video, the update of the content of our controls will happen in a concerted way, allowing each task to modify the value of controls which constitutes the UI of our program.


European Blazor Hosting - HostForLIFE :: Blazor - JavaScript Isolation (ES6 Modules & Blazor)

clock November 16, 2021 07:16 by author Peter

When using JavaScript in Blazor, we typically add the reference to our JavaScript files in _Host.cshtml. This allows us to access our JavaScript from anywhere in our Blazor application.

Since Blazor apps are SPAs (Single-Page Applications), it makes sense why it works this way. But, we often don’t want to pollute the global JavaScript namespace with every function and variable. Often, an individual component will need its own JavaScript to work correctly. How can we isolate JavaScript code to a single component?
Objects As Namespaces

One solution you might find online is to wrap all JavaScript code in objects, effectively making namespaces for each component:
window.MyNamespace = {
    MyFunction: function() {
        ...
    },
};


This works, but it is cumbersome to work with and all of these objects are still globally visible. We still don’t have true isolation.

Luckily, JSInterop in Blazor supports ES6 Modules.

Using ES6 Modules in Blazor
Modules in JavaScript allow us to completely isolate scripts from the global namespace. With a module, only the components that import it can access it, and only code that is explicitly exported within the module can be accessed. This allows us to tightly control access to our code and removes namespace pollution in large projects.

Let’s say we have a component that displays the start time of an event. This start time is stored in our system and displayed as UTC, but when the user clicks a button, we want the displayed time converted to their local timezone. We can do this with the help of JavaScript, since the browser has access to the user's timezone.

First let's create a Blazor Component called TimeDisplay.
[TimeDisplay.razor]

<p>Event starts at: @displayTime.ToString("g")</p>
<button class="btn btn-primary" @onclick="OnClick">Click me</button>
@code {
    private DateTime displayTime = DateTime.UtcNow;
    private void OnClick() {}
}


For this example, we need to utilize JavaScript to get the user’s local timezone. The rest of the web app doesn’t care about this timezone logic, so we want to isolate it to our TimeDisplay component.

Within the project’s wwwroot folder, we can create a folder called scripts then create a subfolder called components

Then, we add our .js file in this folder,


Let’s write some JavaScript. We want a JavaScript function we can call from C# that lets us pass in a DateTime string in UTC, and it’ll return to us converted into the user’s timezone.

function ConvertStartTimeToLocal(utcDateTime) {
    const utcString = new Date(`${utcDateTime} UTC`);
    return utcString.toLocaleString();
}

Now, typically we would add the reference to this script in _Host.cshtml (In Blazor Server) so that we can access it via the JSInterop features.

But since this JavaScript only corresponds to an individual component, it would be ideal if the component itself could load this JavaScript file.
Loading the script in our Component

To begin, we will still need to [Inject] an IJSRuntime instance like normal so that we can do JS Interop.

The difference is that instead of calling JavaScript functions with the IJSRuntime instance directly, we will use it to import our module and store it as an IJSObjectReference instance.
// TimeDisplay.razor
@code {
[Inject] IJSRuntime JSRuntime { get; set; }
IJSObjectReference module;


JavaScript won’t be usable in a component until after the component is rendered to the client, so we must initialize it within the OnAfterRenderAsync method.
protected override async Task OnAfterRenderAsync(bool firstRender)
{
    module = await JSRuntime.InvokeAsync<IJSObjectReference>("import", "./scripts/components/TimeDisplay.js");
}


With this code, instead of calling the JavaScript function directly using the IJSRuntime, we are instead using the import feature of ES6 to import our module. This module is stored as an IJSObjectReference instance, which we can use to communicate with our module directly.

Now let’s implement the button’s OnClick method.
private async Task OnClick()
{
    var converted = await module.InvokeAsync<string>("ConvertStartTimeToLocal",
    displayTime.ToString("g"));
    displayTime = DateTime.Parse(converted);
}


Note carefully, we are using module.InvokeVoidAsync instead of JSRuntime.InvokeVoidAsync. This is the key difference here. We are not calling code from the global JS runtime, we are only accessing code from within our module. Everything else you know about how to use JS Interop stays exactly the same.

Finally, let's go to Index.razor and add our component
<TimeDisplay />

There's a slight catch
If we are using a module, we need to make sure we explicitly dispose of it for garbage collection. If we don't, the JSRuntime will continue holding a reference to our module for the lifetime of the application.

To do this, our component must implement IAsyncDisposable, then we can dispose of our module in the DisposeAsync method.
Here's the completed TimeDisplay component:
@implements IAsyncDisposable
<p>Event starts at: @displayTime.ToString("g")</p>
<button class="btn btn-primary" @onclick="OnClick">Click me</button>
@code {
    [Inject] IJSRuntime JSRuntime {
        get;
        set;
    }
    IJSObjectReference module;
    private DateTime displayTime = DateTime.UtcNow;
    protected override async Task OnAfterRenderAsync(bool firstRender) {
        module = await JSRuntime.InvokeAsync < IJSObjectReference > ("import", "./scripts/components/TimeDisplay.js");
    }
    private async Task OnClick() {
        var converted = await module.InvokeAsync < string > ("ConvertStartTimeToLocal", displayTime.ToString("g"));
        displayTime = DateTime.Parse(converted);
    }
    async ValueTask IAsyncDisposable.DisposeAsync() {
        if (module is not null) {
            await module.DisposeAsync();
        }
    }
}


Let’s run the app. Once the page loads, click on the button and see the result

Woops! We are seeing this error because with ES6 modules, only code that is marked with export can be seen from outside the module. There are a couple of ways to do this, and I’ll show both, but I prefer one over the other and I’ll explain why later.

The change we need to make is very simple, and we don’t need to stop or restart the app.

Note
In Blazor, you don’t need to restart the app after changing JavaScript code. You can just refresh the page after saving the file to see the changes in action.

We will just add the export keyword in front of the function declaration:
export function ConvertStartTimeToLocal(utcDateTime) {
    const utcTimeString = new Date(`${utcDateTime} UTC`);
    return utcTimeString.toLocaleString();
}

Save the file, then refresh the page and try again. You should see the time converted to your local time when the button is clicked.

On the topic of export
Now, as was mentioned previously there is another way to export code out of a JS module, and it’s done like so:
function ConvertStartTimeToLocal(utcDateTime) {
    const utcTimeString = new Date(`${utcDateTime} UTC`);
    return utcTimeString.toLocaleString();
}
export { ConvertStartTimeToLocal };


Both ways of exporting are acceptable. But, I personally prefer putting export before the function/variable declaration. Here’s why: When marking a function or variable explicitly as export function or export const, you can immediately tell just by reading the function declaration that the code is intended to be called from a Blazor component.

Functions and variables declared with export are clearly being used from C# with JSInterop

Functions and variables declared without export are local to the module and won’t be used by C# code

A list of exports at the bottom of the code file makes this far less obvious, in my opinion.

This module feature is, in my opinion, a hidden gem in Blazor. It allows you to write JavaScript files as if everything were global—not worrying about namespacing. The file itself is the namespace!

Stay safe everyone and happy coding!


European Visual Studio 2022 Hosting - HostForLIFE.eu :: What Is New In Visual Studio 2022

clock November 10, 2021 07:00 by author Peter

Microsoft’s Visual Studio is one of the most popular developer IDEs in the world. Not only is Visual Studio modern, feature-rich, and advanced, but it also gets more frequent updates than any other IDE out there. The next version of Visual Studio is going to be Visual Studio 2022. The Visual Studio team just released the first public preview of Visual Studio 2022.

I am sure one of the first questions you probably have is, "What is new in Visual Studio 2022?" In this article, we will learn about the key new features in Visual Studio 2022.
Visual Studio 2022 is modern, faster, intelligent and lightweight

Visual Studio 2022 is much faster and more lightweight compared to the current version. The Visual Studio team has focused on making IDE more user-friendly by enhancing the overall user experience. It looks cleaner.

Visual Studio 2022 also has intelligent features that include recommendations around code cleanness, quality, standards, and best practices.

Let’s look at some of the key updates in Visual Studio by installing the Visual Studio 2022 Community Edition.
Installing Visual Studio 2022

The current version of Visual Studio 2022 is Preview 1 that you can download it from Visual Studio 2022 preview page here.

I selected ASP.NET, Azure, Windows, and UWP workloads and the space required for the installation is close to 20GB.

The good news is, VS 2022 keeps your current login from VS 2019.

Create a new project and the initial screens look similar.

The next screen is a little cleaner.

The current version supports .NET 6.0 (Preview only). I am sure the next upgrades will have more options here.


Key changes and updates in Visual Studio 2022
The first thing I noticed right after the installation was a little cleaner UI and minor color changes of icons. It makes them stand out a little and it's easier to find them in the UI.


Here is a list of some of the key changes in Visual Studio 2022.

Visual Studio 2022 (devenv.exe) is now 64-bit only.

IntelliCode now can complete the whole line auto-complete.

As we saw earlier, Visual Studio 2022 supports .NET 6 SDK (preview for now). .NET 6 also supports .NET MAUI project but you will have to download .NET MAUI workload template direct from Github.

The XAML Designer for .NET Framework has been upgraded in this release.
Git Tooling

Removed the ability to revert back to the Team Explorer Git UI, making the new Git experience the only available built-in tooling.

Removed the option to install the GitHub extension from the Visual Studio Installer.

New versions of the test platform will not be able to run Generic tests and Ordered tests.
Web Tools

The Publish summary page now has actions to start/stop remote debugging and profiling under the '...' menu on the top right corner of the 'Hosting' section

The Connected Services page now has an action to launch Storage Explorer

The "ASP.NET Core Empty" template that comes with .NET 6 is using the new 'minimal APIs' paradigm for which we have started to add support.

Some of the feature that has not implemented yet but is coming in the next releases.

  • Web Live Preview
  • Instrumentation profiler
  • Azure Cloud Service project support
  • T-SQL debugger
  • Web Load Test and TestController/TestAgent
  • Azure DataLake
  • Coded UI Test
  • DotFuscator
  • Incredibuild IDE integration
  • IntelliCode find and replace by example


AngularJS Hosting Europe - HostForLIFE :: Implementing NgRx - Understand And Add Actions In Our Application

clock November 3, 2021 07:27 by author Peter

We have to add some more codes to make NgRx work.

So, the next step is to add the action.

Create a typescript file ‘user-list.action.ts ’ inside the Store folder

In this new file, we will define our action class.
Here, we need to send the action type and payload (user's name in our case) to the reducer.

But the angular Action interface doesn’t have the payload property. It has the type property only.
Since we need to pass a payload to the reducer, we will create a new class ‘UserListAction’ by implementing the Action interface. Action interface has only one property ‘type‘ so, we should implement it in our class.

Please refer to the screenshot below.

To minimize typo errors, it is better to avoid hard-coded strings in our codes. So, I just created a constant for the action type and used the export keyword to make it reusable in the reducer file.

Please refer to the code changes below.


I have changed the type property to read-only. This will ensure that its value never changes from outside.
Next, we should add another property ‘payload’ to pass the user name to the reducer function.
Please refer to the screenshot below.

Here, we imported the UserListAction class and ADD_USER constant from the user-list.action.ts file. And, we used the value of the payload property of UserListAction class to generate the new state. Done!

We have successfully added the action to our application.


About HostForLIFE

HostForLIFE is European Windows Hosting Provider which focuses on Windows Platform only. We deliver on-demand hosting solutions including Shared hosting, Reseller Hosting, Cloud Hosting, Dedicated Servers, and IT as a Service for companies of all sizes.

We have offered the latest Windows 2019 Hosting, ASP.NET 5 Hosting, ASP.NET MVC 6 Hosting and SQL 2019 Hosting.


Tag cloud

Sign in