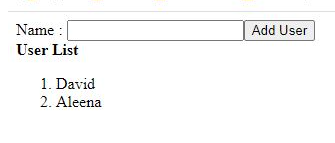
In my previous article, I've tried to explain the basics of NgRx framework. In this article, we are going to implement the NgRx in an Angular application. Let's create a simple angular application first. I have created a simple angular application with a text box to enter username and a button to add the entered name to an array.

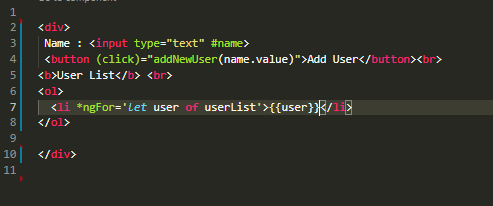
An ordered list is created to display the users by looping through the contents of the array.
Please refer to the screenshots below.
The content of the App.component.html file is shown in the below screenshot.
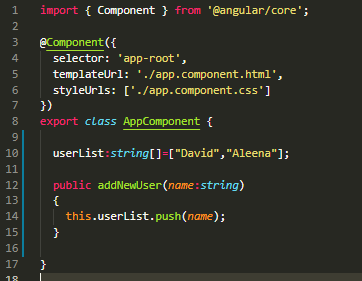
The content of the App.component.ts file is shown in the below screenshot.
We can create an angular service to perform all the user related activities like adding user and keeping user list etc.
But for now, we have created a simple string array to keep the user list.
If we enter anything in the textbox on the screen and click Add User button, it will get inserted into the userList string array and immediately displayed on screen.
But our aim is to store and display the user list data from an NgRx Store.
Let's do it next!
First of all, we should install the ngrx library. We can use the below command to install ngrx library.
npm install –save @ngrx/store
BASIC
Once the installation completes, we can start implementing the NgRx in our application for state management.
Since the Store and reducers are tightly coupled together, we can create the reducer first.
Create Reducer
Please follow the below steps to create the reducer method.
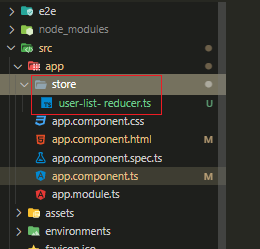
- Create a new folder under app.component folder and name it as ‘Store’
- Inside new folder, create a typescript file and name it as ‘user-list- reducer.ts’
Please see the screenshot below.
The NgRx reduces is just a function with 2 arguments.
Current state
Action
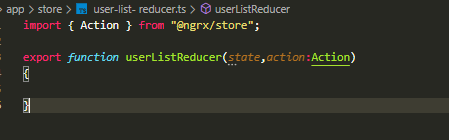
We should export a function with any name we wish.
export function userListReducer(state, action:Action)
{
}
Action interface is imported from @ngrx/store
Please refer to the screenshot below.
We can use the action.type to identify the type of action such as add, update, delete, etc.
Let’s create an initial state as simple object
const intialState={
userList : [“David”, “Aleena”]
}
Then, in the reducer function, I added the initialState as the default value for the state variable
Please refer to the code snippet below
export function userListReducer(state=initialState, action:Action)
{
}
The action argument would have 2 properties.Type and payload(optional)
Based on the type, we can execute different logic inside reducer.
We can use multiple if statements or a switch statement in reducer function to accomplish this.
In this article, we are going to create add user action.
We cannot use the statement ‘initialState.userList.push(newUser)’.
Because, in ngrx, the state should be immutable - ie, we cannot change the current or previous state.
So, in ngrx, we will copy the previous state and add the new change in copied state then return as new state.
In short, we should never touch the existing state.
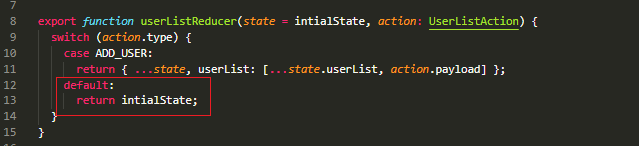
Please refer to the code snippet below.
export function userListReducer(state = intialState, action: Action) {
switch (action.type) {
case 'ADD_USER':
return { ...state, userList: [...state.userList, action] };
}
}
Please refer to the screenshot below for better clarity.

Here we are using the spread (…) operator to copy the current state.
Spread operator is a new addition to the set of operators in JavaScript ES6. This operator is used to make shallow copies of javascript objects.
Let’s understand the above return statement first.
…state will copy all the properties of current state.
Then, we need to update its userList property.(here, we have one property only, but in real app, there might be multiple properties for a state and we might need to update any specific property only).
Since the userList is an array, we should copy all of its current elements using spread operator and then add the new user.
…state.userList pull-out all elements from the array and create a new array by adding a new user to it.
Finally, the reducer function will return the new state which is created immutably from the old state.
Now, at the first time when our application starts up and NgRx loads our reducer, it would initialize our state with the initial state.
To use that initial state and return it unchanged, we need to add a default case to our switch statement to handle any cases we're not explicitly handling.
NgRx will dispatch it automatically when it starts.
In default case, we simply want to return the unchanged state - initial state.
Please refer to the screenshot below.
Great!
We have created our reducer method successfully!