
January 27, 2022 07:16 by
 Peter
PeterYou might feel that there are plenty of articles around which discuss about *ngIf directive in angular - why another article?. The reason I wanted to write this article is :

Many of the articles discuss how to add/remove an element based on the IF condition and do not explain how to write ELSE part and how PIPES can be used with *ngIf.
Let's take one example scenario and see different ways to implement it
Scenario
Display 'Login' and 'Signup' buttons when user is not logged in
Display 'Hello user' message and a 'Logout' button when user is already logged in
Approach #1: Using only IF condition
<div *ngIf="isLoggedIn"> <!-- If user is logged in -->
<label class="mr-2">Hello, User!</label>
<button class="btn btn-primary" (click)="isLoggedIn = !isLoggedIn">
Logout
</button>
</div>
<div *ngIf="!isLoggedIn"> <!-- If user is NOT logged in -->
<button class="btn btn-default mr-2" (click)="isLoggedIn = !isLoggedIn">
Login
</button>
<button class="btn btn-primary">Signup</button>
</div>
As you can see, we are using just two IF conditions ( *ngIf=isLoggedIn and *ngIf=!isLoggedIn ) here.
Approach #2: Using IF / ELSE condition
<div *ngIf="isLoggedIn; else loggedOut"> <!-- If NOT logged in use #loggedOut template-->
<label class="mr-2">Hello, User!</label>
<button class="btn btn-primary" (click)="isLoggedIn = !isLoggedIn">
Logout
</button>
</div>
<ng-template #loggedOut> <!-- loggedOut template -->
<div>
<button class="btn btn-default mr-2" (click)="isLoggedIn = !isLoggedIn">
Login
</button>
<button class="btn btn-primary">Signup</button>
</div>
</ng-template>
So, in the above case, we are using an IF / ELSE condition. If the user is logged in, the div content will be shown, else it will show the content of ng-template ( identified by template reference - #loggedOut )
Approach #3: Using IF THEN / ELSE condition
<div *ngIf="isLoggedIn; then loggedIn; else loggedOut"></div> <!-- If logged in, then use loggedIn template, else use loggedOut template -->
<ng-template #loggedIn> <!-- loggedIn template-->
<div>
<label class="mr-2">Hello, User!</label>
<button class="btn btn-primary" (click)="isLoggedIn = !isLoggedIn">
Logout
</button>
</div>
</ng-template>
<ng-template #loggedOut> <!-- loggedOut template -->
<div>
<button class="btn btn-default mr-2" (click)="isLoggedIn = !isLoggedIn">
Login
</button>
<button class="btn btn-primary">Signup</button>
</div>
</ng-template>
In the above case, we have created two templates ( one for login and the other for logout ), which looks pretty clean compared to other two approaches
There is NO performance benefit of using one approach over the other. It is just that the code looks clean and more readable when you use apporach #3 in case you want to implement IF/ ELSE.
Before we wrap-up, let's see how we can use *ngIf with Pipes.
Scenario :
Display Bitcoin price with the ability to refresh
Implementation :
We will make a HTTP request to one of the public APIs available ( https://api.coindesk.com/v1/bpi/currentprice.json ) to get the bitcoin price.
We will show 'Please wait...' message till we get the response
Once we get the response, we will remove the message and show the bitcoin price
Please note that am using the above api just for DEMO purpose here - not sure whether that can be used for real-time purposes. Please do a research before you use it for any other purposes. More free APIs can be found here : https://apipheny.io/free-api/
import { delay, Observable } from 'rxjs';
@Component({
selector: 'ng-if',
templateUrl: './ngif.component.html',
styleUrls: ['./ngif.component.css'],
})
export class NgIfComponent {
isLoggedIn = false;
bitcoinData: Observable<any>;
constructor(public http: HttpClient) {
this.getBitcoinData();
}
getBitcoinData() {
// Below API is used for DEMO purpose. Please do research before you use it for any other purposes.
this.bitcoinData = this.http
.get('https://api.coindesk.com/v1/bpi/currentprice.json')
.pipe(delay(3000));
}
}
<div id="bitCoinCont">
<span *ngIf="bitcoinData | async as data; else loading"> <!-- the async pipe here ensures that the content of the span element will be rendered only after bitcoin data is fetched -->
{{ data['bpi']['USD']['rate'] }}
</span>
<button class="btn btn-primary" (click)="getBitcoinData()">Refresh</button>
<ng-template #loading>Please wait...</ng-template> <!-- Loading template - displays Please wait.. -->
</div>
Please notice the *ngIf directive above. The async pipe subscribes to the bitcoinData oservable and once the data is available, it will be stored in data. And we are using the properties of data inside span element. The async pipe with *ngIf here ensures that the content of span will be rendered only when the data is available in data variable. Till then, it loads the #loading template.
January 26, 2022 07:22 by
PeterCreating classes based on JSON/XML responses, from APIs are the most usual work for all developers. Normally, if we want to convert a JSON/XML object into class, then we will check tools online for conversion. Hereafter no need for any online tool. Visual Studio can do this work and generate classes from a JSON/XML using just copy-paste. Do you believe this? Yes, there is. In this article, we are going to explore how to convert a JSON/XML object into the classes using Visual Studio.
Convert JSON into Classes
Step 1
Open your project/solution in Visual Studio 2019.
Step 2
Copy the JSON object for which you want to convert as a class. Let consider the below JSON object and i had copied it.
{
"student": {
"name": "Test",
"degree": "IT",
"subjects": [{
"name" : "Computer Science",
"mark": 95
},
{
"name" : "Maths",
"mark": 98
}]
}
}
Step 3
Go to the file where you want to create a class and place the cursor.
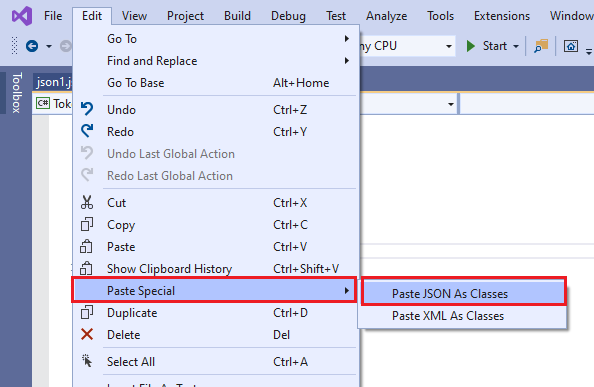
Step 4
Go to Edit -> Paste Special -> Paste JSON as Object
Convert JSON into Classes
Step 5
After clicking the "Paste JSON as Object" menu, the above JSON object is converted into class and pasted in the file as below.
public class Rootobject
{
public Student student { get; set; }
}
public class Student
{
public string name { get; set; }
public string degree { get; set; }
public Subject[] subjects { get; set; }
}
public class Subject
{
public string name { get; set; }
public int mark { get; set; }
}
You can convert any complex JSON object into the class using the above steps.
Convert XML into Classes
Step 1
Open your project/solution in Visual Studio.
Step 2
Copy the XML object for which you want to convert as a class. Let consider the below XML object and i had copied it.
<?xml version="1.0" encoding="UTF-8" ?>
<student>
<name>Test</name>
<degree>IT</degree>
<subjects>
<name>Computer Science</name>
<mark>95</mark>
</subjects>
<subjects>
<name>Maths</name>
<mark>98</mark>
</subjects>
</student>
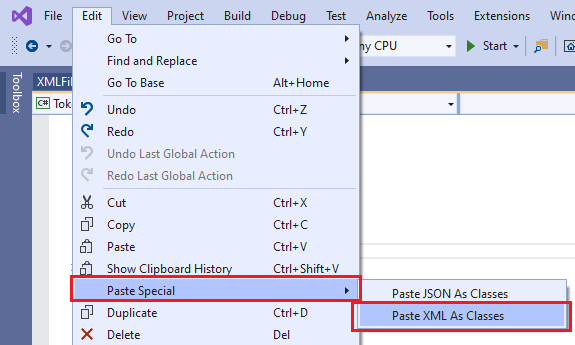
Step 5
After clicking the "Paste XML as Object" menu, the above XML object is converted into class and pasted in the file as below.
// NOTE: Generated code may require at least .NET Framework 4.5 or .NET Core/Standard 2.0.
/// <remarks/>
[System.SerializableAttribute()]
[System.ComponentModel.DesignerCategoryAttribute("code")]
[System.Xml.Serialization.XmlTypeAttribute(AnonymousType = true)]
[System.Xml.Serialization.XmlRootAttribute(Namespace = "", IsNullable = false)]
public partial class student
{
private string nameField;
private string degreeField;
private studentSubjects[] subjectsField;
private string[] textField;
/// <remarks/>
public string name
{
get
{
return this.nameField;
}
set
{
this.nameField = value;
}
}
/// <remarks/>
public string degree
{
get
{
return this.degreeField;
}
set
{
this.degreeField = value;
}
}
/// <remarks/>
[System.Xml.Serialization.XmlElementAttribute("subjects")]
public studentSubjects[] subjects
{
get
{
return this.subjectsField;
}
set
{
this.subjectsField = value;
}
}
/// <remarks/>
[System.Xml.Serialization.XmlTextAttribute()]
public string[] Text
{
get
{
return this.textField;
}
set
{
this.textField = value;
}
}
}
/// <remarks/>
[System.SerializableAttribute()]
[System.ComponentModel.DesignerCategoryAttribute("code")]
[System.Xml.Serialization.XmlTypeAttribute(AnonymousType = true)]
public partial class studentSubjects
{
private string nameField;
private byte markField;
private string[] textField;
/// <remarks/>
public string name
{
get
{
return this.nameField;
}
set
{
this.nameField = value;
}
}
/// <remarks/>
public byte mark
{
get
{
return this.markField;
}
set
{
this.markField = value;
}
}
/// <remarks/>
[System.Xml.Serialization.XmlTextAttribute()]
public string[] Text
{
get
{
return this.textField;
}
set
{
this.textField = value;
}
}
}
Converting JSON/XML object into classes using copy-paste in Visual Studio is one of the great feature. Most of the developers are not aware of this feature in Visual Studio. Definitely, this feature has been used to reduce the developer's manual work (convert JSON/XML into class).
HostForLIFE.eu ASP.NET Core Hosting
European best, cheap and reliable ASP.NET hosting with instant activation. HostForLIFE.eu is #1 Recommended Windows and ASP.NET hosting in European Continent. With 99.99% Uptime Guaranteed of Relibility, Stability and Performace. HostForLIFE.eu security team is constantly monitoring the entire network for unusual behaviour. We deliver hosting solution including Shared hosting, Cloud hosting, Reseller hosting, Dedicated Servers, and IT as Service for companies of all size.

January 4, 2022 08:20 by
PeterVisual Studio Code is a lightweight but powerful source code editor which runs on your desktop and is available for Windows, macOS and Linux. It comes with built-in support for JavaScript, TypeScript and Node.js and has a rich ecosystem of extensions for other languages (such as C++, C#, Java, Python, PHP, Go) and runtimes (such as .NET and Unity).
In this article, will see how to install Visual Studio Code on your PC.
Follow the below steps for the same.
Step 1
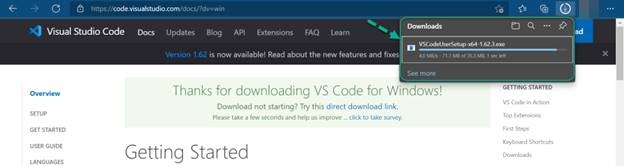
Click here to navigate to Visual Studio Code official website.
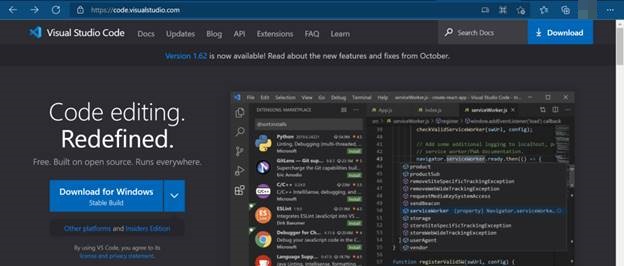
Step 2
Click on Download for Windows.

Step 3
VSCodeUserSetup-x64-1.62.3.exe will be downloaded to your Downloads folder.
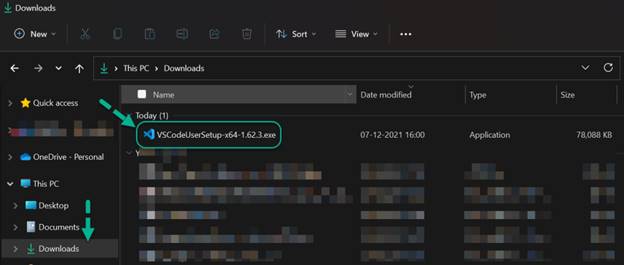
Step 4
Go to the Downloads folder and double click on the executable file.
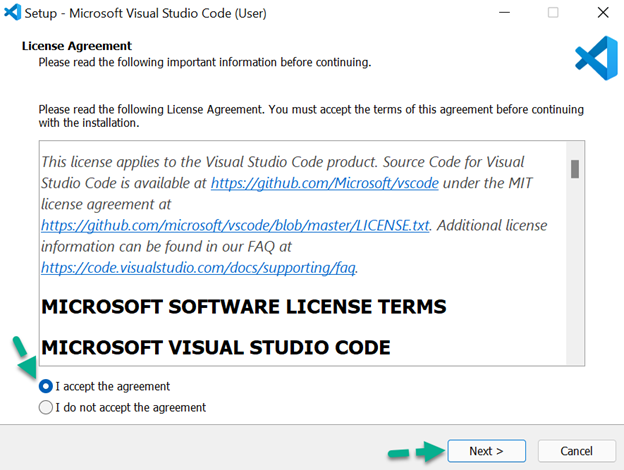
Step 5
Click on I accept the agreement and Click on Next.
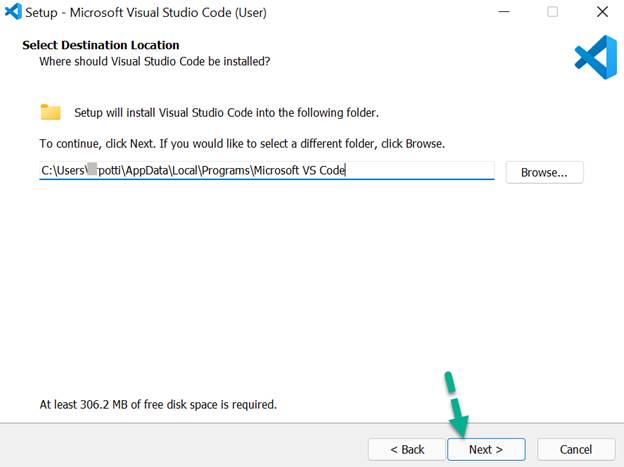
Step 6
Click on Next.
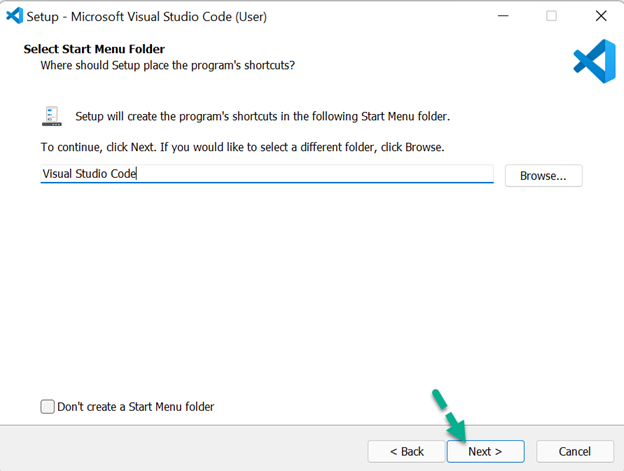
Step 7
Click on Next.
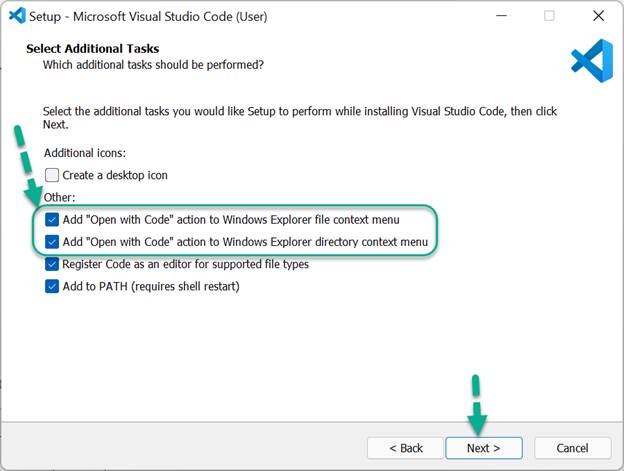
Step 8
Select Add “Open with Code” action to Windows Explorer file context menu and Add “Open with Code” action to Windows Explorer directory context menu, checkboxes.
Click on Next.
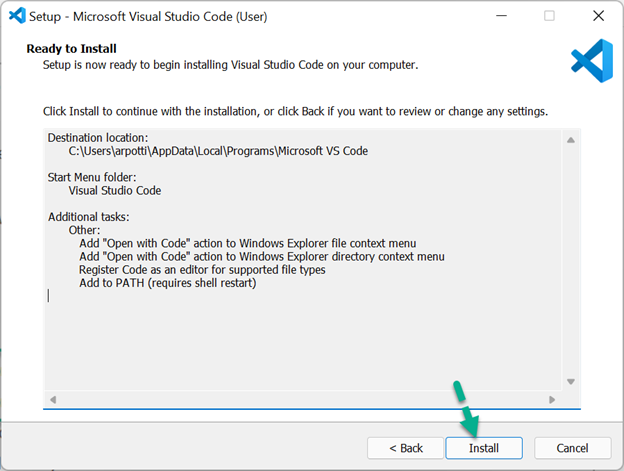
Step 9
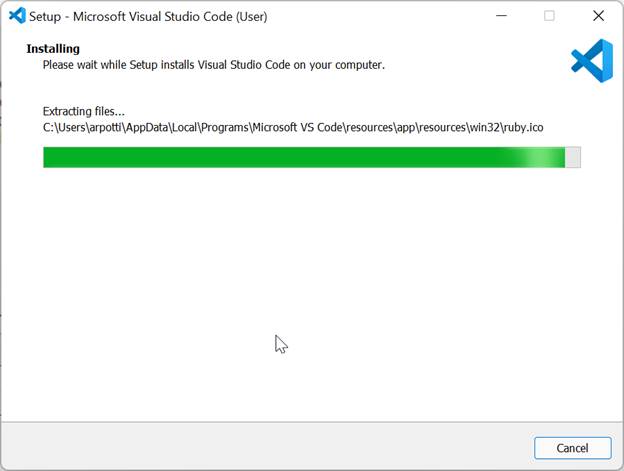
Click on Install.
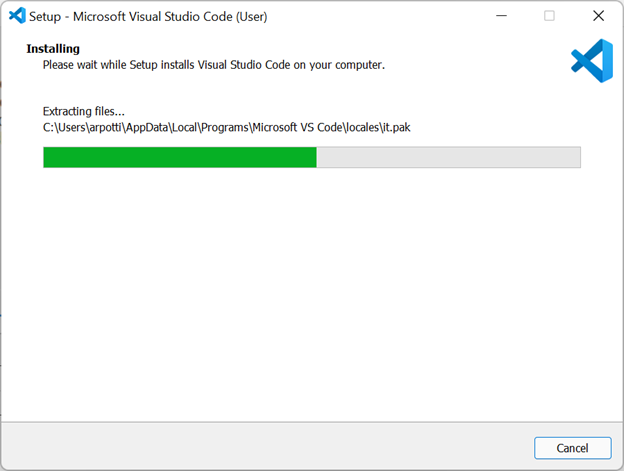
Installation is in progress.
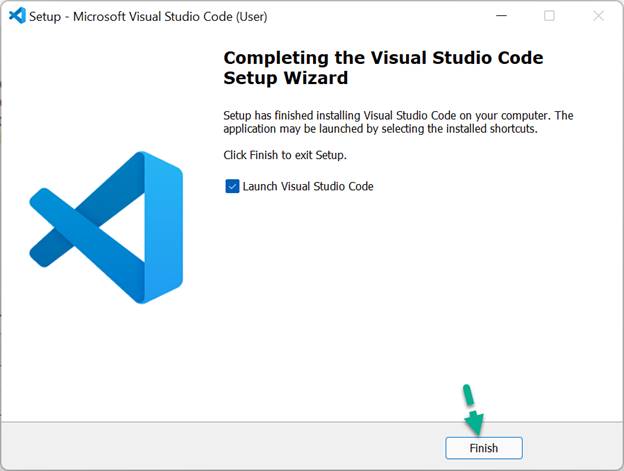
Step 10
Click on Finish to launch the Visual Studio Code.
Step 10
Click on Finish to launch the Visual Studio Code.
Visual Studio Code is launched.
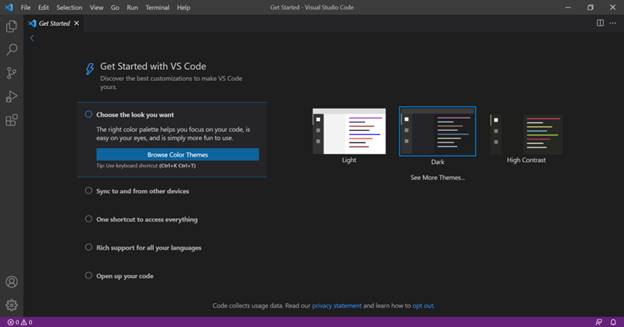
Hope you have successfully installed Visual Studio Code on your PC.
Please like and share your valuable feedback on this article.