May 12, 2023 07:57 by
 Peter
PeterThis article describes how to export to Excel using excelJS in Angular. In our assignment, I will describe how to export to Excel using excelJS in angular.

What exactly is ExcelJS?
ExcelJS is a well-known JavaScript library that generates Excel spreadsheets in the browser. This section will discuss how to export data from an Angular application to an Excel file using ExcelJS.
For this article, I developed an Angular application. To create an Angular project, the following actions must be taken:
Create Project
Using the following command in the Command Prompt, I created a project.
ng new ExcelJSExample
Open a project in Visual Studio Code using the following commands.
cd ExcelJSExample
Code .
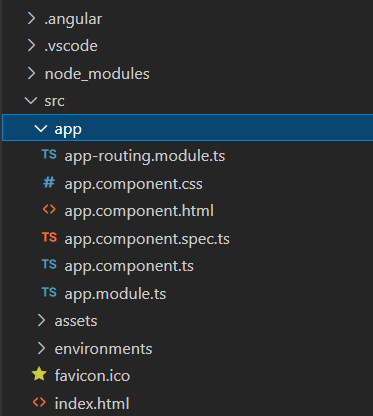
Now in Visual Studio, your project looks as below.

Installation
You need to install the ExcelJS package using npm:
npm install exceljs --save
Also, you need to install the FileSaver.js library, which provides the saveAs() method used to download the Excel file to the user's computer.
npm install file-saver --save
Now create a service file name ExcelService using the following command.
ng g c excelService
You need to import the ExcelJS library in the service file where you want to generate the Excel file.
import * as ExcelJS from 'exceljs';
After installing FileSaver.js, you can import it into the service file as follows
import { saveAs } from 'file-saver';
Then, you need to create a new Excel workbook and worksheet instance.
const workbook = new ExcelJS.Workbook();
const worksheet = workbook.addWorksheet('My Sheet');
Next, you need to add the data to the worksheet. You can do this by iterating over the data and adding it to the worksheet using the worksheet.addRow() method
// Add headers
const headers = Object.keys(data[0]);
worksheet.addRow(headers);
// Add data
data.forEach((item) => {
const row:any = [];
headers.forEach((header) => {
row.push(item[header]);
});
worksheet.addRow(row);
});
JavaScript
After adding the data, you can format the worksheet using the ExcelJS API. For example, you can set the column widths using the worksheet.getColumn(colIndex).width property.
worksheet.getColumn(1).width = 15;
worksheet.getColumn(2).width = 20;
Finally, you can save the workbook to an Excel file using the workbook.xlsx.writeBuffer() method.
// Generate Excel file
workbook.xlsx.writeBuffer().then((buffer: any) => {
const blob = new Blob([buffer], { type: 'application/vnd.openxmlformats-officedocument.spreadsheetml.sheet' });
saveAs(blob, `${fileName}.xlsx`);
});
ExcelService File Code.
import { Injectable } from "@angular/core";
import * as ExcelJS from 'exceljs';
import { saveAs } from 'file-saver';
@Injectable()
export class ExportService{
exportToExcel(data: any[], fileName: string) {
const workbook = new ExcelJS.Workbook();
const worksheet = workbook.addWorksheet('My Sheet');
// Add headers
const headers = Object.keys(data[0]);
worksheet.addRow(headers);
// Add data
data.forEach((item) => {
const row:any = [];
headers.forEach((header) => {
row.push(item[header]);
});
worksheet.addRow(row);
});
worksheet.getColumn(1).width = 15;
worksheet.getColumn(2).width = 20;
// Generate Excel file
workbook.xlsx.writeBuffer().then((buffer: any) => {
const blob = new Blob([buffer], { type: 'application/vnd.openxmlformats-officedocument.spreadsheetml.sheet' });
saveAs(blob, `${fileName}.xlsx`);
});
}
}
Here's an example of how you can create a button to trigger the export functionality.
In html file
<button (click)="generateExcel()">Export to Excel</button>
In ts file
generateExcel(){
const data:any[] = [
{ name: 'John', age: 30 },
{ name: 'Jane', age: 25 },
{ name: 'Bob', age: 40 }
];
this.exportService.exportToExcel(data, 'my-data');
}
With these steps, you should now be able to generate an Excel file with sample data in your Angular project using ExcelJS.
Overall, ExcelJS provides a powerful and flexible API for generating Excel spreadsheets in the browser, and can be easily integrated into Angular applications for exporting data to Excel.