In this article, I will tell you how to apply "Go to Bottom" and "Go Up" with a click of Anchors in an application. We often create single-page applications that are in great demand at the present time. In these applications, you might need a functionality by which the user can go to a different part of a page just by clicking on the link and not by scrolling. To do this kind of functionality, you can use AngularJS.

Now, I will create an application that will help you to create such an application.
Step 1. First of all, you need to add an external Angular.js file to your application, "angular.min.js". For this, you can go to the AngularJS official site or download my source code and then fetch it, or you can click on this link and download it: ANGULARJS. After downloading the external file, you need to add it to the Head section of your application.
<head runat="server">
<title></title>
<script src="angular.min.js"></script>
</head>
Step 2. Now, after adding the external JS file, the first thing you need to do is to add ng-app in the <HTML> Tag; otherwise, your application will not run.
<html ng-app xmlns="http://www.w3.org/1999/xhtml">
Now, I will create a simple application that will help you understand this feature.
First I will create a JavaScript function, this is the heart of this article. All the things will be described in this function.
<script>
function x($scope, $location, $anchorScroll) {
$scope.goDown = function () {
$location.hash('down');
$anchorScroll();
};
$scope.goUp = function () {
$location.hash('up');
$anchorScroll();
};
}
</script>
Here I have created a function named "x", but today in the function $location and $anchorScroll are also used along with $scope. $location service parses the browser address bar and makes the URL available to your application.
Then I created a function that will help the user to go down just with the click of a link, this function is named "goDown". In this function a hash method is used with location, you can't change the "hash" method with any other variable name, it's fixed, and this has the method id of control that is passed to be followed on the click of the anchor.
Similarly, I have created a function that will help the user to go up, here also the hash method is used and in this method, the name of the control is passed that is to be followed when clicking the anchor.
Step 3. Our work on the View is completed, and now I will work on the View Model of this application.
<body>
<form id="form1" runat="server">
<div ng-app="App">
<div id="div" ng-controller="x">
<div style="color: green;">
<a id="up" ng-click="goDown()">Go Down</a>
</div>
<div style="color: red;">
<a id="down" ng-click="goUp()">You're at the bottom</a>
</div>
</div>
</div>
</form>
</body>
Here a div is bound to the function "x" using the ng-controller, in this div again two divs are created. In both the div anchors are used, the first anchor is bound to the "goDown" function using the ng-click, and the second anchor is also bound using the ng-click but it is bound to the group function.
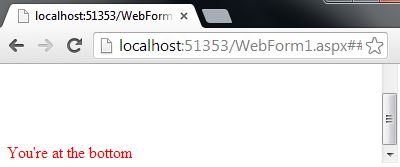
Some style is also applied to this application, this style will help to show the two anchors at a specific distance by which only one will be seen at a time and the second one will only be seen when the user clicks on the anchor.
Now, our application is created and is ready for execution.
Output
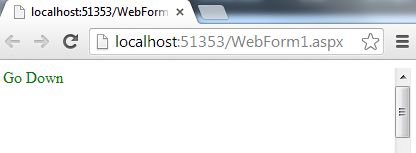
Now, if we run our application, then we will get output like this.

You can see that only one anchor can be seen at this time and in other words the first anchor, now if we click on the first anchor then our page will go down to the element that was called using the JavaScript function.

Complete Code
The complete code of this application is as follows.
<html ng-app xmlns="http://www.w3.org/1999/xhtml">
<head runat="server">
<title></title>
<script src="angular.min.js"></script>
<script>
function x($scope, $location, $anchorScroll) {
$scope.goDown = function () {
$location.hash('down');
$anchorScroll();
}
$scope.goUp = function () {
$location.hash('up');
$anchorScroll();
}
}
</script>
<style>
#div {
height: 350px;
overflow: auto;
}
#down {
display: block;
margin-top: 2000px;
}
</style>
</head>
<body>
<form id="form1" runat="server">
<div ng-app="App">
<div id="div" ng-controller="x">
<div style="color:green;">
<a id="up" ng-click="goDown()">Go Down</a>
</div>
<div style="color:red;">
<a id="down" ng-click="goUp()">You're at the bottom</a>
</div>
</div>
</div>
</form>
</body>
</html>