Full Trust European Hosting

BLOG about Full Trust Hosting and Its Technology - Dedicated to European Windows Hosting Customer

Joomla 3.4 Hosting France - HostForLIFE.eu :: How to Use SP Page Builder to to Build One Page Layout

clock August 18, 2015 07:09 by author Rebecca

In this tutorial, I will tell you how to build one page layout in Joomla using SP Page Builder. Many templates customized can be used as One Page layout, not only those which were created expressly for this purpose. In general what may be surprising for you don't even need any module position expect maybe top menu, all new positions you can create using only SP Page Builder and each Joomla subpage can use different layout. This Joomla! extension designed for you to help you create your own one subpage masterpiece with many modern trendy features in-build. One of them is an intelligent responsive design that changes it's display depending on the size of the screen your visitor is viewing your site with.

Step 1

First step is almost this same, you have to install SP Page Builder component (Basic or Pro version), you can go to http://www.joomshaper.com/page-builder/

Step 2

Inside PB component click "New" button to create a new page view. Input name, for example "onepage". Now for example you can install template layout called "Full Width Layout" which can show you how it works.

While building PB we kept in mind User Experience and customizability. As a result it is easy to navigate and to customize appearance of used elements.

Step 3

Each row has under "gear" icon settings also there you will find "Section ID" field - where you can set the ID attribute for the specific element. An ID should be unique within a page if you want use it later for OnePage purposes. Knowing this you can easily add new rows with selected addons and use unique ID name for each of them, for example: company-features, our-services, our-clients, address-map.

More generally, design requires making many choices, including colors, fonts, and images; we leave selecting these variables to future work.

Step 4

After it will allows you to use #company-features menu links in Menu Manager for your sub-menu module. Right now focus on adding different add-ons to your layout with real content if you have it.

Step 5

Save new page layout, and go to Menu Manager -> New Menu Item -> Menu Item Type -> SP Page Builder -> Page and choose your created before layout, in my case it was "one-page".

It means that under this menu item you will have page which you created in SP Page Builder few moments ago.

Step 6

Now using # before ID name you can add menu lub sub-menu links. Don't forget that they are only local links in single page view.

Remember, the component offers here only basic styles - so if you need more polished and beautiful final result you have to use your own css styles and class'es in rows. Happy designing!

HostForLIFE.eu Joomla 3.4 Hosting
HostForLIFE.eu is European Windows Hosting Provider which focuses on Windows Platform only. We deliver on-demand hosting solutions including Shared hosting, Reseller Hosting, Cloud Hosting, Dedicated Servers, and IT as a Service for companies of all sizes. We have customers from around the globe, spread across every continent. We serve the hosting needs of the business and professional, government and nonprofit, entertainment and personal use market segments.


Joomla 3.4 Hosting UK - HostForLIFE.eu :: How to Add Javascript Code to Articles and Custom HTML Modules in Joomla

clock April 29, 2015 07:54 by author Rebecca

By default, text editors in Joomla administrator interface work in visual (WYSIWYG) mode. WYSIWYG editors allow editing the HTML markup when you just need to publish some text and throw bolds and headers here and there, but when you try to publish a Javascript code through it, it will do its best to reformat it in the way that it shows up as a readable text, not as an actual working code. Moreover, there are security settings in Joomla that can prohibit using of Javascript codes within an HTML, in such cases the text editor just strips all <script> blocks.

Therefore, adding some custom Javascript in your article or custom HTML module, you might find out that it doesn't work in the front end or even disappears from HTML sources. Please follow these instructions in order to solve such problems:

Step 1: Set up general text filtering options for being able to use Javascript safely inside HTML source editor

  •     Open Content → Article Manager in your Joomla administrator panel and click on the 'Options' button in top right corner
  •     In the new popup window with Article Manager Options, open the 'Text Filters' tab and select 'No Filtering' under your user group (it is usually 'Super Users')
  •     Click 'Save'

Step 2: Configure your text editor so that it allows you to have <script> elements in your code

The text editor that you use in Joomla may set its own security settings, which can affect code formatting. By default, the 'TinyMCE' is used in Joomla administrator interface. Here is how to configure it properly:

  •     In your administrator panel, go to Extensions → Plug-in Manager, find the 'Editors - TinyMCE' line and click it
  •     In TinyMCE options on right, find 'Prohibited elements' section and remove a mention of 'script' from it
  •     Click 'Save'

There can be different filtering settings in different text editors plugins though. For example, if you are using JCE editor, you don't need to change any of its settings, it doesn't strip scripts by default. Please refer to the documentation of the plugin you use.

Step 3: Use the 'HTML' mode when pasting the javascript codes into HTML

No matter what editor you're using, when trying to insert a javascript code you need to switch the editor into the HTML mode first - look for HTML button or tab somewhere around the editor area. With that mode the codes that you enter into editor are to be treated as exactly the codes and should work. Joomla administrator interface sometimes also features a button reading 'Toggle editor' below the actual editor - you can switch from WYSIWYG into the code editor by hitting that button:

By using the above recomendations, you'll be able to make Javascript codes work inside your HTML sources in Joomla.

HostForLIFE.eu Joomla 3.4 Hosting
HostForLIFE.eu is European Windows Hosting Provider which focuses on Windows Platform only. We deliver on-demand hosting solutions including Shared hosting, Reseller Hosting, Cloud Hosting, Dedicated Servers, and IT as a Service for companies of all sizes. We have customers from around the globe, spread across every continent. We serve the hosting needs of the business and professional, government and nonprofit, entertainment and personal use market segments.


Joomla 3.4 Hosting France - HostForLIFE.eu :: Creating Lightbox for Images and Videos on Joomla Website

clock April 11, 2015 05:12 by author Rebecca

In this tutorial, I will show you how to create a 'Lightbox' effect for your Joomla website using the plugin YOOeffects. Using a Lightbox is a great way to show off your images on your website, as a slideshow or for individual pictures. Videos can also be shown using the Lightbox javascript - both from your own website or streamed from another site (such as YouTube).

What is Lightbox?

Lightbox is a simple javascript that creates an effect that when a user clicks on the image, it pops up, is magnified using a smooth animation and is set on a darkened background. Lightbox is triggered by a 'rel' attribute in the HTML which is used in the <a> tag which surrounds the target image. The Lightbox script is great because it works on all browsers and eliminates the need for Flash animation. Flash although popular is notoriously bad for SEO as Google's bots struggle to read the data within the flash animation.

Here is an example of the lightbox:

Lightbox effect for Images

If the YOOEffects plugin has been successfully installed, it's time to see how to write the code to ensure the plugin works for your chosen images. The code looks a little daunting, but it is really quite simple once you break it down, especially if you are used to using HTML.

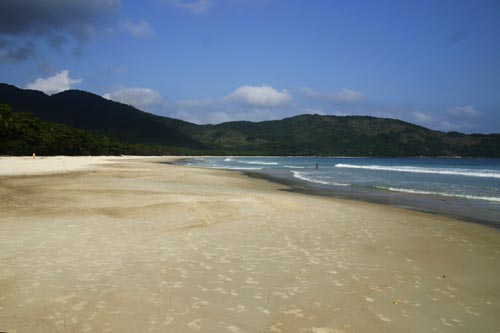
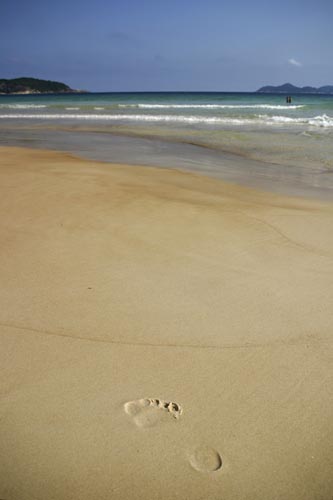
The following is an images is the Lopes Mendes beach, on Ihla Grande, Brazil. If you click on the image you will see the lightbox effect.

The code should be entered into the article that you are wanting to display the image in. It is key not to copy and paste this code as text into your article, but click on the 'HTML' editor within your chosen editor then paste it.

<a href="/images/stories/lopes-mendes-beach.jpg"
title="Lopes Mendes Beach" rel="shadowbox;width=500;height=333"
alt="Lopes Mendes Beach" title="Ihla Grande" width="250" height="165" />

You will notice i have changed the title of the image for each part of the code. This is to show you that the 'Lopes Mendes Beach' is the description that appears when the lightbox is engaged, and Ihla Grande appears when you hover over the image in its present state. It can be a useful way of providing more information about your chosen image to your users.

The second part of the code determines the size of the thumbnail that is displayed to click on, be sure to keep the same proportions, to ensure the image is not distorted!

Lightbox Image Slideshow

Having slideshows of images is a clean, easy and convenient way to display images and this can be done using a Lightbox effect too. 

The code you would insert to create a slideshow of images is the following:

title="Lightbox Slideshow"rel="lightbox[group];width=500;height=333">
Click here to see a lightbox slideshow.

title="butterfly photo"rel="lightbox[group];width=500;height=333">

title="waterfall photo"rel="lightbox[group];width=333;height=500">


The best way to construct a slideshow is to add the "rel=lightbox" attribute to your links first so that they open in lightbox. Once you have done this, you need to remove the names of the links so they become invisible. The final step is to add in [group] in the rel attribute. You can name this anything you want, but all of the links must have to same name, so they appear in the same slideshow. witYou can see how i have done this in the code above. You can add in as many images as you like, and you can do this with videos too, not just images. The code is very simple, but it can be easy to make mistakes, so check through your work carefully if it does not work first time!

Display Videos using Lightbox

The great thing about this plugin is that you can use the same script to show videos on your website. It is far easier for users to focus on a video if the rest of the screen is darkened, so this plugin can be used to great effect. Importantly, this plugin means that people can watch videos hosted on other sites within your own - so there is no reason for visitors to leave you site.

The code is very similar and is as follows:

<a href="http://www.youtube.com/v/jtK6qITij5k&hl=en&autoplay=1"
title="Open Source Content Management Systems"
rel="shadowbox;width=425;height=355">Joomla and Google's Summer of Code</a>


You can play any type of video file as long as your browser can, so this tool is very useful. The key is to ensure you have the linked to the video directly - make sure you are not just linking to the page, otherwise lightbox will not play the video.

HostForLIFE.eu Joomla 3.4 Hosting

HostForLIFE.eu is European Windows Hosting Provider which focuses on Windows Platform only. We deliver on-demand hosting solutions including Shared hosting, Reseller Hosting, Cloud Hosting, Dedicated Servers, and IT as a Service for companies of all sizes. We have customers from around the globe, spread across every continent. We serve the hosting needs of the business and professional, government and nonprofit, entertainment and personal use market segments.


About HostForLIFE

HostForLIFE is European Windows Hosting Provider which focuses on Windows Platform only. We deliver on-demand hosting solutions including Shared hosting, Reseller Hosting, Cloud Hosting, Dedicated Servers, and IT as a Service for companies of all sizes.

We have offered the latest Windows 2019 Hosting, ASP.NET 5 Hosting, ASP.NET MVC 6 Hosting and SQL 2019 Hosting.


Tag cloud

Sign in