Full Trust European Hosting

BLOG about Full Trust Hosting and Its Technology - Dedicated to European Windows Hosting Customer

AngularJS Hosting Europe - HostForLIFE :: Using Pipes to Create Clear and Effective Angular Applications

clock October 23, 2025 10:12 by author Peter

The use of "pipes" is one of Angular's most potent tools for formatting and changing data inside templates. Developers can apply transformations like formatting dates, changing text cases, or even filtering data in an efficient and reusable way by using pipes, which offer a declarative mechanism to handle data before it is shown to the user. Writing clean, manageable, and modular code for Angular applications requires an understanding of pipes. The main distinctions between pipes and functions will be discussed in this post, along with how to use built-in pipes and make your own custom pipes to increase Angular's functionality. You will have a firm grasp on how to integrate pipes into your Angular projects to improve user experience and expedite data presentation by the end of this tutorial.

What is an Angular Pipe?
In Angular, a pipe is a way to transform data before it is displayed in the user interface. Pipes can be used in templates to modify or format data without having to alter the original data. Pipes are an Angular concept, not a TypeScript (TS) feature. They are a core part of Angular’s template syntax and are used to transform data in the view (template) layer of Angular applications.

Key Points about Pipes in Angular

Angular-Specific: Pipes are a built-in feature of the Angular framework designed to be used in Angular templates. They are not a native feature of JavaScript or TypeScript.
Purpose: Their primary function is to transform data in the template before it is displayed to the user. This transformation can include formatting dates, numbers, currencies, filtering arrays, or performing more complex data transformations.

Declarative Transformation: Pipes enable declarative transformation of data within the template, meaning that the logic for transforming data is cleanly abstracted away from the component’s TypeScript code.

You may be wondering why we should use Pipes when we can use functions.

Criteria Pipe Function
Purpose Data transformation in the template Business logic and calculations
Use case Formatting, filtering, sorting, etc. Complex or multi-step calculations
Performance Pure pipes are efficient for transforming data only when needed Functions can be less performant when used in templates (requires manual calls)
Reusability Highly reusable across templates Functions are reusable within the component or service
Asynchronous Handling Handles observables and promises with AsyncPipe Requires manual subscription logic or use of 'async' in templates
Complexity Best for simple, declarative transformations Best for complex or dynamic logic
When to use When transforming data for display in the template When performing business logic or side effects that don't belong in the template

Types of Pipes

There are two types of Pipes.
Pure Pipe (Default): A pure pipe will only re-run when its input value changes.
    @Pipe({
      name: 'pureExample',
      pure: true // This is the default value, so you can omit this
    })
    export class PureExamplePipe implements PipeTransform {
      transform(value: any): any {
        console.log('Pure pipe executed');
        return value;
      }
    }


Impure Pipe: An impure pipe will re-run whenever Angular detects a change in the component’s state, even if the input value hasn’t changed.
@Pipe({
  name: 'impureExample',
  pure: false // Set to false to make it impure
})
export class ImpureExamplePipe implements PipeTransform {
  transform(value: any): any {
    console.log('Impure pipe executed');
    return value;
  }
}

In Angular, you can use in-built pipes or create your own.

In-built pipes
Angular provides some basic pipes that can be used.

It comes from the '@angular/common' package.

Some popular ones that can be helpful are:
CurrencyPipe, DatePipe, DecimalPipe, LowerCasePipe, UpperCasePipe and TitleCasePipe

How to use an in-built pipe?
In your ts file, define your variable. In our example, we will use the variable title.
title = 'app works!';

In your html, you can use the pipe as follows:
<h1> {{title | uppercase}} </h1>

The result is how the string title is displayed:

Chaining in-built pipes
Create your variable in the ts file.
amount = 123456.123456

In your html file, you can do the following.
<p>{{ amount | currency:'USD' | slice:0:10 }}</p>

The result is as per below:

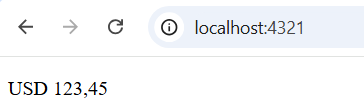
Note. The currency ‘USD’ is added in front because of the currency pipe, and only 10 characters are displayed because of the slide pipe.

Custom pipes

    Run the command below to create a pipe file:
    ng generate pipe <<pipe-name>>.

For example: ng generate pipe my-custom-pipe. Once executed, the two files below will be created.

Open the file ‘my-custom-pipe.pipe.ts. You will see the following boilerplate code provided:
import { Pipe, PipeTransform } from '@angular/core';

@Pipe({
  name: 'myCustomPipe'
})
export class MyCustomPipePipe implements PipeTransform {
  transform(value: any, args?: any): any {
    return null;
  }
}


After the default class, you can create the function for your new pipe. In our case, we will create a pipe that will replace spaces in a hyphen. It is important to add the decorator ‘@Pipe’ before the class so that Angular knows what follows will be a pipe. Also, pass the name of the pipe as a parameter in the ‘@Pipe’ decorator. Also, when creating the class, implement ‘PipeTransform’. The resulting class will be as follows: 

@Pipe({name: 'removeWhiteSpace'})
export class RemoveWhiteSpacePipe implements PipeTransform {
  transform(value: string): string {
    return value.replace(/\s+/g, '-');
  }
}

The resulting class will be as follows (the full code):
import { Pipe, PipeTransform } from '@angular/core';

@Pipe({
  name: 'myCustomPipe'
})
export class MyCustomPipePipe implements PipeTransform {


  transform(value: any, args?: any): any {
    return null;
  }
}


@Pipe({name: 'removeWhiteSpace'})
export class RemoveWhiteSpacePipe implements PipeTransform {
  transform(value: string): string {
    return value.replace(/\s+/g, '-');
  }
}

In the ts file of your component, create the variable that will hold the value that will be transformed
textWithSpaces = 'This is a text with a lot of spaces that will be transformed';

In the html file of your component, do the following:
<p>{{ textWithSpaces | removeWhiteSpace }}</p>

    The result is the following:

Conclusion
Angular pipes are a powerful and efficient way to transform and format data in your application’s templates. By using built-in pipes, you can easily manipulate data types such as strings, dates, and numbers without having to write repetitive logic in your components. Custom pipes offer even more flexibility, allowing you to create reusable, maintainable, and modular transformation logic tailored to your specific needs.

Understanding the distinction between pipes and functions is key to leveraging their full potential. While functions provide a direct way to execute code, pipes offer a declarative approach to handle transformations directly within templates, improving readability and performance.


Building dynamic and user-friendly applications greatly benefits from the ease with which data can be manipulated in the view layer, whether you're using Angular's built-in pipes or making your own. Gaining proficiency with Angular Pipes will help you write code that is clear, succinct, and compliant with best practices, which will eventually result in applications that are easier to maintain and scale.

Now that you know how to utilize and design pipes, you can add strong data transformations to your Angular applications, which will improve the efficiency and enjoyment of your development process.


European Visual Studio 2022 Hosting - HostForLIFE.eu :: What’s New in Visual Studio 2026 Insiders: Faster, Smarter, and More Modern?

clock October 15, 2025 07:45 by author Peter

For many years, Visual Studio has been the preferred IDE for C++ and.NET developers. Microsoft has advanced developer productivity with the release of Visual Studio 2026 Insiders, which features a new user interface, significant speed improvements, and AI-powered coding assistance. The most intriguing features in Visual Studio 2026 and their implications for developers will be discussed in this blog.

Performance Enhancements
One of the biggest complaints developers often have is slow load times and laggy performance in large solutions. Visual Studio 2026 addresses this with:

  • Faster Operations: Solution loading, builds, and debugging are now significantly quicker.
  • Optimized for Large Codebases: Both x64 and Arm64 architectures benefit from better memory management and reduced delays.

For teams working on massive enterprise applications, these improvements translate into a smoother, more productive workflow.

Deep AI Integration with GitHub Copilot
Visual Studio 2026 takes AI integration to the next level:

  • Contextual Assistance: GitHub Copilot is now embedded directly into the IDE, providing smart code suggestions as you type.
  • Automation of Repetitive Tasks: From generating boilerplate code to suggesting optimizations, AI helps you focus on problem-solving instead of repetitive coding.

This makes VS 2026 a dream for developers looking to leverage AI to accelerate their projects.

Modern UI with Fluent Design
Microsoft has revamped the Visual Studio interface to be cleaner, more modern, and visually cohesive:

  • Fluent UI Overhaul: Menus, dialogs, and toolbars now follow Fluent Design principles.
  • New Themes: Eleven new tinted themes inspired by Microsoft Edge give you better contrast and readability.
  • Intuitive Settings: Icons, spacing, and menus are redesigned for a more user-friendly experience.

A modern, streamlined interface can reduce eye strain and make coding more enjoyable.

Side-by-Side Installation
Upgrading doesn’t mean breaking your current setup:

  • Coexist with Older Versions: Install Visual Studio 2026 alongside VS 2022 without conflicts.
  • Preserve Settings and Extensions: All your previous configurations and plugins remain intact, making the transition seamless.

Full-Stack Development Support
Visual Studio 2026 is ready for modern development:

  • .NET 10 and C# 14 Support: Build high-performance apps with the latest language features.
  • C++26 Updates: New language features, STL improvements, and cross-platform development capabilities.
  • Game Development Tools: Enhanced support for Unity, Unreal Engine, and C++ game development.

Whether you’re building enterprise apps, modern desktop applications, or games, VS 2026 has the tools you need.

Insider Preview Access

Developers eager to try new features early can join the Insiders Channel:

  • Access experimental tools and previews before they are officially released.
  • Provide feedback directly to the Visual Studio team to influence future updates.

Conclusion
Visual Studio 2026 isn’t just an upgrade; it’s a major step forward for developers. From blazing-fast performance and AI-powered coding assistance to a modernized UI, this IDE helps you code smarter, faster, and more efficiently.


AngularJS Hosting Europe - HostForLIFE :: How to Use Reactive Forms to Manage Form Validation in Angular?

clock October 8, 2025 08:52 by author Peter

Create a Basic Reactive Form
Start by importing ReactiveFormsModule in your Angular module:

// app.module.ts
import { ReactiveFormsModule } from '@angular/forms';

@NgModule({
  imports: [ReactiveFormsModule, /* other imports */],
})
export class AppModule {}


Then, build a form in your component using FormBuilder:
// user-form.component.ts
import { Component } from '@angular/core';
import { FormBuilder, FormGroup, Validators } from '@angular/forms';

@Component({ selector: 'app-user-form', templateUrl: './user-form.component.html' })
export class UserFormComponent {
  userForm: FormGroup;

  constructor(private fb: FormBuilder) {
    this.userForm = this.fb.group({
      name: ['', [Validators.required, Validators.minLength(2)]],
      email: ['', [Validators.required, Validators.email]],
      password: ['', [Validators.required, Validators.minLength(6)]],
    });
  }
}


In the template, bind the form and controls:
<!-- user-form.component.html -->
<form [formGroup]="userForm" (ngSubmit)="onSubmit()">
  <label>
    Name
    <input formControlName="name" />
  </label>
  <div *ngIf="userForm.get('name')?.touched && userForm.get('name')?.invalid">
    <small *ngIf="userForm.get('name')?.errors?.required">Name is required.</small>
    <small *ngIf="userForm.get('name')?.errors?.minlength">Name must be at least 2 characters.</small>
  </div>

  <label>
    Email
    <input formControlName="email" />
  </label>
  <div *ngIf="userForm.get('email')?.touched && userForm.get('email')?.invalid">
    <small *ngIf="userForm.get('email')?.errors?.required">Email is required.</small>
    <small *ngIf="userForm.get('email')?.errors?.email">Enter a valid email.</small>
  </div>

  <button type="submit" [disabled]="userForm.invalid">Submit</button>
</form>


Built-in Validators
Angular provides several built-in validators:

  • Validators.required — field must have a value.
  • Validators.email — value must be a valid email.
  • Validators.min / Validators.max — numeric limits.
  • Validators.minLength / Validators.maxLength — string length limits.
  • Validators.pattern — regex-based validation.

You can combine validators in an array for a control, as shown in the example above.

Custom Synchronous Validators

For rules that don’t exist out of the box (e.g., username format), write a custom validator function that returns either null (valid) or an error object:
import { AbstractControl, ValidationErrors } from '@angular/forms';

export function usernameValidator(control: AbstractControl): ValidationErrors | null {
  const value = control.value as string;
  if (!value) return null;
  const valid = /^[a-z0-9_]+$/.test(value);
  return valid ? null : { invalidUsername: true };
}

// usage in form builder
this.userForm = this.fb.group({
  username: ['', [Validators.required, usernameValidator]],
});

Show helpful messages in the template when invalidUsername exists.

Cross-Field Validation (Password Match)

Some validations depend on multiple controls. Use a validator on the FormGroup:
function passwordMatchValidator(group: AbstractControl): ValidationErrors | null {
  const password = group.get('password')?.value;
  const confirm = group.get('confirmPassword')?.value;
  return password === confirm ? null : { passwordsMismatch: true };
}

this.userForm = this.fb.group({
  password: ['', Validators.required],
  confirmPassword: ['', Validators.required],
}, { validators: passwordMatchValidator });

In the template, show the group-level error:
<div *ngIf="userForm.errors?.passwordsMismatch && userForm.touched">
  <small>Passwords do not match.</small>
</div>


Async Validators (e.g., Check Email Uniqueness)

Async validators are useful for server checks like "is this email taken?". They return an Observable or Promise.
import { AbstractControl } from '@angular/forms';
import { map } from 'rxjs/operators';
import { of } from 'rxjs';

function uniqueEmailValidator(apiService: ApiService) {
  return (control: AbstractControl) => {
    if (!control.value) return of(null);
    return apiService.checkEmail(control.value).pipe(
      map(isTaken => (isTaken ? { emailTaken: true } : null))
    );
  };
}

// in component
this.userForm = this.fb.group({
  email: ['', {
    validators: [Validators.required, Validators.email],
    asyncValidators: [uniqueEmailValidator(this.apiService)],
    updateOn: 'blur' // run async validator on blur to reduce calls
  }]
});

Use updateOn: 'blur' to prevent calling the server on every keystroke.

Displaying Validation State and UX Tips

  • Show errors only after user interaction — use touched or dirty to avoid overwhelming users with errors on load.
  • Disable submit while invalid — [disabled]="userForm.invalid" prevents sending bad data.
  • Focus the first invalid control — on submit, set focus to the first invalid field for better UX.
  • Use updateOn: 'blur' or debounce — reduces validation frequency and server calls.

Example to focus first invalid:
onSubmit() {
  if (this.userForm.invalid) {
    const invalidControl = this.el.nativeElement.querySelector('.ng-invalid');
    invalidControl?.focus();
    return;
  }
  // process valid form
}

Reacting to Value Changes and Live Validation
You can subscribe to valueChanges for any control or the whole form to implement live validation messages, dynamic rules, or enable/disable fields.
this.userForm.get('country')?.valueChanges.subscribe(country => {
  if (country === 'US') {
    this.userForm.get('state')?.setValidators([Validators.required]);
  } else {
    this.userForm.get('state')?.clearValidators();
  }
  this.userForm.get('state')?.updateValueAndValidity();
});

Remember to unsubscribe in ngOnDestroy or use the takeUntil pattern.

Integrating with Backend Validation
Server-side validation is the final source of truth. When the backend returns validation errors, map them to form controls so users can correct them:
// after API error response
handleServerErrors(errors: Record<string, string[]>) {
  Object.keys(errors).forEach(field => {
    const control = this.userForm.get(field);
    if (control) {
      control.setErrors({ server: errors[field][0] });
    }
  });
}


Show control.errors.server messages in the template.

Testing Form Validation
Unit test reactive forms by creating the component, setting values, and asserting validity:
it('should invalidate empty email', () => {
  component.userForm.get('email')?.setValue('');
  expect(component.userForm.get('email')?.valid).toBeFalse();
});


For async validators, use fakeAsync and tick() to simulate time.

  • Accessibility (A11y) Considerations
  • Always link error messages to inputs with aria-describedby.
  • Use clear error language and avoid technical terms.
  • Ensure focus management sends keyboard users to errors on submit.

Example
<input id="email" formControlName="email" aria-describedby="emailError" />
<div id="emailError" *ngIf="userForm.get('email')?.invalid">
  <small>Enter a valid email address.</small>
</div>

Performance Tips and Best Practices

  • Use OnPush change detection where appropriate to reduce re-renders.
  • Avoid heavy computation inside valueChanges subscribers.
  • Use debounceTime for expensive validations or server calls:

this.userForm.get('search')?.valueChanges.pipe(debounceTime(300)).subscribe(...);

Clean up subscriptions with takeUntil or async pipe.

Summary
An effective, testable method for managing form validation is provided by Angular's Reactive Forms. For common rules, use the built-in validators; for special cases, create your own sync and async validators; and for cross-field checks, such as password confirmation, use group validators. Enhance the user experience by integrating server-side errors using setErrors, emphasizing the initial incorrect control, and displaying errors upon interaction. Use performance techniques like debouncing and OnPush change detection, test your validations, and consider accessibility.


Europe mySQL Hosting - HostForLIFEASP.NET :: What happens if you restart the database service provided by WAMP, MySQL?

clock October 6, 2025 08:59 by author Peter

What happens when you restart MySQL (WAMP’s database service)?

  • Active connections are dropped → any application connected to MySQL will lose its session.
  • Running queries/transactions are aborted → if a query was in the middle of writing, MySQL will roll back that transaction (thanks to transaction logs in InnoDB).
  • Tables/data themselves are safe → MySQL ensures durability, so committed data is not lost.
  • Non-transactional tables (MyISAM) are riskier → if you still have MyISAM tables, they can become corrupted if a write was in progress when the service stopped.

Risks of Restarting Every 3 Hours

  • Apps/websites using the DB may fail while the service is down.
  • Any batch jobs, cron jobs, or API calls during restart will error out.
  • If you restart during heavy writes, performance may be affected briefly.

Tables themselves won’t get corrupted in InnoDB, but MyISAM tables can.

Safer Alternatives
Only restart if the service fails

Instead of restarting every 3 hours, configure Task Scheduler to start the service if it’s stopped (health check).

Example batch
sc query wampmysqld64 | find "RUNNING" >nul
if %errorlevel%==1 net start wampmysqld64
sc query wampapache64 | find "RUNNING" >nul
if %errorlevel%==1 net start wampapache64


This way it only starts services if they’re not running.

Schedule a restart during off-peak hours

e.g. once daily at 3 AM, when traffic is minimal.

Use MySQL config for stability
Instead of forced restarts, tune MySQL memory, query cache, etc., so it doesn’t need frequent restarting.

Answer to your question
No, restarting won’t corrupt data in InnoDB tables.

Yes, it can cause temporary downtime and aborted queries, so apps may face errors.

If you use MyISAM tables, there is a small risk of corruption.


Node.js Hosting - HostForLIFE :: Understanding package.json and package-lock.json in Node.js

clock October 3, 2025 08:48 by author Peter

1. What is package.json?
package.json is the heart of any Node.js project. It declares your project’s dependencies and provides metadata about your application.


Key Features

  • Lists dependencies and devDependencies.
  • Specifies version ranges using semantic versioning ( ^ , ~ ).
  • Includes project metadata like name, version, scripts, author, and license.
  • Human-readable and editable.

{
  "name": "my-app",
  "version": "1.0.0",
  "dependencies": {
    "lodash": "^4.17.21"
  },
  "devDependencies": {
    "jest": "~29.0.0"
  },
  "scripts": {
    "start": "node index.js"
  }
}


Key Point: package.json specifies what versions your project is compatible with , not the exact installed version.

2. What is package-lock.json?
package-lock.json is automatically generated by npm to lock the exact versions of every installed package, including nested dependencies.

Key Features

  • Records the exact version installed for each package.
  • Contains resolved URLs and integrity hashes to ensure packages are not tampered with.
  • Records nested dependencies (dependencies of dependencies).
  • Not intended for manual editing.

{
  "name": "my-app",
  "lockfileVersion": 3,
  "dependencies": {
    "lodash": {
      "version": "4.17.21",
      "resolved": "https://registry.npmjs.org/lodash/-/lodash-4.17.21.tgz",
      "integrity": "sha512-xyz"
    }
  }
}


Key Point: package-lock.json ensures that every environment installs exactly the same versions , even if package.json allows ranges.

3. Main Differences Between package.json and package-lock.json

Featurepackage.jsonpackage-lock.json
Purpose Declares dependencies and project info Locks exact versions of installed packages
Edited by Developer npm automatically
Version Can specify ranges (^, ~) Exact versions installed
Nested dependencies Not recorded Fully recorded
Effect on installation npm uses ranges to resolve versions Ensures consistent installs
Human-readable? Yes Not really

4. How npm install Works

The npm install command is used to install packages based on package.json and package-lock.json.

# Install all dependencies listed in package.json
npm install

# Install a specific package and save it to dependencies
npm install lodash

# Install a package as a dev dependency
npm install --save-dev jest

# Install a package globally
npm install -g typescript


Process

  • Reads package.json for dependencies.
  • Resolves the latest versions allowed by version ranges (if package-lock.json doesn’t exist).
  • Downloads packages to node_modules.
  • Updates or creates package-lock.json with exact versions.


5. What Happens If You Delete package-lock.json?

If package-lock.json is deleted and you run:

npm install

  • npm will resolve latest versions matching the ranges in package.json.
  • Download new packages and regenerate package-lock.json.
  • This may result in different versions from the previous install, which could break your code.

Safe scenarios for deleting:

  • Intentionally updating packages.
  • Starting a fresh project or refreshing dependencies.

Why are both files important

  • package.json defines what your project needs.
  • package-lock.json ensures everyone gets the exact same package versions for consistent development and production environments.

Conclusion
package.json = “What I want” (dependency ranges and project info)
package-lock.json = “Exactly what I got” (locked versions)


Deleting package-lock.json can lead to installing newer package versions, which may cause unexpected issues. Always commit package-lock.json to version control for consistency.


About HostForLIFE

HostForLIFE is European Windows Hosting Provider which focuses on Windows Platform only. We deliver on-demand hosting solutions including Shared hosting, Reseller Hosting, Cloud Hosting, Dedicated Servers, and IT as a Service for companies of all sizes.

We have offered the latest Windows 2019 Hosting, ASP.NET 5 Hosting, ASP.NET MVC 6 Hosting and SQL 2019 Hosting.


Tag cloud

Sign in