Comment is an important function that is included in almost every CMS and Drupal is not an exception. In Drupal, you can add more fields to comment sections, configure display, permission for comments of a content type. In tihs tutorial, I'm going to explain to you how to manage comments in Drupal 7.

Changing Comment Permission
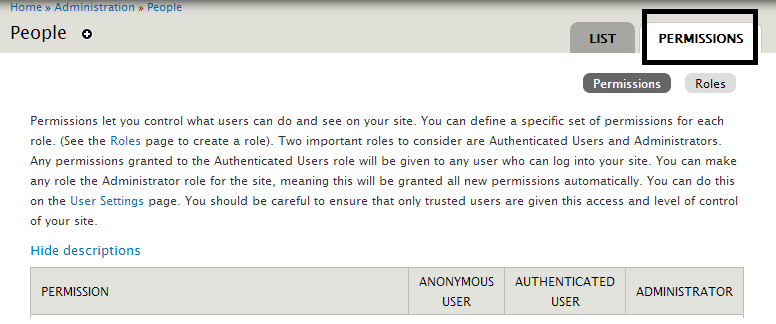
Step 1
By default, anonymous user’s not allowed to comment. To enable comment for anonymous users, go to People > Permission tab as below:
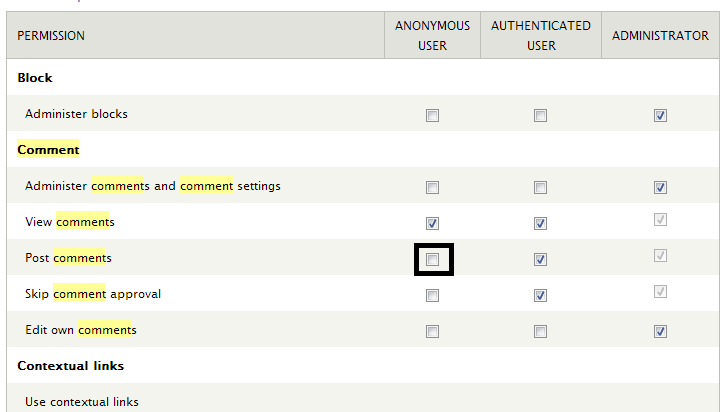
Now, find Comment section, in Post comment select Anonymous user > Save.
Step 3
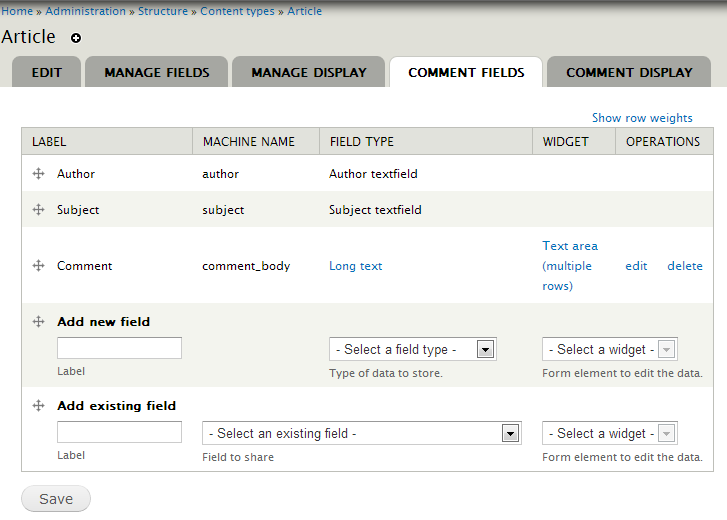
Next, use another browser to open node you created and view comment form. To configure comment form, go to Structure content type > article > comment field as follows:
Remove Subject of Comment
To remove subject of comment, set content type as follows:
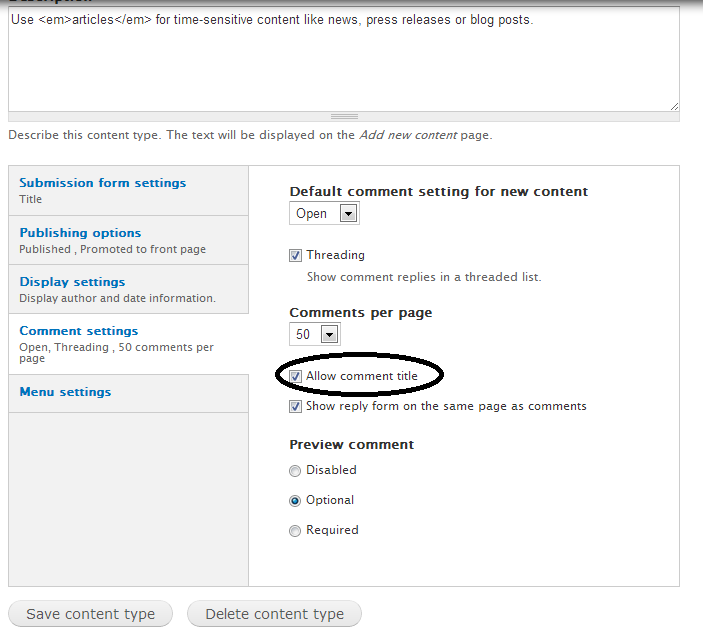
Uncheck Allow comment title and save.
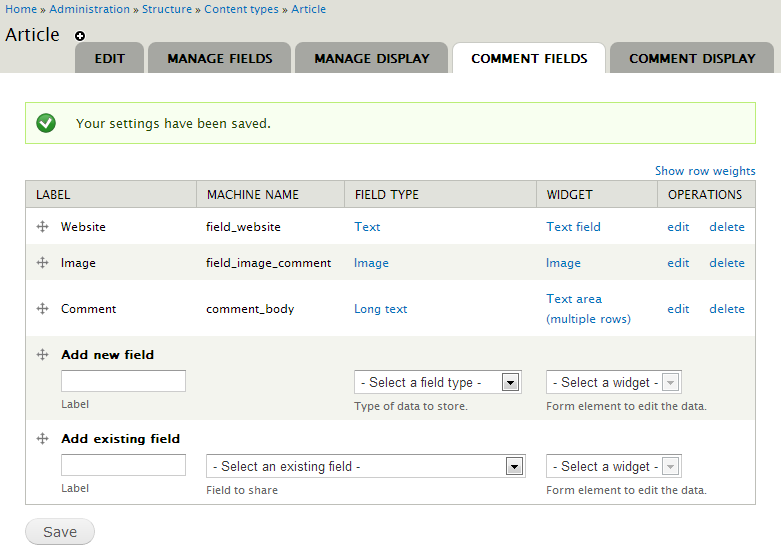
Add New Fields for Comment
To add new field for comment, at add new field section insert field label, select field type and widget:
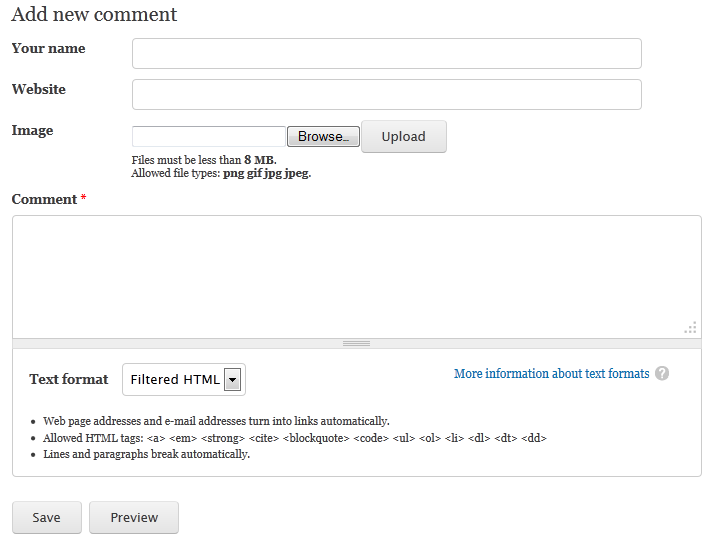
Now, in front-end, you will see the fields you just added:
Now, you can try adding some new comments, you will see that comments need to be approved before showing on post. To manage submitted comments, go to Content > Comment > Unapproved comments:
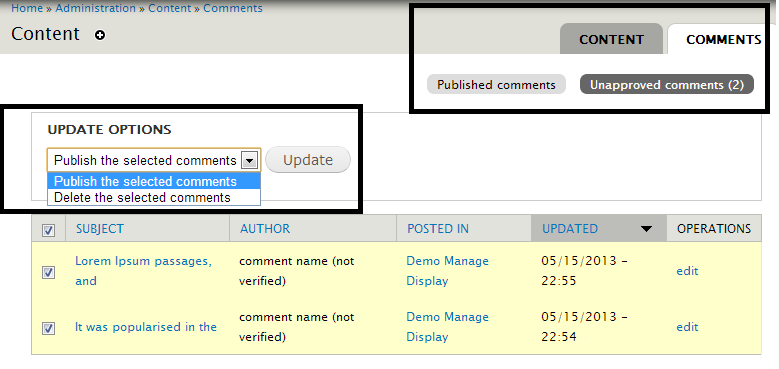
Select the comments you wants, choose publish the selected comments to let them showed on frontend. “Delete selected comments” will remove the selected comments.
Change Comment Display
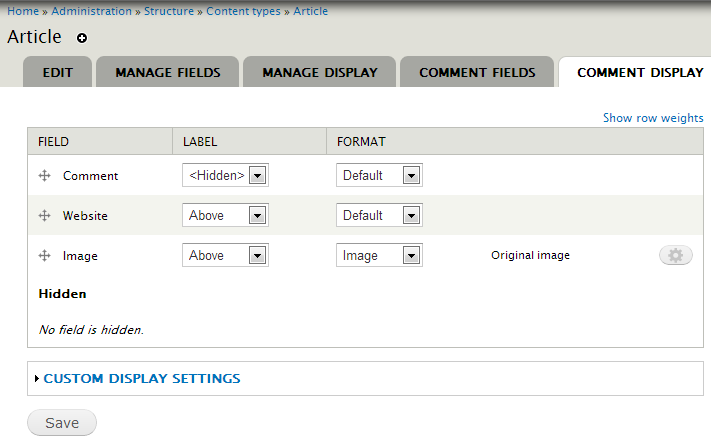
To change how comments are displayed, go to Structure > content type > article > comment display:
HostForLIFE.eu Drupal 7.37 Hosting
HostForLIFE.eu is European Windows Hosting Provider which focuses on Windows Platform only. We deliver on-demand hosting solutions including Shared hosting, Reseller Hosting, Cloud Hosting, Dedicated Servers, and IT as a Service for companies of all sizes. We have customers from around the globe, spread across every continent. We serve the hosting needs of the business and professional, government and nonprofit, entertainment and personal use market segments.
