In this tutorial, we will show you how to install the latest Moodle manually on Windows Server hosting environment with Plesk Control panel and will show you the error during the installation. Hope this tutorial will help you.
Moodle Installation Requirement

To install Moodle, we need to make sure that your server support the latest PHP 5.4 version or higher. Without this PHP version, we can’t install the latest Moodle version. And also you need to install MySQL on your server. With our configuration settings (Plesk), we have install MySQL previously and you can create the database via Control Panel. Please see this complete steps how to install Moodle
1. Download the latest Moodle version directly on their site https://download.moodle.org/releases/latest/. Just download it to your computer.
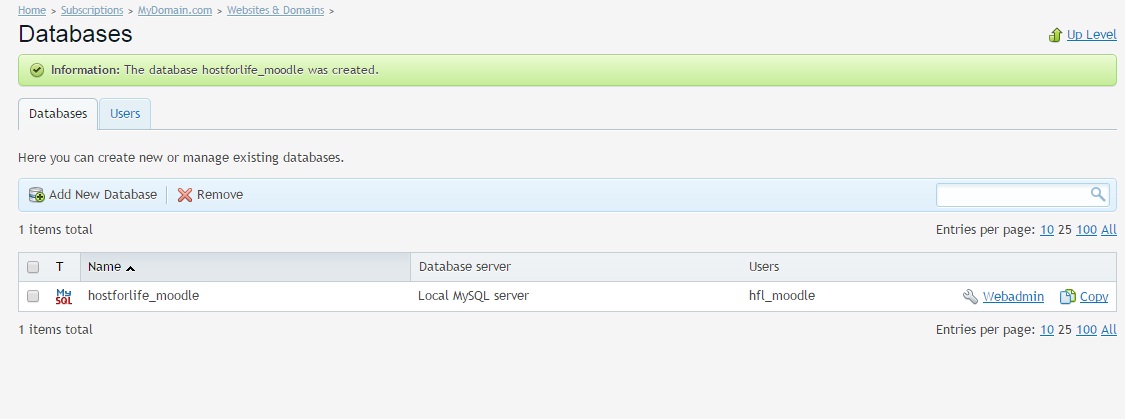
2. Login to your Plesk Control Panel and add MySQL database.
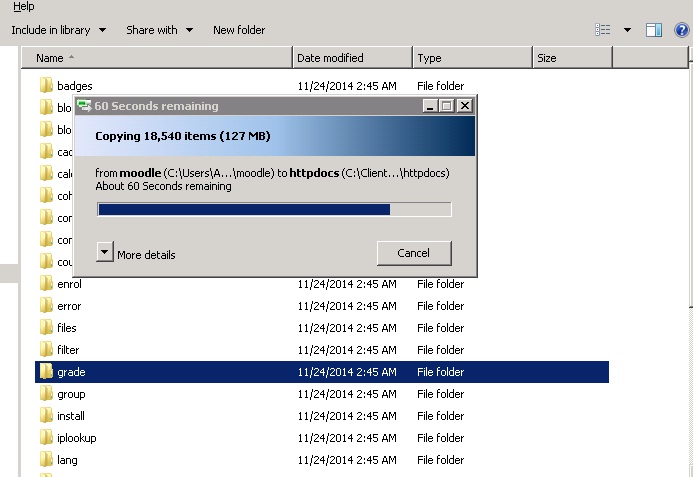
3. Extract the Moodle file to your root folder.
4. Then, you may try to browse your site and it will prompt permission error as below
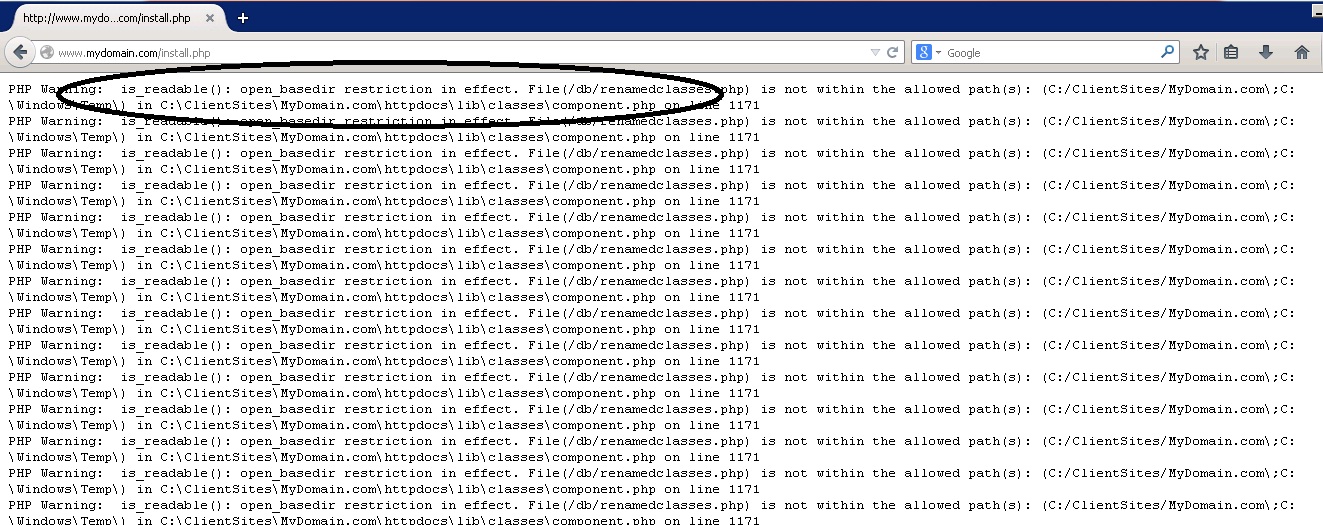
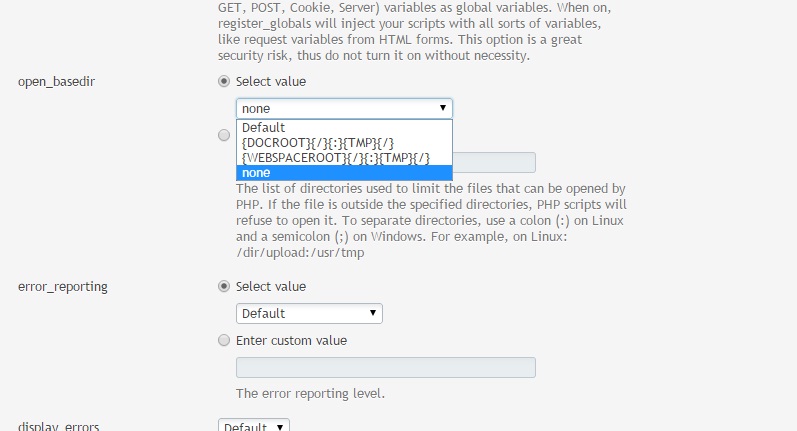
5. What we need to do is give full permission to root folder and then change the open_basedir restriction to NONE on your Plesk Control Panel. Login to your Control Panel, find PHP settings on your Plesk Control Panel and then set open_basedir to None and then click OK. Please see this image below:
6. Browse your site again. It will ask the Moodle installation.
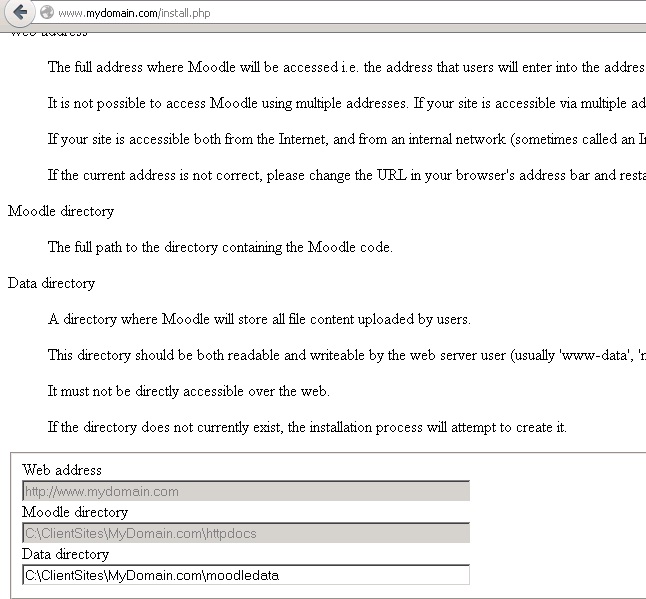
7. It will show the error message again:
"Parent directory (C:\ClientSites\MyDomain.com) is not writeable. Data directory (C:\ClientSites\MyDomain.com\moodledata) cannot be created by the installer."
Then, please give full permission again to C:\ClientSites\MyDomain folder. Once, you have given the permission, then you can continue the installation.
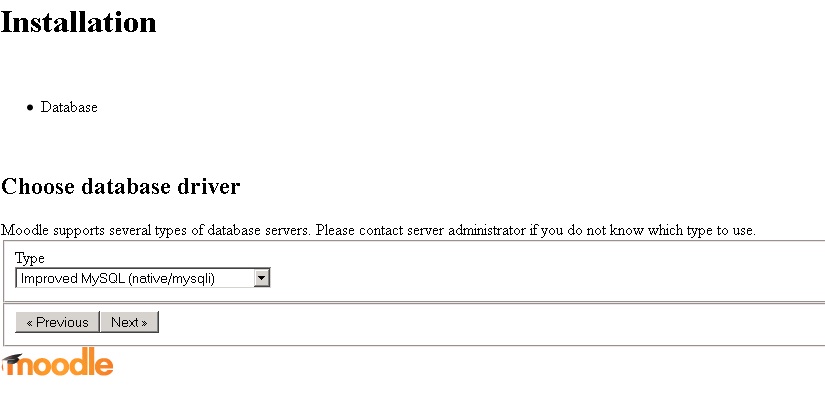
8. Once you click Next, it will ask the database server that you want to use. In this case, we use MySQL server so we select MySQL.
9. Once you click Next, Moodle requires your database details. Please make sure you fill the correct details so you can continue the installation.
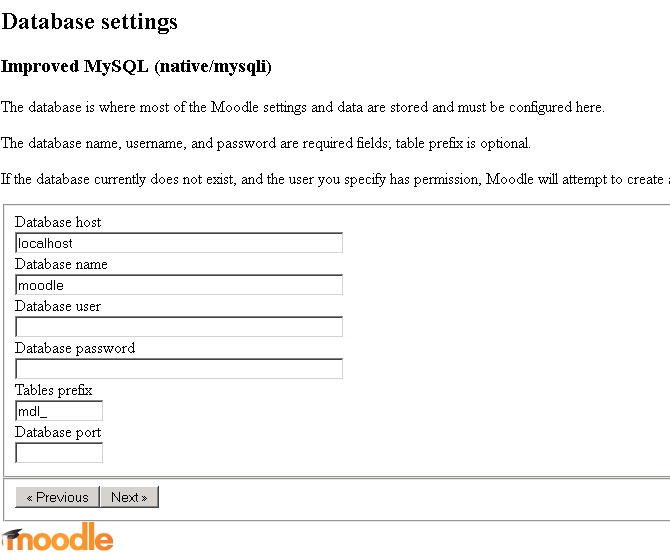
10. Once you have filled all your database details, it will show this error message

If you receive this error message, then refresh the installation again
11. Once you have refreshed it, you won’t see this error message again. You will be asked about language that you want to use.
12. Then, some of you find this error message:
HTTP Error 500.0 - Internal Server Error
c:\php-fastcgi\php-cgi.exe - The FastCGI process exceeded configured activity timeout
This is the last error that you might find during the installation. If you can fix this issue, then the Moodle is ready. This issue is about the timeout error, so we need to increase PHP activity timeout on the server.
How to Increase Fast-CGI ActivityTimeout in IIS
When your PHP script runs longer than 10 minutes (600 seconds) you will get an 500 Internal server error.
To fix this issue you will need to increase the fastCgi activityTimeout in IIS7.
1. Start a command promt and go to this folder:
c:\Windows\System32\inetsrv
2. Execute this command to see the current settings:
C:\Windows\System32\inetsrv>appcmd list config -section:system.webServer/fastCgi
Output will be something like this:
<system.webServer>
<fastCgi>
<application fullPath="C:\Program Files (x86)\PHP\v5.4\php-cgi.exe" monitorChangesTo="php.ini" activityTimeout="600" requestTimeout="600" instanceMaxRequests="10000">
<environmentVariables>
<environmentVariable name="PHP_FCGI_MAX_REQUESTS" value="10000" />
<environmentVariable name="PHPRC" value="C:\Program Files (x86)\PHP\v5.4" />
</environmentVariables>
</application>
</fastCgi>
</system.webServer>
3. To change the timeout to 1 hour (3600 seconds) execute the following command:
C:\Windows\System32\inetsrv>appcmd set config -section:system.webServer/fastCgi "-[fullPath='C:\Program Files (x86)\PHP\v5.4\php-cgi.exe'].activityTimeout:3600"
Not the use of double and single quotes to specify the correct parameters.
4. After you run this command you will see this output:
Applied configuration changes to section "system.webServer/fastCgi" for "MACHINE/WEBROOT/APPHOST" at configuration commit path "MACHINE/WEBROOT/APPHOST"
After running the list config command again the output now looks like this:
<system.webServer>
<fastCgi>
<application fullPath="C:\Program Files (x86)\PHP\v5.4\php-cgi.exe" monitorChangesTo="php.ini" activityTimeout="3600" requestTimeout="600" instanceMaxRequests="10000">
<environmentVariables>
<environmentVariable name="PHP_FCGI_MAX_REQUESTS" value="10000" />
<environmentVariable name="PHPRC" value="C:\Program Files (x86)\PHP\v5.4" />
</environmentVariables>
</application>
</fastCgi>
</system.webServer>
As you can see the activityTimeout is now increased.
5. Restart your IIS service and your good to go.
Conclusion
I hope article above help you to install Moodle. Please feel free to share this tutorial if you find this is useful. Thank you for reading this tutorial.