
April 19, 2022 10:12 by
 Peter
PeterRequirements
Microsoft SQL Server. If not installed, go to the official site and download and install the setup file.

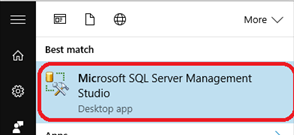
STEP 1
Go to Start and search for Microsoft SQL Server.
You can find an option for Microsoft SQL Server Management Studio.
Click on it to open the SQL Management Studio.
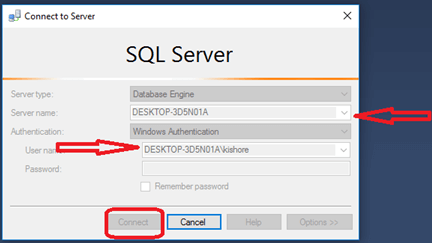
STEP 2
To create a local database, you need a Server first.
While installing the SQL Server, you would have set a user which will act as the Server.
Select the Server and also ensure that the credentials you are providing in the authentication processes are right.
After entering all the details, click on the "Connect" button.
If the connection fails, check if the Server is in running state.
If it is not running, just right click on the Local Sever and click on the Start option.
You can find the Server in the Local Server option of the Registered Servers.
To view the registered servers, go to VIEW -> REGISTERED SERVERS.
STEP 3
- Now, you are connected to the Server, so can you create a database.
- In the Object Explorer, find the Databases folder.
- Simply right click on it and select new database option.
- This will initiate the new database creation.

Step 4
- You will see a window when clicked on the new database option.There, you can add the new database.
- You can add more than one database on the same Server.
- Click on the "Add" button to add a new database.
- If you want to remove any database, just click on the "Remove" button.
- Once you are finished with adding your required number of databases, click on the OK button.
STEP 5
Now, you can see a new database appearing in the database menu in the Object Explorer. You can now use this database for your local storage.

So, this was the process for local database creation using MS SQL
In my next write-up, I will explain the steps for writing queries and creating tables. Thank you.