For sending an email using Node.js, we need a node package called nodemailer. Before this, we need to set up the Node environment. To download the latest version of Node, click this link and download.

Once downloaded, install the local environment and make it ready. For confirming the Node installation, open command prompt and type the following command and press enter.
node -v
We will get the currently installed version of Node.js. After completion of all this, follow the below steps.
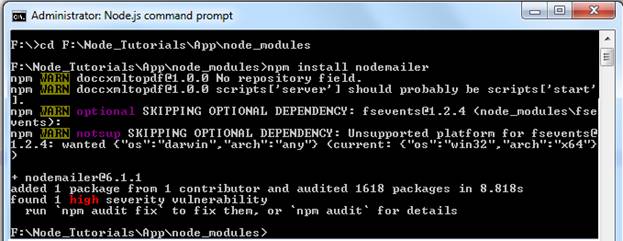
Install the nodemailer package using Node.js command prompt with this command.
npm install nodemailer –s

Once installed, the package.json file will be modified with the dependencies of the nodemailer package.
After installing nodemailer package, import the file to our node.js file which we are using for sending an email. For importing any node package, we need to use -
var nodemailer = require('nodemailer');
Here, we have created an instance for nodemailer package as nodemailer. Now, we need to use the createTransport method for assigning the host and credentials for authentication. Find the below one.
var transporter = nodemailer.createTransport({
host: 'mail.yourserver.com',
auth: {
user: [email protected]',
pass: 'password'
}
})
Once we're finished with the above things, we need to construct the list of objects which are required to send an email. Check below.
var mailOptions = {
from: emailFrom,
to: emailTo,
cc: emailCc,
bcc: emailBcc,
subject: emailSubject,
html: emailContent
};
Now, we need to use the sendMail method with transporter instance as mentioned below. For this method, we need to pass the mailOptions variable which contains the details of sending an email and we have added the callback function.
transporter.sendMail(mailOptions, function(error, info) {
if (error)
{
res.send([{
result: "failed"
}]);
}
else
{
res.send([{
result: "success"
}]);
}
});
Now, the below part will summarize everything.
const express = require('express');
const app = express();
var nodemailer = require('nodemailer');
app.get('/sendmail', (req, res) => {
var transporter = nodemailer.createTransport({
service: 'gmail',
auth: {
user: '[email protected]',
pass: 'gmail_account_password'
}
});
var mailOptions = {
from: 'DAEMON <[email protected]>',
to: '[email protected]',
cc: '[email protected]',
bcc: '[email protected]',
subject: 'Reg: Send Email using node JS',
html: 'Welcome to Node JS'
};
transporter.sendMail(mailOptions, function (error, info) {
if (error) {
res.send([{
result: "failed"
}]);
console.log("failed" + error);
} else {
res.send([{
result: "success"
}]);
}
});
});
const port = process.env.PORT || 3000;
app.listen(port);
console.log('API server started on: ' + port);
Just copy this all code and place it into a Node file and name that as Emailsending.js.
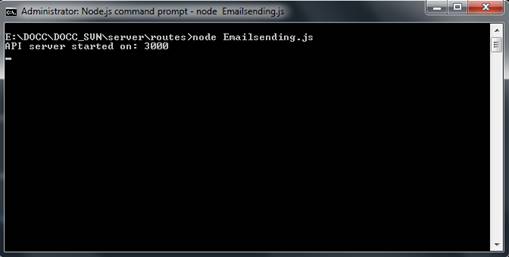
Now, open the Node js Command Prompt and execute the Node.js file.
For the execution of node js file, use
node file_name.js

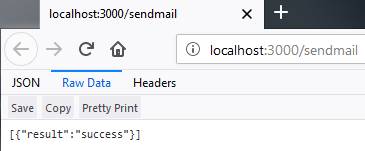
Once the Node.js file is executed, just check this URL http://localhost:3000/sendmail. Here, sendMail is the get method for the above program.

HostForLIFE.eu Node.js Hosting
HostForLIFE.eu is European Windows Hosting Provider which focuses on Windows Platform only. We deliver on-demand hosting solutions including Shared hosting, Reseller Hosting, Cloud Hosting, Dedicated Servers, and IT as a Service for companies of all sizes. We have customers from around the globe, spread across every continent. We serve the hosting needs of the business and professional, government and nonprofit, entertainment and personal use market segments.
