Overview of Swagger in Node.js
An effective tool for planning, creating, and documenting APIs is Swagger. It gives developers a consistent vocabulary to define RESTful APIs, which facilitates their comprehension, consumption, and interaction with API endpoints. Swagger can be very helpful when producing documentation for Node.js applications that is both machine- and human-readable.

Essential Elements of Swagger
Swagger Specification/OpenAPI: A standard for characterizing RESTful APIs, the Swagger Specification is now the OpenAPI Specification. It establishes a format for machine-readable documentation of the architecture and operation of APIs.
The specification describes parameters, authentication techniques, request/response formats, API endpoints, and more in JSON or YAML.
A user-friendly interface for visualizing and interacting with the Swagger/OpenAPI documentation is called Swagger UI. It enables developers to test endpoints, investigate the API, and comprehend the typical formats for requests and responses.
The Swagger Specification is used to automatically construct the User Interface (UI), which offers an interactive method of interacting with the API.
Swagger Codegen: Based on the Swagger Specification, this tool creates client libraries, server stubs, and API documentation. This can be especially useful for preserving consistency between an API's client and server components.
Integrating Swagger in a Node.js API
To integrate Swagger into a Node.js API, you can follow these step-by-step:
Step 1. Install Necessary Packages
Use npm to install the two required packages, such as express, swagger-jsdoc, and swagger-ui-express.
1. Swagger-jsdoc
npm install swagger-jsdoc --save
2. Swagger-ui-express
npm install swagger-ui-express --save
Go to the project folder and open the terminal to install the required packages.
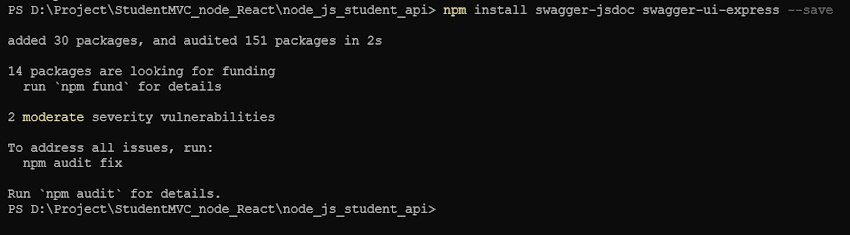
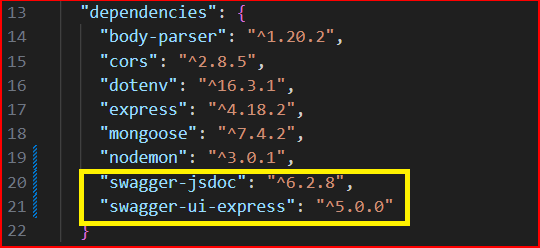
You can verify whether the package.json package was added or not after installation.
Step 2. Create Swagger Configuration
Write a Swagger configuration file that describes the API using JSDoc comments in the code. This configuration includes information such as API title, version, paths, parameters, and responses.
index.js
const options = {
definition: {
openapi: '3.0.0',
info: {
title: 'Student Management System',
version: '1.0.0',
description: 'Student Management System covered Create, Read, Update, and Delete operations using a Node.js API',
},
servers:[
{url:'http://localhost:5000/api'}, //you can change you server url
],
},
apis: ['./routes/*.js'], //you can change you swagger path
};
Step 3: Use Swagger Middleware Integration
For your Express.js application, you can use middleware packages such as swagger-jsdoc and swagger-ui-express to integrate Swagger. This middleware serves the Swagger UI and dynamically creates the Swagger Specification.
index.js
1. Import the middleware packages that are needed.
const swaggerUi = require('swagger-ui-express');
const swaggerJsdoc = require('swagger-jsdoc');
JavaScript
2 . Initialize Swagger-jsdoc.
const specs = swaggerJsdoc(options);
JavaScript
3. Serve Swagger documentation using Swagger UI.
app.use('/api-docs', swaggerUi.serve, swaggerUi.setup(specs));
JavaScript
Step 4. Define API Routes
Define the API routes using Express.js as usual. Swagger will automatically pick up the route information from the code comments.
Add the Swagger in studentRoute.js
1. API route : router.get("/student", getAllStudents);
Get all students
/**
* @swagger
* /student:
* get:
* summary: Get a list of all students
* tags: [Students]
* responses:
* 200:
* description: Successful response
* content:
* application/json:
* example:
* data: [{}]
* 400:
* description: Bad Request
* content:
* application/json:
* example:
* error:
* message: "Bad Request"
*/
//Get All Students
router.get("/student", getAllStudents);
2. API route: router.get("/student/:id", getStudent);
Get the Student by ID
/**
* @swagger
* /student/{id}:
* get:
* summary: Get a student by ID
* tags: [Students]
* parameters:
* - name: id
* in: path
* required: true
* description: The ID of the student
* schema:
* type: string
* example:
* 658918e852a0131af4c0aab1
* responses:
* 200:
* description: Successful response
* content:
* application/json:
* example:
* data: [{}]
* 404:
* description: Student not found
*/
//Get the Student
router.get("/student/:id", getStudent);
3. API route: router.post("/student", createStudent);
Create a new student
/**
* @swagger
* /student:
* post:
* summary: Create a new student
* tags: [Students]
* requestBody:
* description: Student object to be added
* required: true
* content:
* application/json:
* schema:
* type: object
* properties:
* name:
* type: string
* address:
* type: string
* dateOfBirth:
* type: date
* gender:
* type: string
* phoneNum:
* type: integer
* example:
* name: "John Doe"
* address: "Colombo - Srilanka "
* dateOfBirth: 07/14/1990
* gender: "male"
* phoneNum: 01145252525
* responses:
* 201:
* description: Successful response
* content:
* application/json:
* example:
* data: [{}]
* 400:
* description: Invalid request
*/
//Create Student
router.post("/student", createStudent);
4. API route: router.put("/student/:id", updateStudent);
Update a student by ID
/**
* @swagger
* /student/{id}:
* put:
* summary: Update a student by ID
* description: Update the details of a student by providing the student ID.
* tags: [Students]
* parameters:
* - in: path
* name: id
* description: The ID of the student to be updated.
* required: true
* schema:
* type: string
* requestBody:
* description: Updated student information
* required: true
* content:
* application/json:
* schema:
* type: object
* properties:
* name:
* type: string
* address:
* type: string
* dateOfBirth:
* type: string
* format: date
* gender:
* type: string
* phoneNum:
* type: integer
* responses:
* 200:
* description: Successful update
* content:
* application/json:
* example:
* message: 'Student updated successfully'
* 404:
* description: Student not found
* content:
* application/json:
* example:
* message: 'Student not found'
*/
//put the Student
router.put("/student/:id", updateStudent);
5. API route: router.delete("/student/:id", deleteStudent);
Delete a student by ID
/**
* @swagger
* /student/{id}:
* delete:
* summary: Delete a student by ID
* tags: [Students]
* parameters:
* - name: id
* in: path
* required: true
* description: The ID of the student
* schema:
* type: integer
* example:
* 658918e852a0131af4c0aab1
* responses:
* 204:
* description: Student deleted successfully
* 404:
* description: Student not found
*/
//Delete the Student
router.delete("/student/:id", deleteStudent);
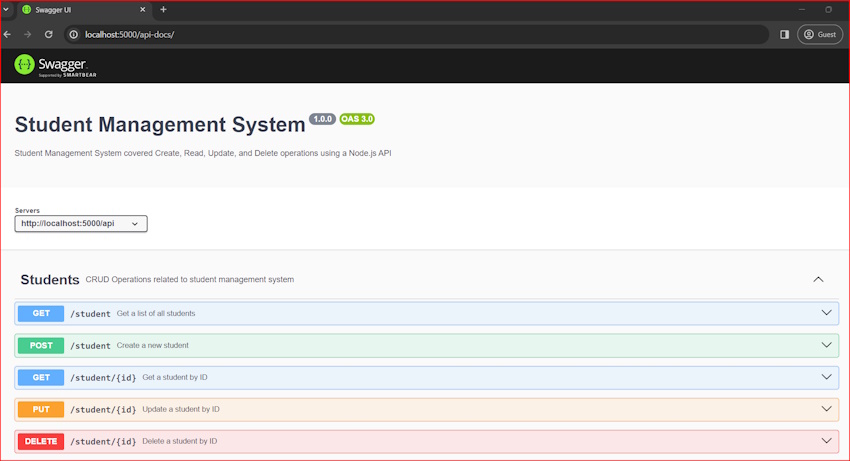
Step 5. Run The Application
Start the Node.js application, npm start
Access the Swagger documentation by visiting the specified endpoint, usually /api-docs or a custom path. Example: http://localhost:5000/api-docs/
Following these steps, you can enhance your Node.js API with interactive and well-documented Swagger/OpenAPI documentation, making it easier for developers to understand, test, and integrate with your API.
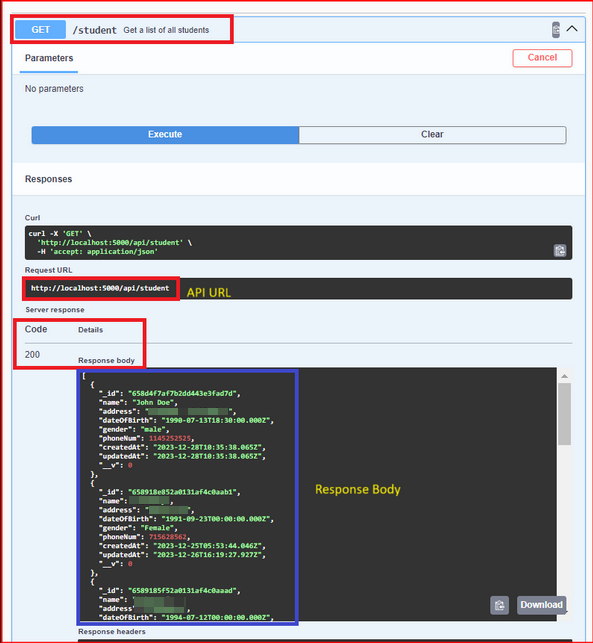
1. Go to the swagger path http://localhost:5000/api-docs/
2. Click on the Try it out button.
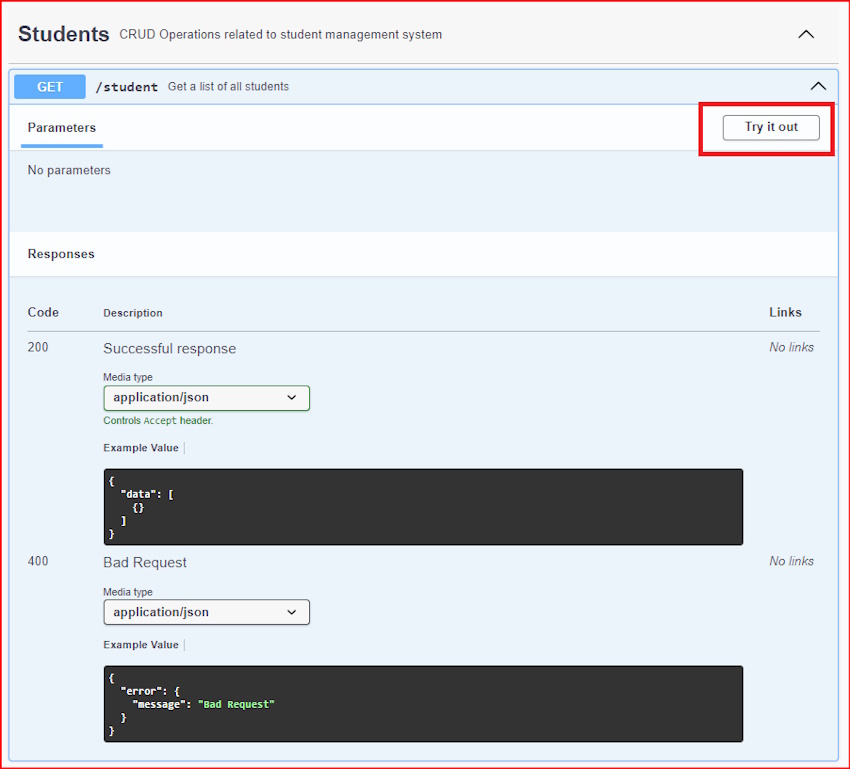
3. Click on the Execute button, and get the response.
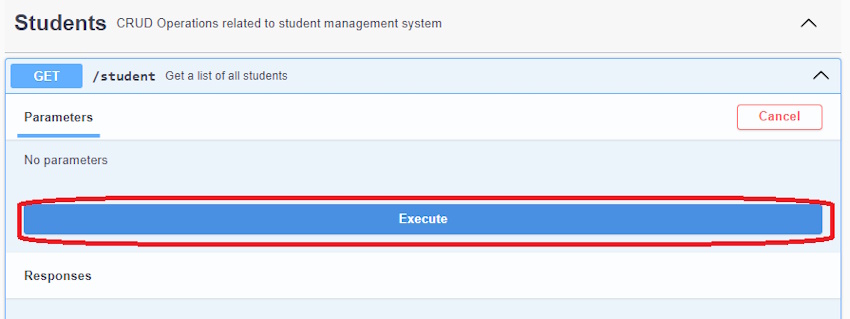
4. Get the Response.
The tutorial walks readers through the process of using Express to create a Node.js API that supports Swagger. To include Swagger into a Node.js API, install the required libraries, make a Swagger configuration file, then use Express.js to define the API routes.
With an emphasis on using Swagger annotations in JSDoc comments to automatically generate interactive Swagger documentation, the book offers thorough code examples for every step. The last section explains how to launch the application and use Swagger UI to view the documentation, which enables developers to easily comprehend, test, and work with the API. The procedures are illustrated clearly in the accompanying photos, which also show how to use the Swagger UI and submit API queries.