The goal of this module is to develop full product administration capability, which includes smooth connection between the frontend interface and backend APIs as well as full CRUD activities. It guarantees that users may effectively create, update, view, and remove products while preserving a responsive and seamless system experience.

This system will allow your administrators to:
Communicate with the backend APIs you've already built
This lecture covers everything in one place:
- Auth Guard
- Full CRUD page for Product
- Product Service
- Product Route
- Update App Routes
- Update Menu
1. - Auth Guard
Path : "src/app/services/authguard/auth-guard.service.ts"
auth-guard.service.ts
import { Injectable } from '@angular/core';
import { Router } from '@angular/router';
import { AuthApiService } from '../api/auth.service';
@Injectable({
providedIn: 'root'
})
export class AuthGuardService {
constructor(
private authService: AuthApiService,
private router: Router
) {}
canActivate(): boolean {
const token = this.authService.getToken();
const refreshToken = this.authService.getRefreshToken();
// If no token and no refresh token, redirect to login
if (!token && !refreshToken) {
this.router.navigate(['/auth/login']);
return false;
}
// If no token but refresh token exists, try to refresh
if (!token && refreshToken) {
this.attemptTokenRefresh(refreshToken);
return false; // Wait for refresh attempt
}
// If token exists, user is authenticated
if (token) {
return true;
}
return false;
}
private attemptTokenRefresh(refreshToken: string): void {
this.authService.refresh({ token: '', refreshToken }).subscribe({
next: () => {
// Token refreshed successfully, reload current route
this.router.navigate([this.router.url]);
},
error: () => {
// Refresh failed, redirect to login
this.authService.logout();
this.router.navigate(['/auth/login']);
}
});
}
}
2. - UI Pages using PrimeNG
Create 3 Files for Product
Path : "src/app/features/products/product/product.html"
"src/app/features/products/product/product.scss" (blank file)
"src/app/features/products/product/product.ts"
product.html
<p-toolbar styleClass="mb-6">
<ng-template #start>
<p-button label="New" icon="pi pi-plus" severity="secondary" class="mr-2" (onClick)="openNew()" />
<p-button severity="secondary" label="Delete" icon="pi pi-trash" outlined (onClick)="deleteSelectedProducts()" [disabled]="!selectedProducts || !selectedProducts.length" />
</ng-template>
<ng-template #end>
<p-button label="Export" icon="pi pi-upload" severity="secondary" (onClick)="exportCSV()" />
</ng-template>
</p-toolbar>
<p-table
#dt
[value]="products()"
[rows]="10"
[columns]="cols"
[paginator]="true"
[globalFilterFields]="['name', 'country.name', 'representative.name', 'status']"
[tableStyle]="{ 'min-width': '75rem' }"
[(selection)]="selectedProducts"
[rowHover]="true"
dataKey="id"
currentPageReportTemplate="Showing {first} to {last} of {totalRecords} products"
[showCurrentPageReport]="true"
[rowsPerPageOptions]="[10, 20, 30]"
>
<ng-template #caption>
<div class="flex items-center justify-between">
<h5 class="m-0">Manage Products</h5>
<p-iconfield>
<p-inputicon styleClass="pi pi-search" />
<input pInputText type="text" (input)="onGlobalFilter(dt, $event)" placeholder="Search..." />
</p-iconfield>
</div>
</ng-template>
<ng-template #header>
<tr>
<th style="width: 3rem">
<p-tableHeaderCheckbox />
</th>
<th style="min-width: 8rem">ID</th>
<th pSortableColumn="name" style="min-width:16rem">
Name
<p-sortIcon field="name" />
</th>
<th pSortableColumn="description" style="min-width:16rem">
Description
<p-sortIcon field="description" />
</th>
<th pSortableColumn="price" style="min-width: 8rem">
Price
<p-sortIcon field="price" />
</th>
<th pSortableColumn="stock" style="min-width: 8rem">
Stock
<p-sortIcon field="stock" />
</th>
<th style="min-width: 12rem"></th>
</tr>
</ng-template>
<ng-template #body let-product>
<tr>
<td style="width: 3rem">
<p-tableCheckbox [value]="product" />
</td>
<td style="min-width: 8rem">{{ product.id }}</td>
<td style="min-width: 16rem">{{ product.name }}</td>
<td style="min-width: 16rem">{{ product.description }}</td>
<td>{{ product.price | currency: 'USD' }}</td>
<td>{{ product.stock }}</td>
<td>
<p-button icon="pi pi-pencil" class="mr-2" [rounded]="true" [outlined]="true" (click)="editProduct(product)" />
<p-button icon="pi pi-trash" severity="danger" [rounded]="true" [outlined]="true" (click)="deleteProduct(product)" />
</td>
</tr>
</ng-template>
</p-table>
<p-dialog [(visible)]="productDialog" [style]="{ width: '450px' }" header="Product Details" [modal]="true">
<ng-template #content>
<div class="flex flex-col gap-6">
<div>
<label for="name" class="block font-bold mb-3">Name</label>
<input type="text" pInputText id="name" [(ngModel)]="product.name" required autofocus fluid />
<small class="text-red-500" *ngIf="submitted && !product.name">Name is required.</small>
</div>
<div>
<label for="description" class="block font-bold mb-3">Description</label>
<textarea id="description" pTextarea [(ngModel)]="product.description" required rows="3" cols="20" fluid></textarea>
</div>
<div class="grid grid-cols-12 gap-4">
<div class="col-span-6">
<label for="price" class="block font-bold mb-3">Price</label>
<p-inputnumber id="price" [(ngModel)]="product.price" mode="currency" currency="USD" locale="en-US" fluid />
</div>
<div class="col-span-6">
<label for="stock" class="block font-bold mb-3">Stock</label>
<p-inputnumber id="stock" [(ngModel)]="product.stock" fluid />
</div>
</div>
</div>
</ng-template>
<ng-template #footer>
<p-button label="Cancel" icon="pi pi-times" text (click)="hideDialog()" />
<p-button label="Save" icon="pi pi-check" (click)="saveProduct()" />
</ng-template>
</p-dialog>
<p-confirmdialog [style]="{ width: '450px' }" />
product.scss
product.ts
import { Component, OnInit, signal, ViewChild } from '@angular/core';
import { ConfirmationService, MessageService } from 'primeng/api';
import { Table, TableModule } from 'primeng/table';
import { CommonModule } from '@angular/common';
import { FormsModule } from '@angular/forms';
import { ButtonModule } from 'primeng/button';
import { RippleModule } from 'primeng/ripple';
import { ToastModule } from 'primeng/toast';
import { ToolbarModule } from 'primeng/toolbar';
import { RatingModule } from 'primeng/rating';
import { InputTextModule } from 'primeng/inputtext';
import { TextareaModule } from 'primeng/textarea';
import { SelectModule } from 'primeng/select';
import { RadioButtonModule } from 'primeng/radiobutton';
import { InputNumberModule } from 'primeng/inputnumber';
import { DialogModule } from 'primeng/dialog';
import { TagModule } from 'primeng/tag';
import { InputIconModule } from 'primeng/inputicon';
import { IconFieldModule } from 'primeng/iconfield';
import { ConfirmDialogModule } from 'primeng/confirmdialog';
import { ProductDto, ProductApiService } from '../../../services/api/product.service';
interface Column {
field: string;
header: string;
customExportHeader?: string;
}
interface ExportColumn {
title: string;
dataKey: string;
}
@Component({
selector: 'app-product',
standalone: true,
imports: [
CommonModule,
TableModule,
FormsModule,
ButtonModule,
RippleModule,
ToastModule,
ToolbarModule,
RatingModule,
InputTextModule,
TextareaModule,
SelectModule,
RadioButtonModule,
InputNumberModule,
DialogModule,
TagModule,
InputIconModule,
IconFieldModule,
ConfirmDialogModule
],
templateUrl: './product.html',
styleUrl: './product.scss',
providers: [MessageService, ConfirmationService]
})
export class Product implements OnInit {
productDialog: boolean = false;
products = signal<ProductDto[]>([]);
product!: ProductDto;
selectedProducts!: ProductDto[] | null;
submitted: boolean = false;
@ViewChild('dt') dt!: Table;
exportColumns!: ExportColumn[];
cols!: Column[];
constructor(
private productApi: ProductApiService,
private messageService: MessageService,
private confirmationService: ConfirmationService
) {}
exportCSV() {
this.dt.exportCSV();
}
ngOnInit() {
this.loadProducts();
this.cols = [
{ field: 'id', header: 'ID' },
{ field: 'name', header: 'Name' },
{ field: 'description', header: 'Description' },
{ field: 'price', header: 'Price' },
{ field: 'stock', header: 'Stock' }
];
this.exportColumns = this.cols.map((col) => ({ title: col.header, dataKey: col.field }));
}
loadProducts() {
this.productApi.list().subscribe((data) => {
this.products.set(data);
});
}
onGlobalFilter(table: Table, event: Event) {
table.filterGlobal((event.target as HTMLInputElement).value, 'contains');
}
openNew() {
// Do not set `id` (omit it) so backend can accept/create without GUID parsing errors
this.product = { name: '', description: '', price: 0, stock: 0 } as ProductDto;
this.submitted = false;
this.productDialog = true;
}
editProduct(product: ProductDto) {
this.product = { ...product };
this.productDialog = true;
}
deleteSelectedProducts() {
this.confirmationService.confirm({
message: 'Are you sure you want to delete the selected products?',
header: 'Confirm',
icon: 'pi pi-exclamation-triangle',
accept: () => {
if (this.selectedProducts) {
this.selectedProducts.forEach(product => {
if (product.id) {
this.productApi.delete(product.id).subscribe(() => {
this.loadProducts();
});
}
});
this.selectedProducts = null;
this.messageService.add({
severity: 'success',
summary: 'Successful',
detail: 'Products Deleted',
life: 3000
});
}
}
});
}
hideDialog() {
this.productDialog = false;
this.submitted = false;
}
deleteProduct(product: ProductDto) {
this.confirmationService.confirm({
message: 'Are you sure you want to delete ' + product.name + '?',
header: 'Confirm',
icon: 'pi pi-exclamation-triangle',
accept: () => {
if (product.id) {
this.productApi.delete(product.id).subscribe(() => {
this.loadProducts();
this.messageService.add({
severity: 'success',
summary: 'Successful',
detail: 'Product Deleted',
life: 3000
});
});
}
}
});
}
findIndexById(id: string): number {
let index = -1;
for (let i = 0; i < this.products().length; i++) {
if (this.products()[i].id === id) {
index = i;
break;
}
}
return index;
}
createId(): string {
let id = '';
var chars = 'ABCDEFGHIJKLMNOPQRSTUVWXYZabcdefghijklmnopqrstuvwxyz0123456789';
for (var i = 0; i < 5; i++) {
id += chars.charAt(Math.floor(Math.random() * chars.length));
}
return id;
}
getSeverity(status: string) {
switch (status) {
case 'INSTOCK':
return 'success';
case 'LOWSTOCK':
return 'warn';
case 'OUTOFSTOCK':
return 'danger';
default:
return 'info';
}
}
saveProduct() {
this.submitted = true;
if (this.product.name?.trim()) {
if (this.product.id) {
this.productApi.update(this.product.id, this.product).subscribe(() => {
this.loadProducts();
this.messageService.add({
severity: 'success',
summary: 'Successful',
detail: 'Product Updated',
life: 3000
});
});
} else {
this.productApi.create(this.product).subscribe((created) => {
this.loadProducts();
this.messageService.add({
severity: 'success',
summary: 'Successful',
detail: 'Product Created',
life: 3000
});
});
}
this.productDialog = false;
}
}
}
3. Product Services
Create Product Service
Path : "/src/app/services/api/product.service.ts"
product.service.ts
import { Injectable } from '@angular/core';
import { HttpClient } from '@angular/common/http';
// Try to read API base url from environment; fallback to '/api' when not set
import { environment } from '../../../environments/environment';
import { Observable } from 'rxjs';
import { map } from 'rxjs/operators';
// Match backend ProductDto
export interface ProductDto {
id?: string;
name: string;
description: string;
price: number;
stock: number;
}
interface ApiListResponse<T> {
fromCache: boolean;
data: T;
}
@Injectable({
providedIn: 'root'
})
export class ProductApiService {
private baseUrl = environment.baseUrl + '/products';
constructor(private http: HttpClient) {}
// Returns product[] (unwrapped from { fromCache, data })
list(): Observable<ProductDto[]> {
return this.http
.get<ApiListResponse<ProductDto[]>>(this.baseUrl)
.pipe(map((res) => res.data));
}
// Returns single product (unwrapped)
get(id: string): Observable<ProductDto> {
return this.http
.get<ApiListResponse<ProductDto>>(`${this.baseUrl}/${id}`)
.pipe(map((res) => res.data));
}
// Create returns created product (controller returns dto in body)
create(product: ProductDto): Observable<ProductDto> {
return this.http.post<ProductDto>(this.baseUrl, product);
}
// Update returns no content; use void
update(id: string, product: ProductDto): Observable<void> {
return this.http.put<void>(`${this.baseUrl}/${id}`, product);
}
delete(id: string): Observable<void> {
return this.http.delete<void>(`${this.baseUrl}/${id}`);
}
}
4. Product Route
Create New File for Product Ruting
Path : "src/app/features/products/products.routes.ts"
import { Routes } from '@angular/router';
import { Product } from './product/product';
export default [
{ path: '', component: Product }
] as Routes;
4. Update App Routes
Path : "src/app/app.routes.ts"
import { Routes } from '@angular/router';
import { AppLayout } from './app/layout/component/app.layout';
import { Dashboard } from './app/pages/dashboard/dashboard';
import { Documentation } from './app/pages/documentation/documentation';
import { Landing } from './app/pages/landing/landing';
import { Notfound } from './app/pages/notfound/notfound';
import { AuthGuardService } from './app/services/authguard/auth-guard.service';
export const appRoutes: Routes = [
{
path: '',
redirectTo: () => {
const token = localStorage.getItem('auth_token');
return token ? '/dashboard' : '/auth/login';
},
pathMatch: 'full'
},
{
path: 'dashboard',
component: AppLayout,
canActivate: [AuthGuardService],
children: [
{ path: '', component: Dashboard }
]
},
{
path: 'products',
component: AppLayout,
canActivate: [AuthGuardService],
children: [
{ path: '', loadChildren: () => import('./app/features/products/products.routes') }
]
},
{
path: 'uikit',
component: AppLayout,
canActivate: [AuthGuardService],
children: [
{ path: '', loadChildren: () => import('./app/pages/uikit/uikit.routes') }
]
},
{
path: 'pages',
component: AppLayout,
canActivate: [AuthGuardService],
children: [
{ path: '', loadChildren: () => import('./app/pages/pages.routes') }
]
},
{
path: 'documentation',
component: AppLayout,
canActivate: [AuthGuardService],
children: [
{ path: '', component: Documentation }
]
},
{ path: 'landing', component: Landing },
{ path: 'notfound', component: Notfound },
{ path: 'auth', loadChildren: () => import('./app/features/auth/auth.routes') },
{ path: '**', component: Notfound }
];
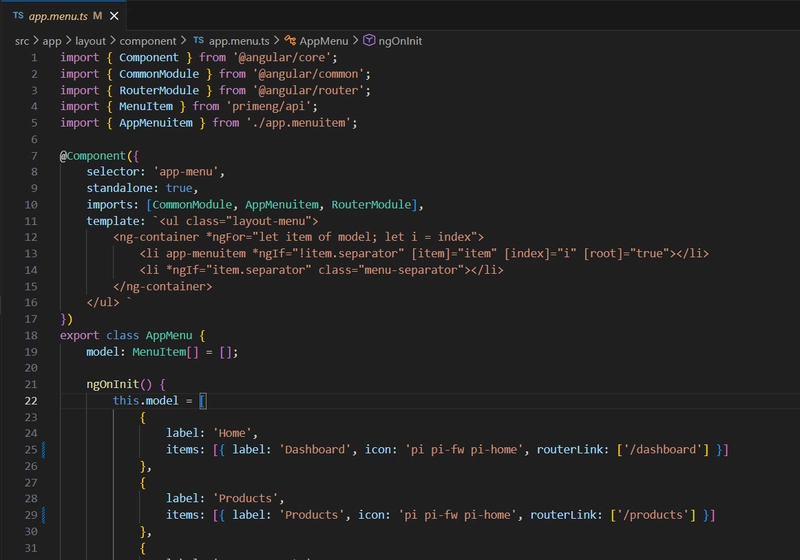
5. Update App Menu
Path : "src/app/layout/component/app.menu.ts"
import { Component } from '@angular/core';
import { CommonModule } from '@angular/common';
import { RouterModule } from '@angular/router';
import { MenuItem } from 'primeng/api';
import { AppMenuitem } from './app.menuitem';
@Component({
selector: 'app-menu',
standalone: true,
imports: [CommonModule, AppMenuitem, RouterModule],
template: `<ul class="layout-menu">
<ng-container *ngFor="let item of model; let i = index">
<li app-menuitem *ngIf="!item.separator" [item]="item" [index]="i" [root]="true"></li>
<li *ngIf="item.separator" class="menu-separator"></li>
</ng-container>
</ul> `
})
export class AppMenu {
model: MenuItem[] = [];
ngOnInit() {
this.model = [
{
label: 'Home',
items: [{ label: 'Dashboard', icon: 'pi pi-fw pi-home', routerLink: ['/dashboard'] }]
},
{
label: 'Products',
items: [{ label: 'Products', icon: 'pi pi-fw pi-home', routerLink: ['/products'] }]
},
{
label: 'UI Components',
items: [
{ label: 'Form Layout', icon: 'pi pi-fw pi-id-card', routerLink: ['/uikit/formlayout'] },
{ label: 'Input', icon: 'pi pi-fw pi-check-square', routerLink: ['/uikit/input'] },
{ label: 'Button', icon: 'pi pi-fw pi-mobile', class: 'rotated-icon', routerLink: ['/uikit/button'] },
{ label: 'Table', icon: 'pi pi-fw pi-table', routerLink: ['/uikit/table'] },
{ label: 'List', icon: 'pi pi-fw pi-list', routerLink: ['/uikit/list'] },
{ label: 'Tree', icon: 'pi pi-fw pi-share-alt', routerLink: ['/uikit/tree'] },
{ label: 'Panel', icon: 'pi pi-fw pi-tablet', routerLink: ['/uikit/panel'] },
{ label: 'Overlay', icon: 'pi pi-fw pi-clone', routerLink: ['/uikit/overlay'] },
{ label: 'Media', icon: 'pi pi-fw pi-image', routerLink: ['/uikit/media'] },
{ label: 'Menu', icon: 'pi pi-fw pi-bars', routerLink: ['/uikit/menu'] },
{ label: 'Message', icon: 'pi pi-fw pi-comment', routerLink: ['/uikit/message'] },
{ label: 'File', icon: 'pi pi-fw pi-file', routerLink: ['/uikit/file'] },
{ label: 'Chart', icon: 'pi pi-fw pi-chart-bar', routerLink: ['/uikit/charts'] },
{ label: 'Timeline', icon: 'pi pi-fw pi-calendar', routerLink: ['/uikit/timeline'] },
{ label: 'Misc', icon: 'pi pi-fw pi-circle', routerLink: ['/uikit/misc'] }
]
},
{
label: 'Pages',
icon: 'pi pi-fw pi-briefcase',
routerLink: ['/pages'],
items: [
{
label: 'Landing',
icon: 'pi pi-fw pi-globe',
routerLink: ['/landing']
},
{
label: 'Auth',
icon: 'pi pi-fw pi-user',
items: [
{
label: 'Login',
icon: 'pi pi-fw pi-sign-in',
routerLink: ['/auth/login']
},
{
label: 'Error',
icon: 'pi pi-fw pi-times-circle',
routerLink: ['/auth/error']
},
{
label: 'Access Denied',
icon: 'pi pi-fw pi-lock',
routerLink: ['/auth/access']
}
]
},
{
label: 'Crud',
icon: 'pi pi-fw pi-pencil',
routerLink: ['/pages/crud']
},
{
label: 'Not Found',
icon: 'pi pi-fw pi-exclamation-circle',
routerLink: ['/pages/notfound']
},
{
label: 'Empty',
icon: 'pi pi-fw pi-circle-off',
routerLink: ['/pages/empty']
}
]
},
{
label: 'Hierarchy',
items: [
{
label: 'Submenu 1',
icon: 'pi pi-fw pi-bookmark',
items: [
{
label: 'Submenu 1.1',
icon: 'pi pi-fw pi-bookmark',
items: [
{ label: 'Submenu 1.1.1', icon: 'pi pi-fw pi-bookmark' },
{ label: 'Submenu 1.1.2', icon: 'pi pi-fw pi-bookmark' },
{ label: 'Submenu 1.1.3', icon: 'pi pi-fw pi-bookmark' }
]
},
{
label: 'Submenu 1.2',
icon: 'pi pi-fw pi-bookmark',
items: [{ label: 'Submenu 1.2.1', icon: 'pi pi-fw pi-bookmark' }]
}
]
},
{
label: 'Submenu 2',
icon: 'pi pi-fw pi-bookmark',
items: [
{
label: 'Submenu 2.1',
icon: 'pi pi-fw pi-bookmark',
items: [
{ label: 'Submenu 2.1.1', icon: 'pi pi-fw pi-bookmark' },
{ label: 'Submenu 2.1.2', icon: 'pi pi-fw pi-bookmark' }
]
},
{
label: 'Submenu 2.2',
icon: 'pi pi-fw pi-bookmark',
items: [{ label: 'Submenu 2.2.1', icon: 'pi pi-fw pi-bookmark' }]
}
]
}
]
},
{
label: 'Get Started',
items: [
{
label: 'Documentation',
icon: 'pi pi-fw pi-book',
routerLink: ['/documentation']
},
{
label: 'View Source',
icon: 'pi pi-fw pi-github',
url: 'https://github.com/primefaces/sakai-ng',
target: '_blank'
}
]
}
];
}
}